Wifi driver not working on clean Windows install

Hi all,

I wonder if anyone is having the same problem as me and has been able to solve it.
If didn’t use the WIM image to install my PI X, but I did a clean install of Windows 10 Pro.

I updated all the drivers using the driver pack downloaded from the website and most works, but most importantly the Wifi driver for the broadcom device does not :frowning:

1 2

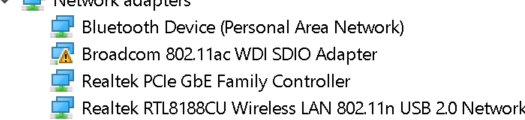
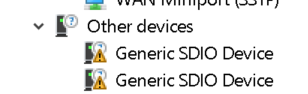
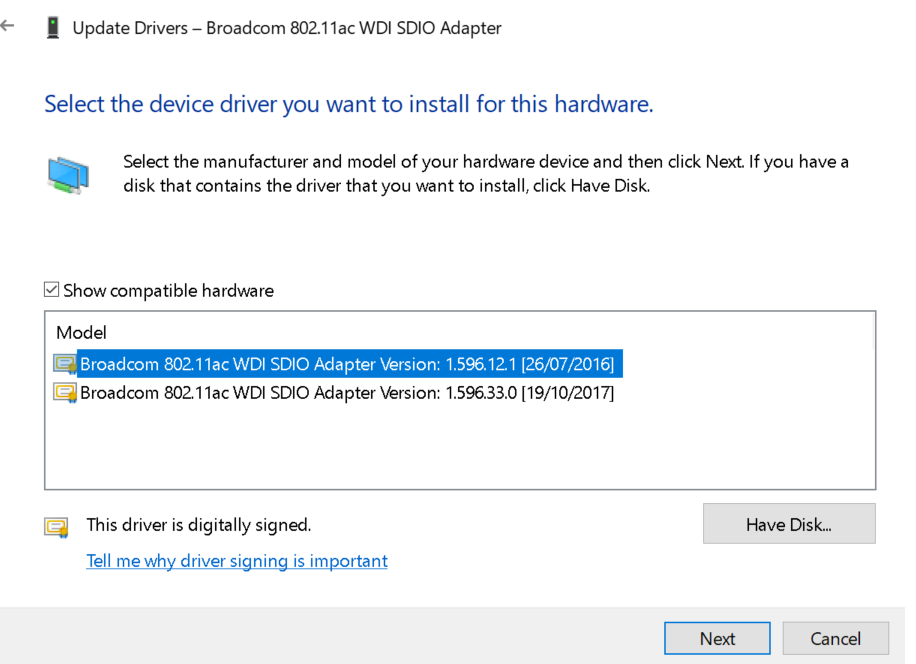
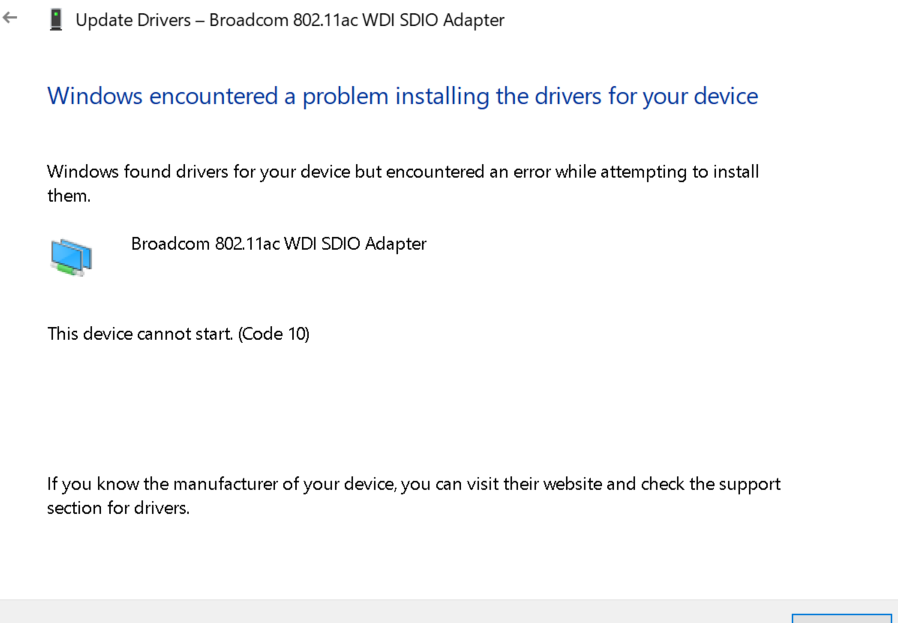
Has anyone managed to get this driver working on a clean windows 10 install ?

Thanks

Paul.

I have done the exact same experience than you.
With a recent version of Windows there are also some drivers that I can’t install and at the end the wifi don’t work. If i use the Wim image then I can use the Wifi without problemes.
In fact it’s a choice to do, it depends of what you need.

Hey,
Recently I have faced the same issue with my wifi drivers. My friend suggests me to update these drivers then I have tried it from the device manager. I did not get the solution from that. The process which I did are given below:

  1. Open Start.
  2. Search for Device Manager from the search bar.
  3. Double-click the category with the device you want to update.
  4. Right-click the device, and select the Update Driver option.
  5. Click the Search automatically for the updated driver software option.
    In these steps, I did not get my solution. Then i have tried it with a free driver updater and i got a quick solution.

I didn’t get it either. Finally I have installed the WINDOWS OEM version and after the automatic installation to the latest version of W’10 everything works correctly for me.

Please also see Bluetooth and WiFi not worling - Using ROCK Pi X - Radxa Forum

Hi!,How do you run Dism to put install.wim into the usb drive?. Thanks!

Hi Roberto

It is not necessary to run DISM.

First, you can install the WINDOWS OEM version (from here), activate it and only wait to have the newest Windows version from the Windows Update :wink:

Thanks Pharizna!, yes, I misunderstood the text, now its ok.
Saludos!

To use the Deployment Image Servicing and Management (DISM) tool to put the install.wim file onto a USB drive, you can follow these steps:

  1. Insert your USB drive into your computer and make sure it’s recognized by the system.
  2. Open the Command Prompt with administrator privileges by right-clicking on the Start button and selecting “Command Prompt (Admin)”.
  3. Type “diskpart” in the Command Prompt window and press Enter.
  4. Type “list disk” and press Enter to see a list of disks attached to your computer. Identify your USB drive by looking at its size and note its disk number.
  5. Type "select disk " (without quotes) and press Enter to select your USB drive.
  6. Type “clean” and press Enter to delete any existing partitions on the USB drive.
  7. Type “create partition primary” and press Enter to create a new primary partition.
  8. Type “select partition 1” and press Enter to select the new partition.
  9. Type “format fs=ntfs quick” and press Enter to format the partition with the NTFS file system.
  10. Type “assign” and press Enter to assign a drive letter to the USB drive.
  11. Copy the install.wim file to the USB drive.
  12. Open the Command Prompt window again with administrator privileges.
  13. Type “dism /apply-image /imagefile:<path-to-install.wim>\install.wim /index: /applydir:” (without quotes), replacing <path-to-install.wim> with the path to the install.wim file, with the index number of the Windows image you want to install (if there is only one image, use “1”), and with the drive letter of the USB drive.
  14. Press Enter and wait for the process to complete.
  15. Safely eject the USB drive from your computer.

That’s it! Your USB drive should now contain the Windows image from the install.wim file and is ready for installation.