But unfortunately this 1st version stil has a couple of quirks
One of the holes is part that slots the disk is of an incorrect size (is 10.2mm should be 11.2 mm)
The clips holding this par tin the outer casing are much too thin (1.1mm) and do not have enough material connecting them to the slotted part. Recommendation would be mak them thicker 1.6mm and add a bevel to for a better connection
While at it there are a few other things you might want to have a quick look at.
the main body (largest shape with the ventilation raster) seemed to have some open surfaces in Prusaslicer (the raster). Ultimatly I was able to fix this my re-exporting the file as 3mf.
The ventilation holes in the top surface (the one with the nice hole pattern seem to be a little bit small, making them difficult to print, and making me doubt is a fan would be able to generate sufficient flow. Maybe it is possible to make the holes slightly larger
Regards
Remi
btw, is the fan that would fit in this case already available, or is there an off the shelf you would recommend?
In the mean time I have received my Radxa Penta hat unit so I am continuing to put things together.
There are two other issues with the model of which at least one requires an update.
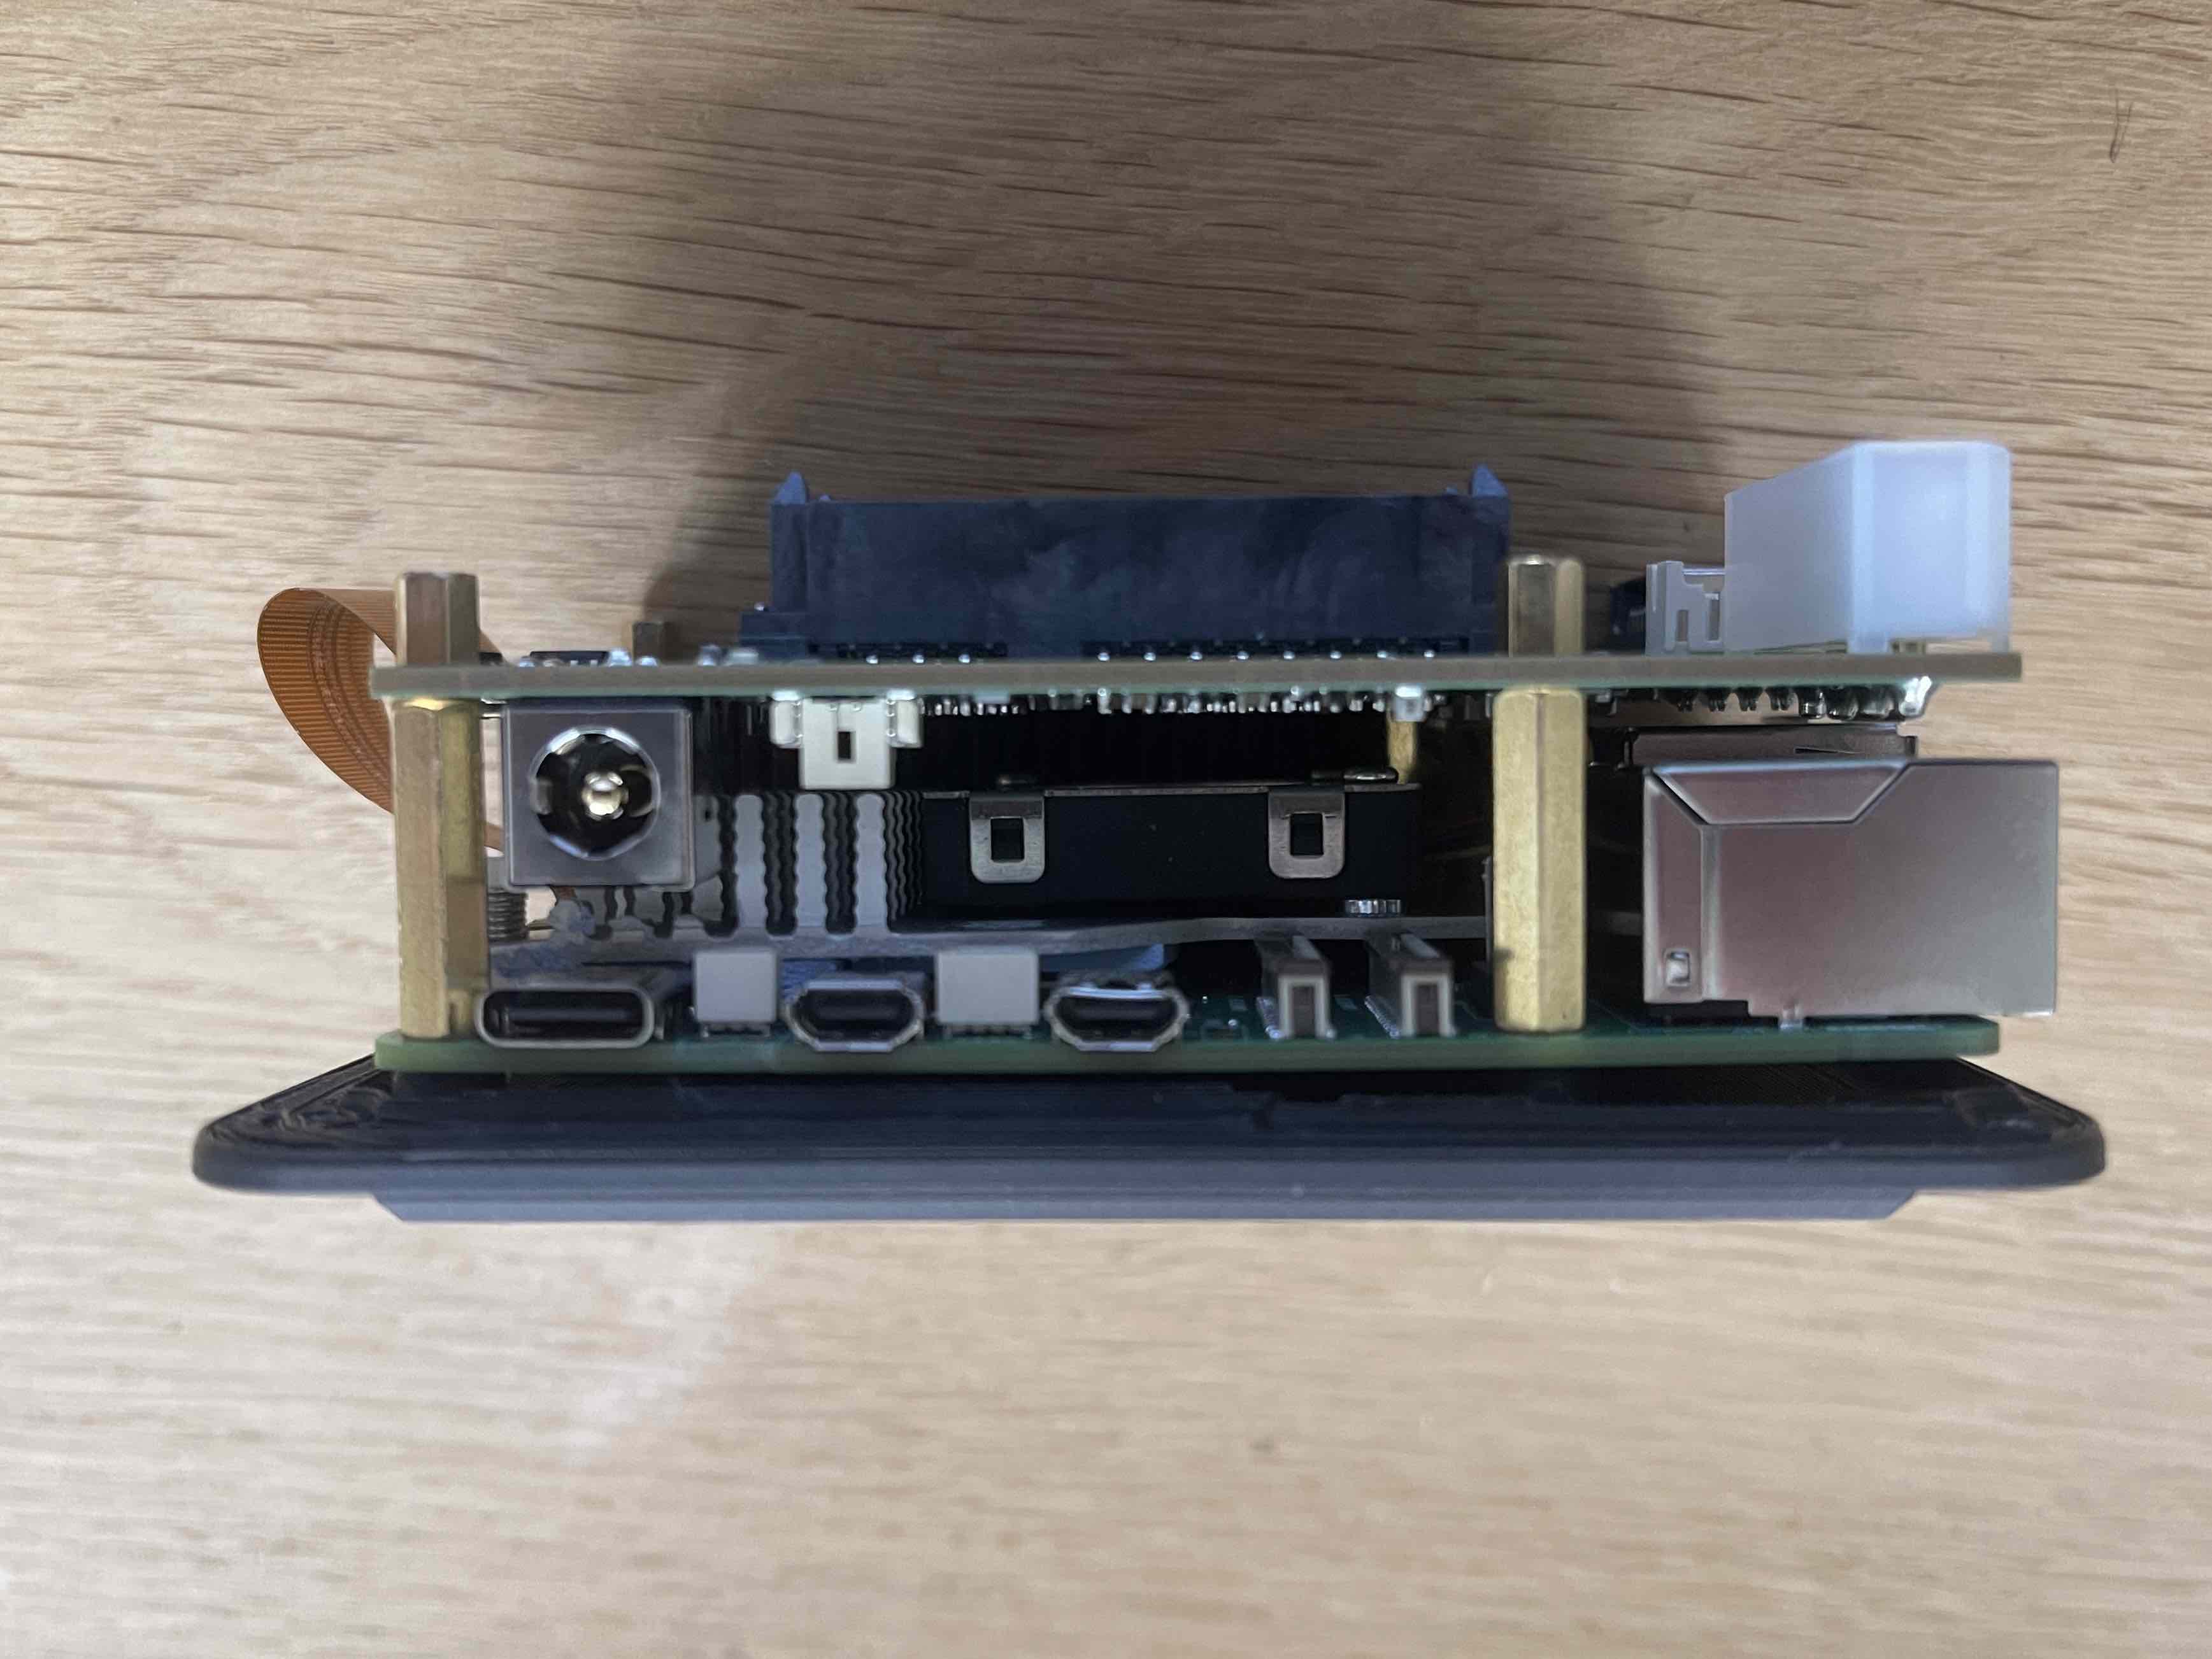
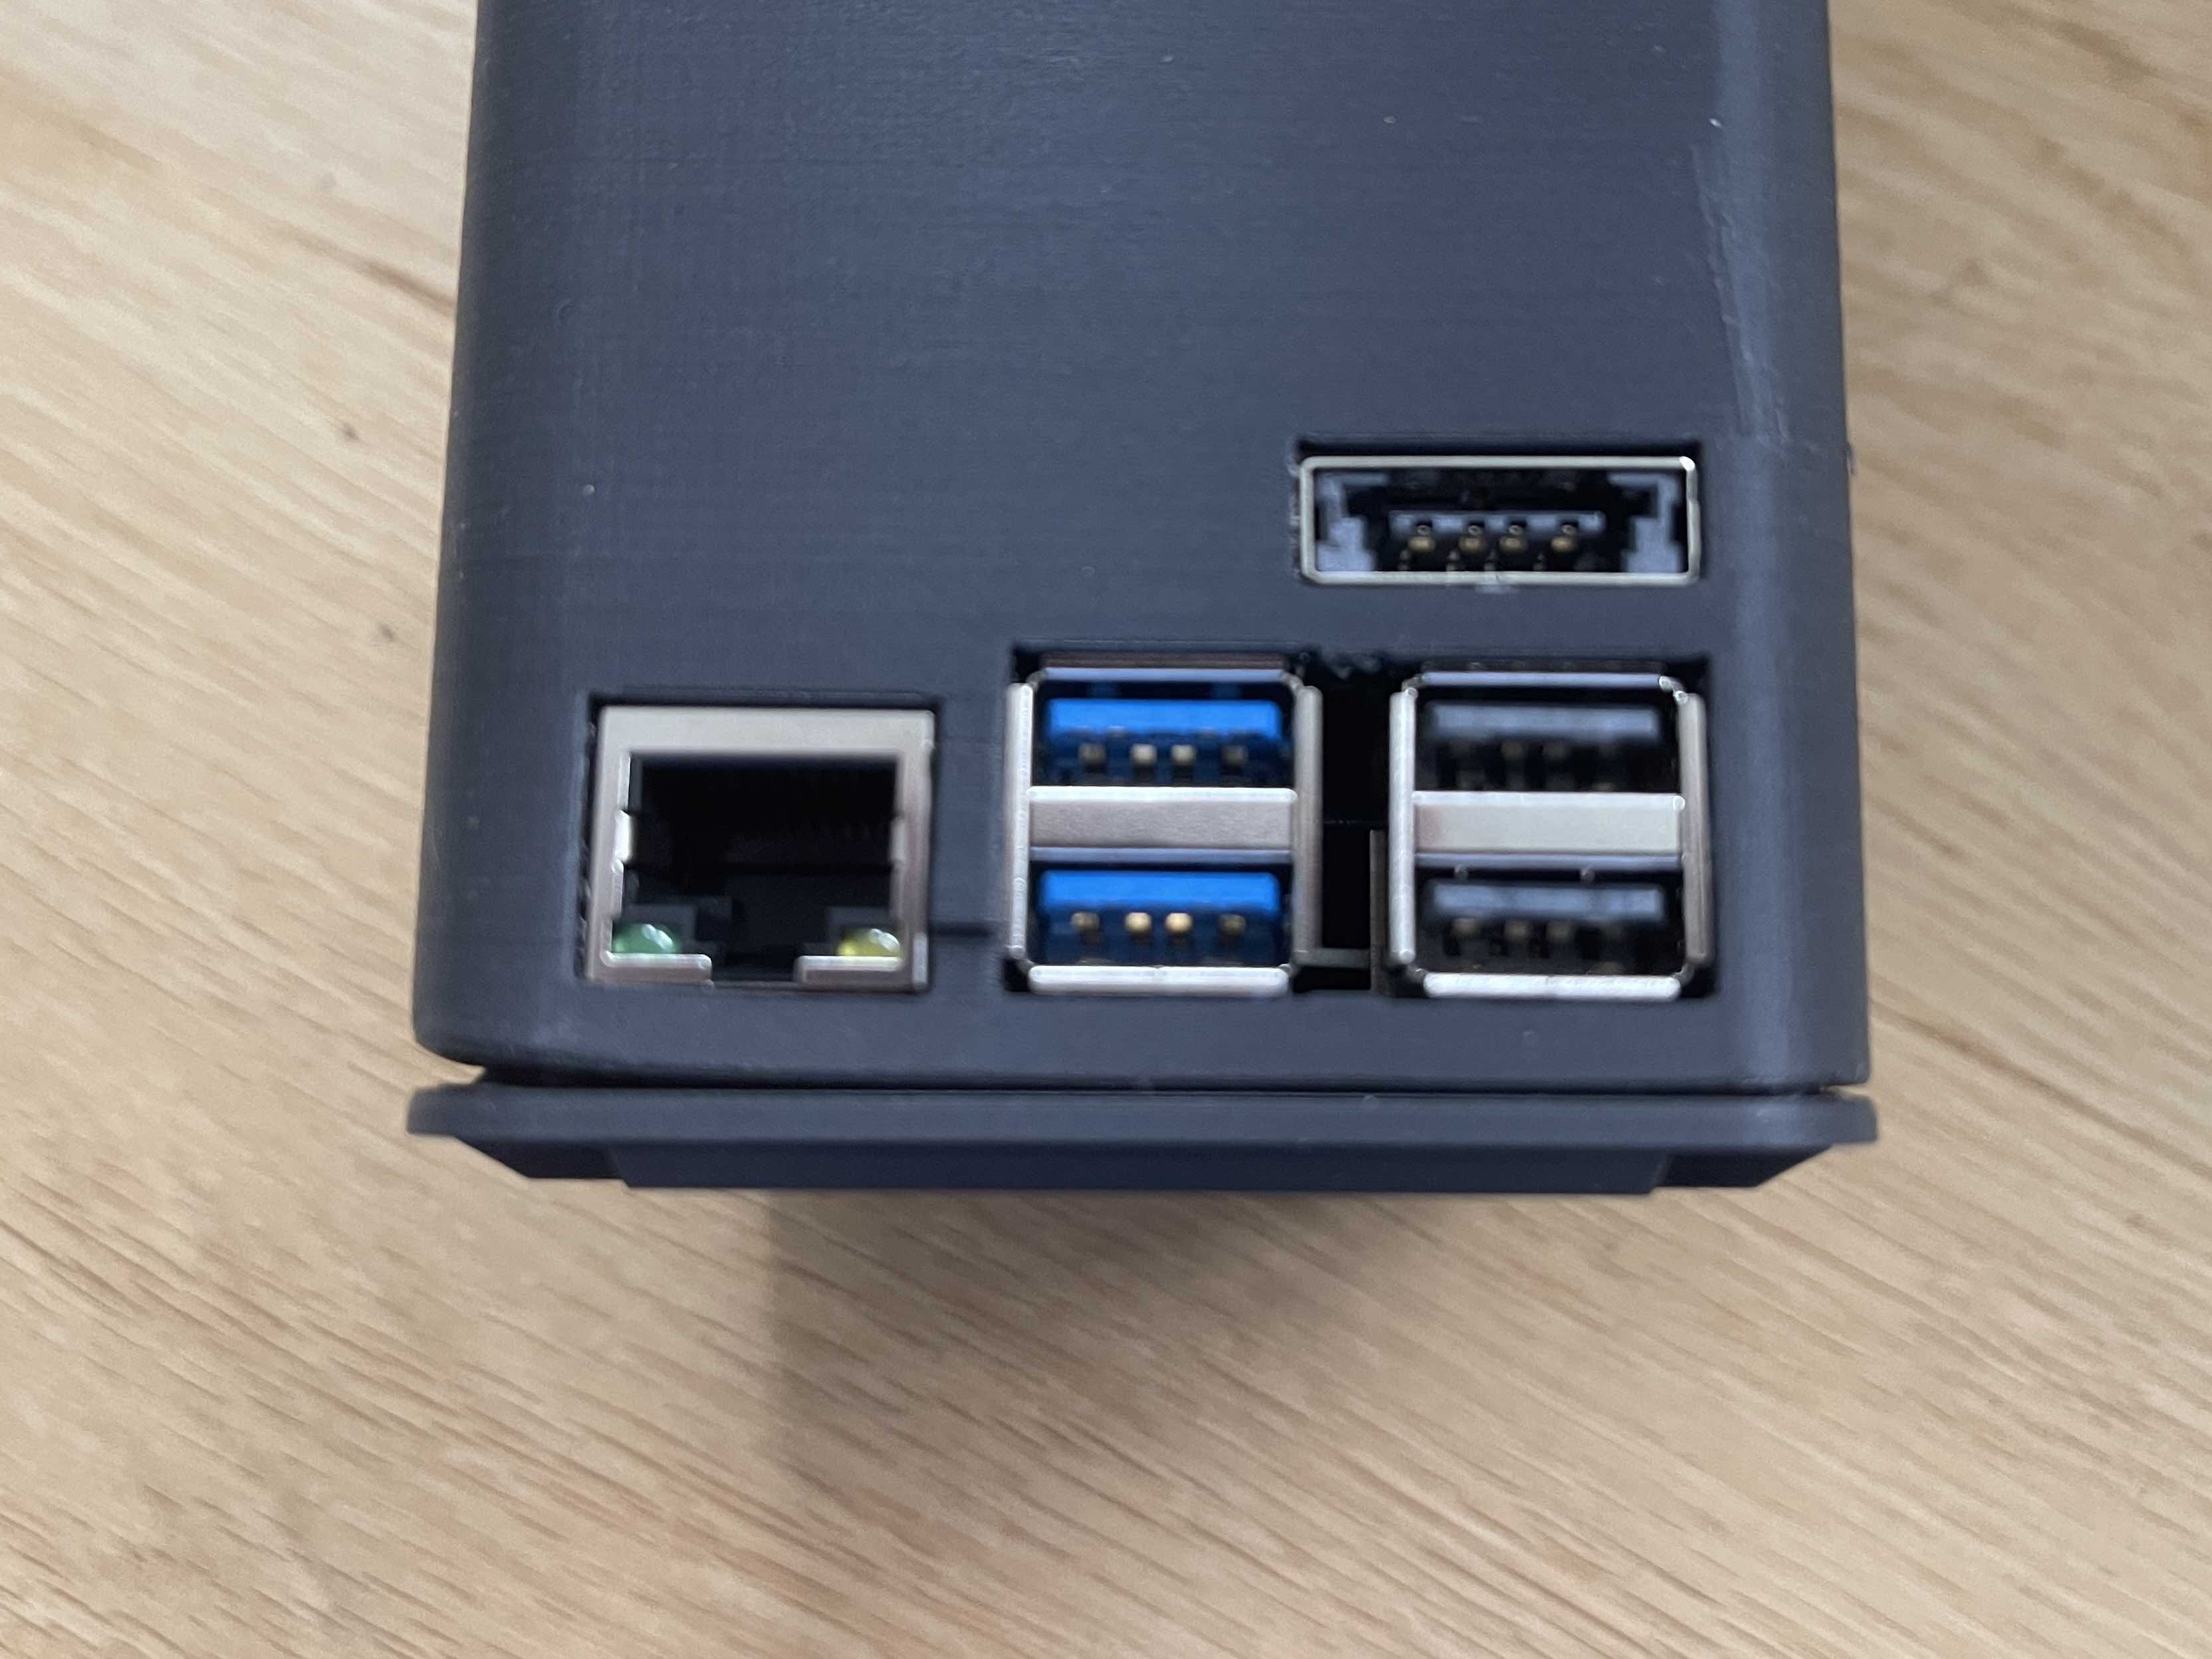
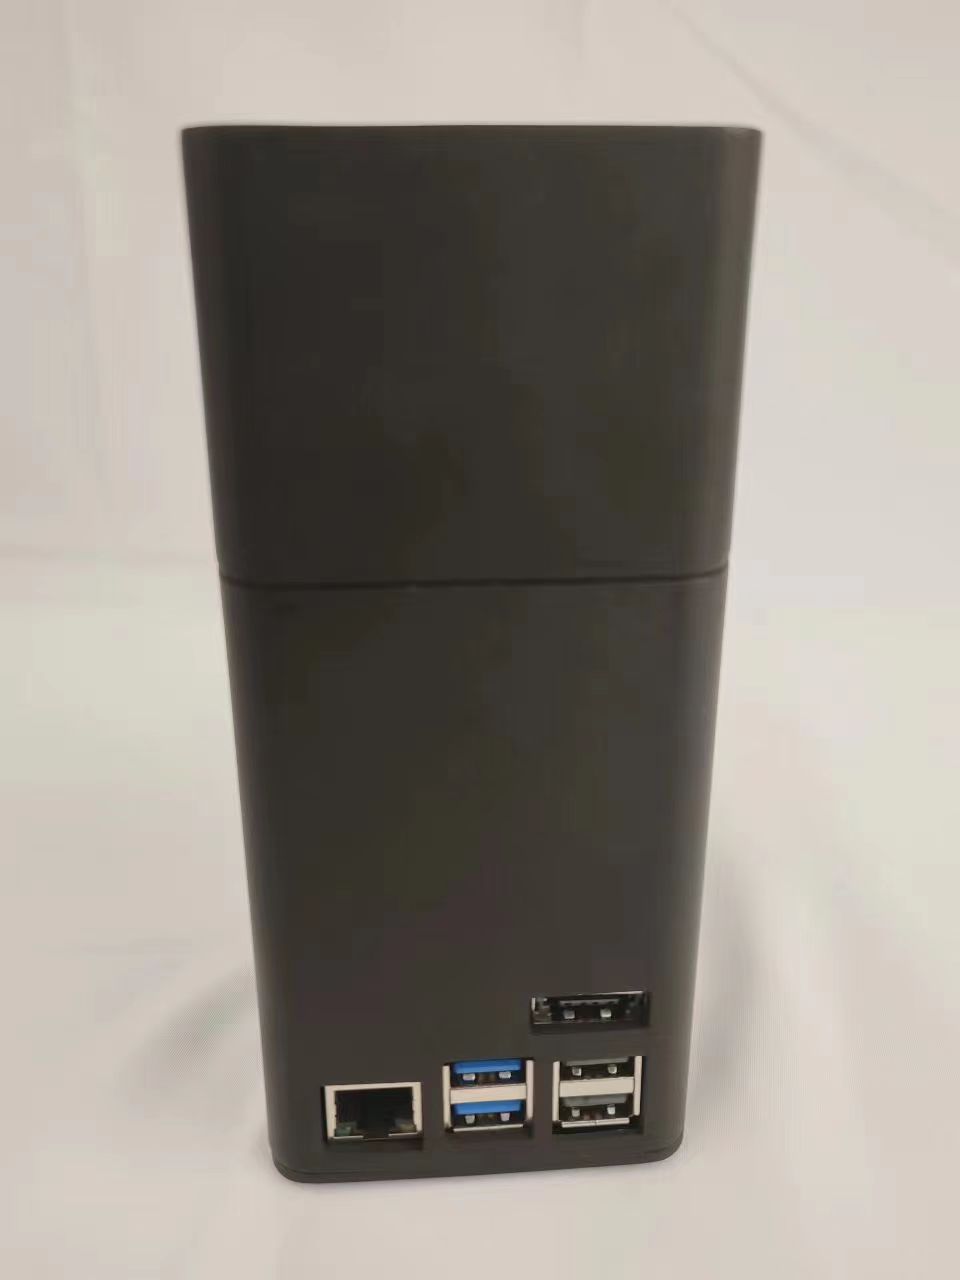
When putting the unit together the back side holes (usb/sata/ethernet) align nicely.
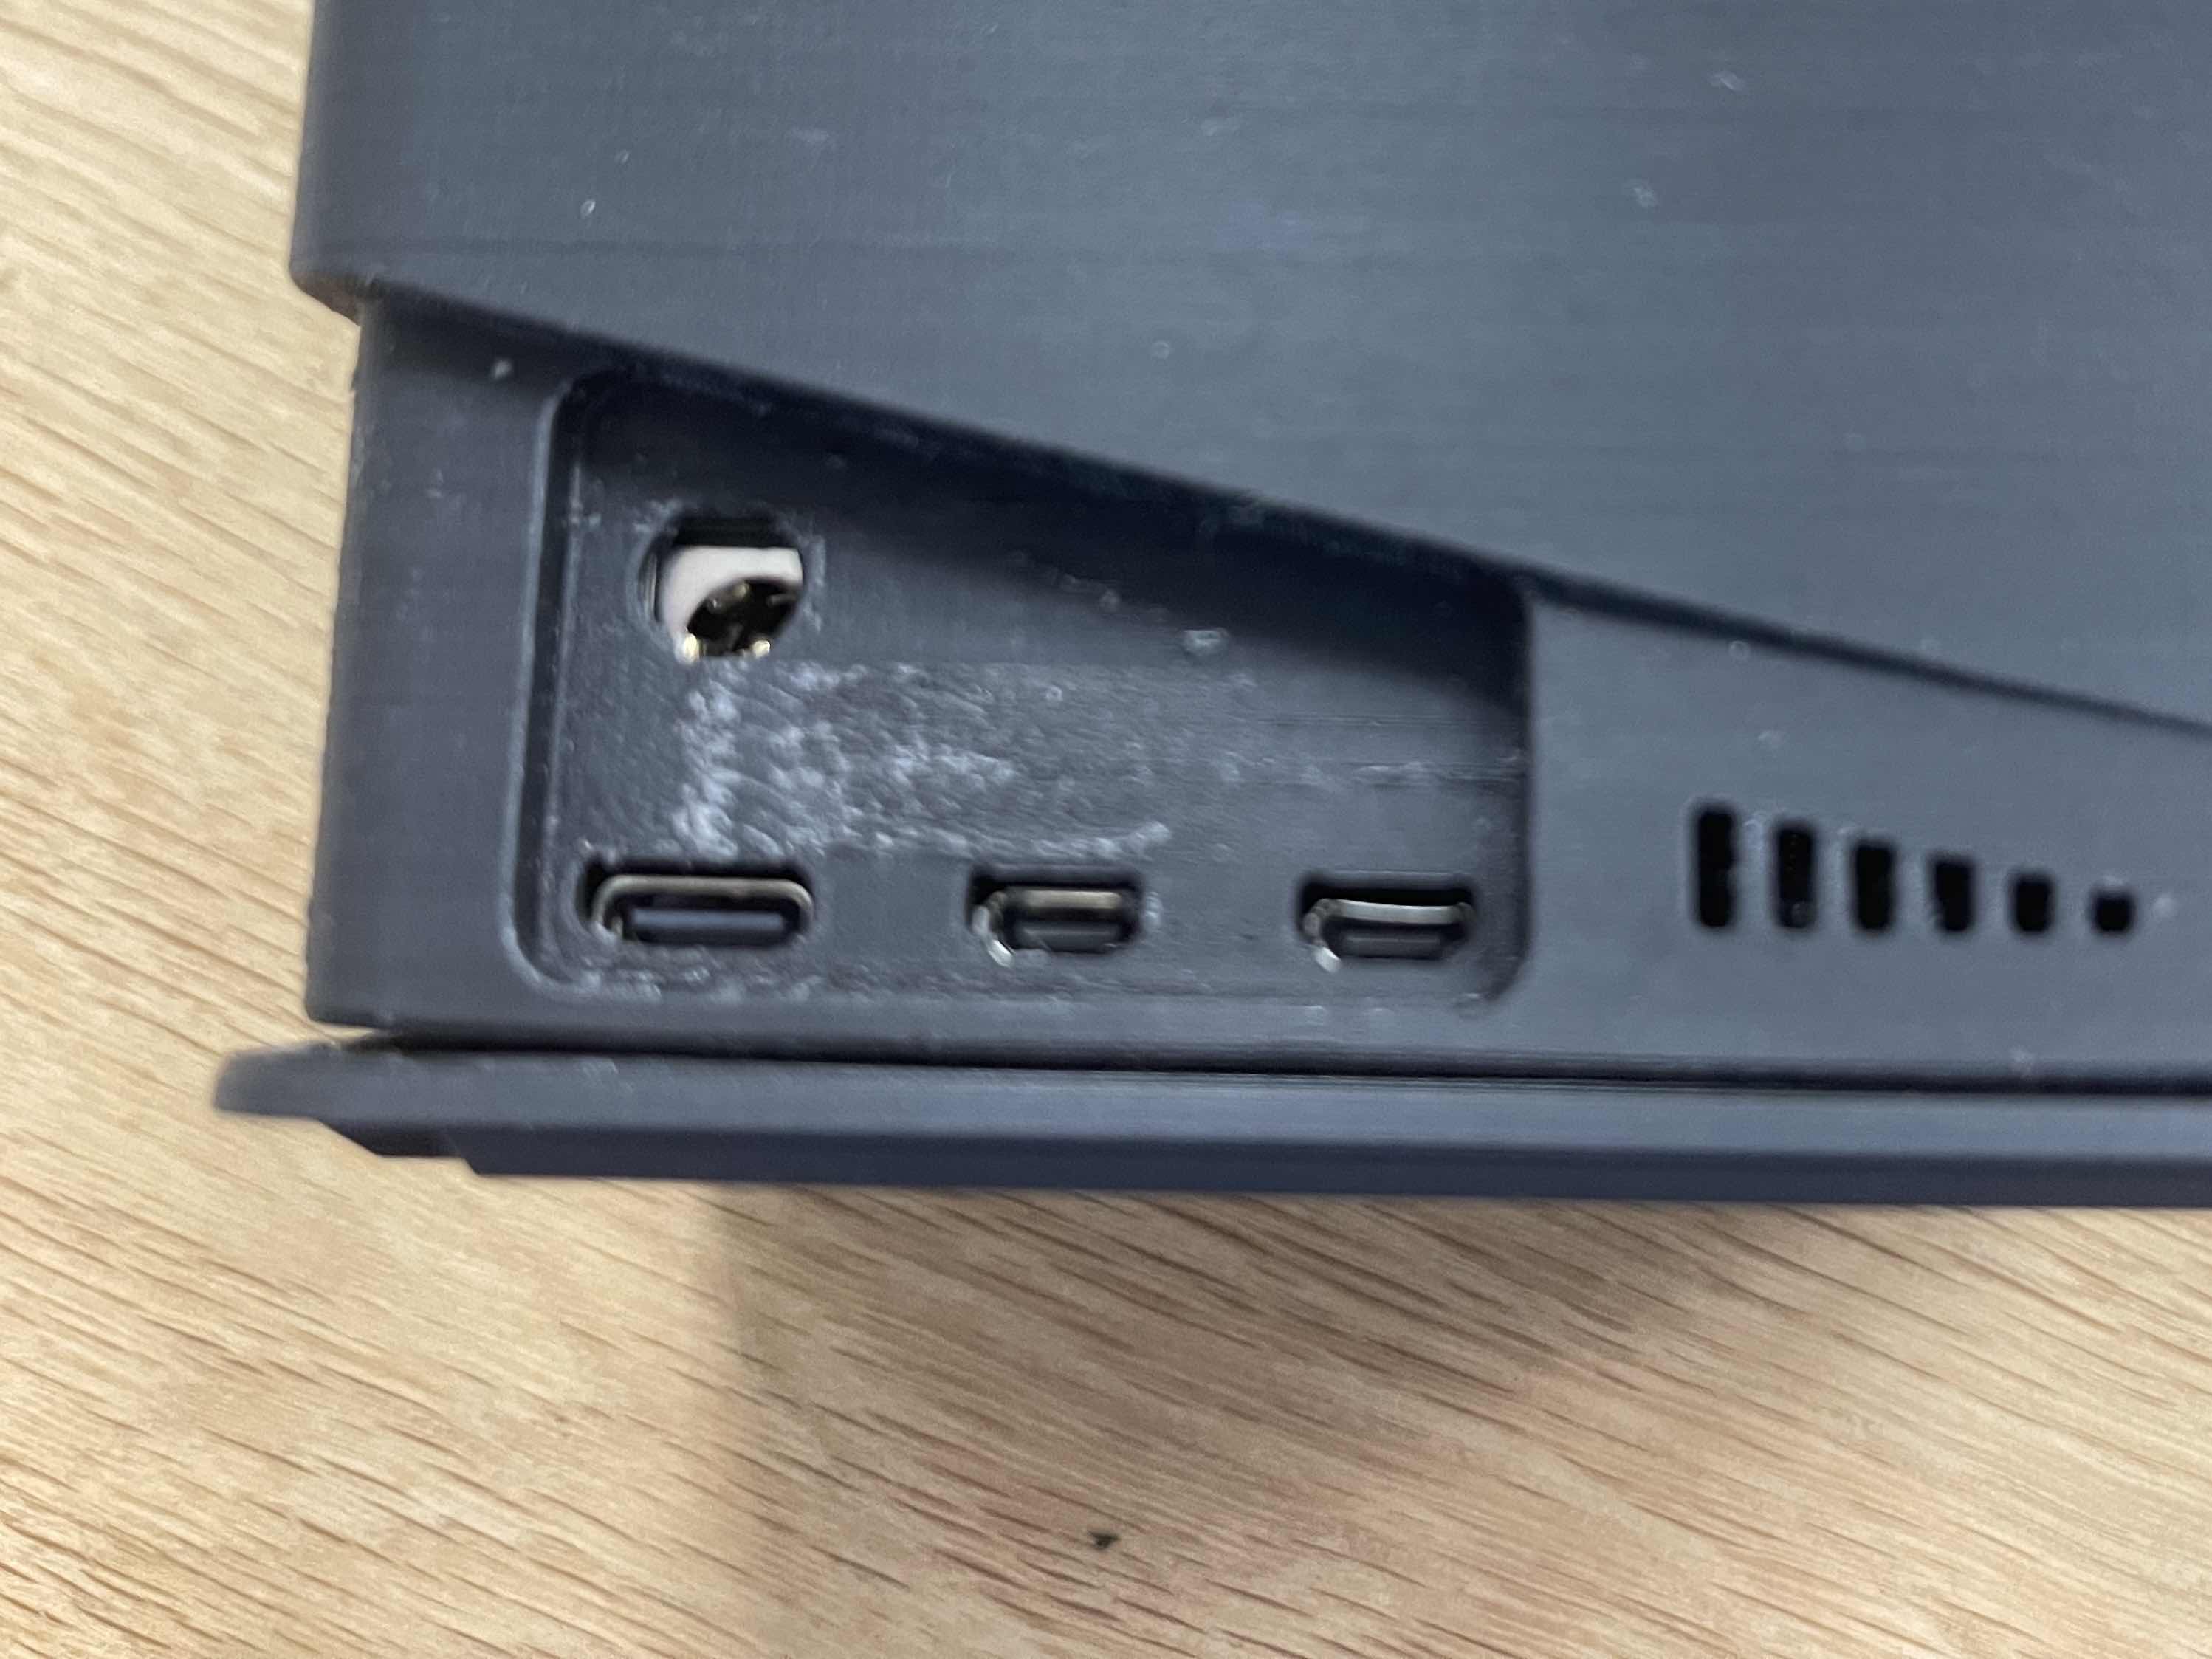
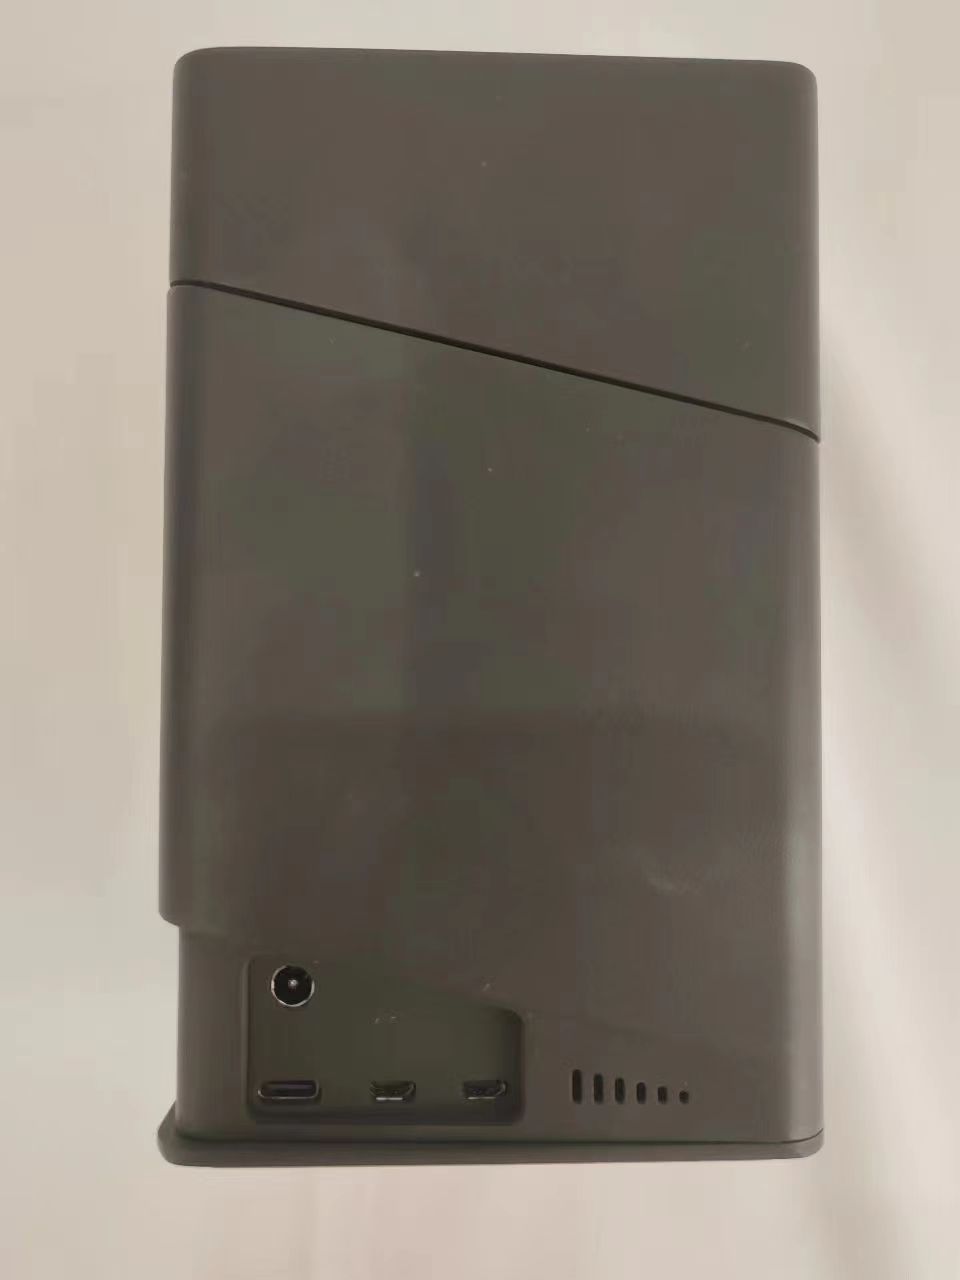
On the slide things are mostly ok (ideally the usb-c & display output house would be about 0.5mm lower), but the 12V power supply hole is clearly off the current hole is about 1.3 mm to far to the left and about 2mm too high, meaning the power supply will not fit.
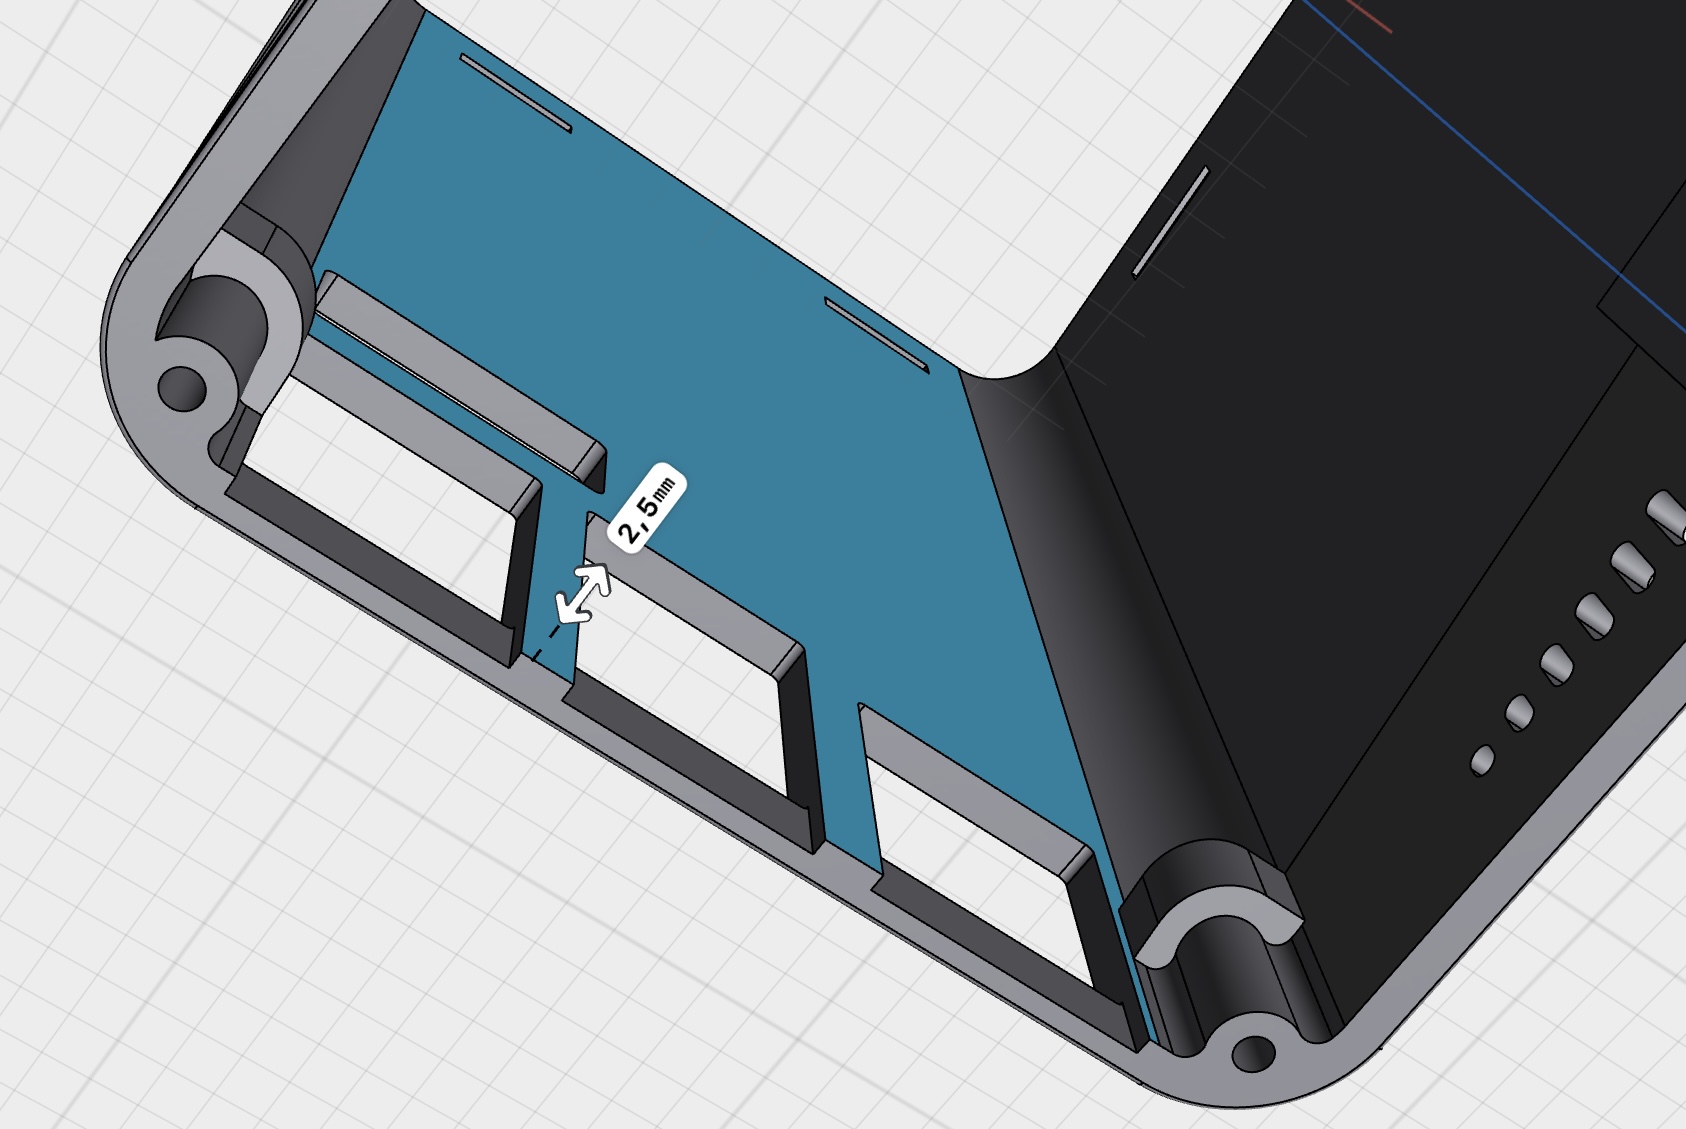
The pillars on the back side of the case (between the usb and ethernet connectors seem to break relatively easily (I recognise this may be due to the PLA filament I have been using). It would seem to be possible to slightly extend them backwards (in some areas, so they don’t interfere with the PCBs) and to increase the width of the bottom bar under the connectors to 2.5mm (1now 1.5mm)
Other than the glitches mentioned it is a really a nice model thanks.
Regards
Remi
p.s. do you have any info on when a top case fan unit might become available?
Hello Ray71,
thx for the information. So I have to wait until Radxa will fix the problems with the Powersupply hole and usb-c & display output house.
Thx a lot
Apologies for adding remarks as I actually the DIY case option is awesome.
Since the case is closed on the front side there is no way to remove the SD card from the Pi without opening the case removing the SSDs and partially removing the PI. I recognise there is no easy fix for this a the SD will not pop out when pressed. The bast way (not the most beautiful) would be to add a U shape slot to the underside of the case. Slightly better looking would be to add a slightly oversize slot to the front so that a pair of tweezers could do the job. In this case a small extra cleaning to the base plate owed be sufficient.
Not a critical item but it might be nice to add a hole to the case to be able to a access the on/off button
for both these to changes I can imagine it is a matter of preference. so just adding them for completeness sake.
I agree that it is not ideal, but then in “Radxa” defence they are providing the case free of charge.
(I do agree though that several problems could have been spotted relatively easily)
Most of them should also be fairly easy to fix by individual user provided you are somewhat savvy with 3D programs. My own problem that I am very well aware of what I would like to change but changing it (for example moving the power hole) can be more of a hassle than you would expect (probably because I am doing it wrong).
One tip: when attempting your own print, be very mindfull on the about edges not curing up on your prints, especcially for the top and bottom outside pieces (not the inserts) this is proving somewhat of a challenge (it might even be worth while to temporarily add material here that can later be cut out)
i will wait a little bit more otherwise i correct the case files. Printing is not really the problem i am using Ultimaker S3 with Dual Extruder, i try CPE+ with Breakaway filament for support,
We printed it, found some minor problems in the original version, corrected it and then uploaded the file. Not printing again seriously is indeed we are not rigorous enough.
I apologize for a serious error here. The initial version of the Penta used a DC jack type 5521, but we later switched to a 5525 to accommodate higher current. When we were making this 3D case, we mistakenly used the previous version.
To all the 3D printing gurus, i would love to make a feature request. is it possible to add a ledge or holder for a 2.5" ssd above the e-sata port? would be awesome to be able to just plug in the 2.5" ssd and have it “secured” in place…