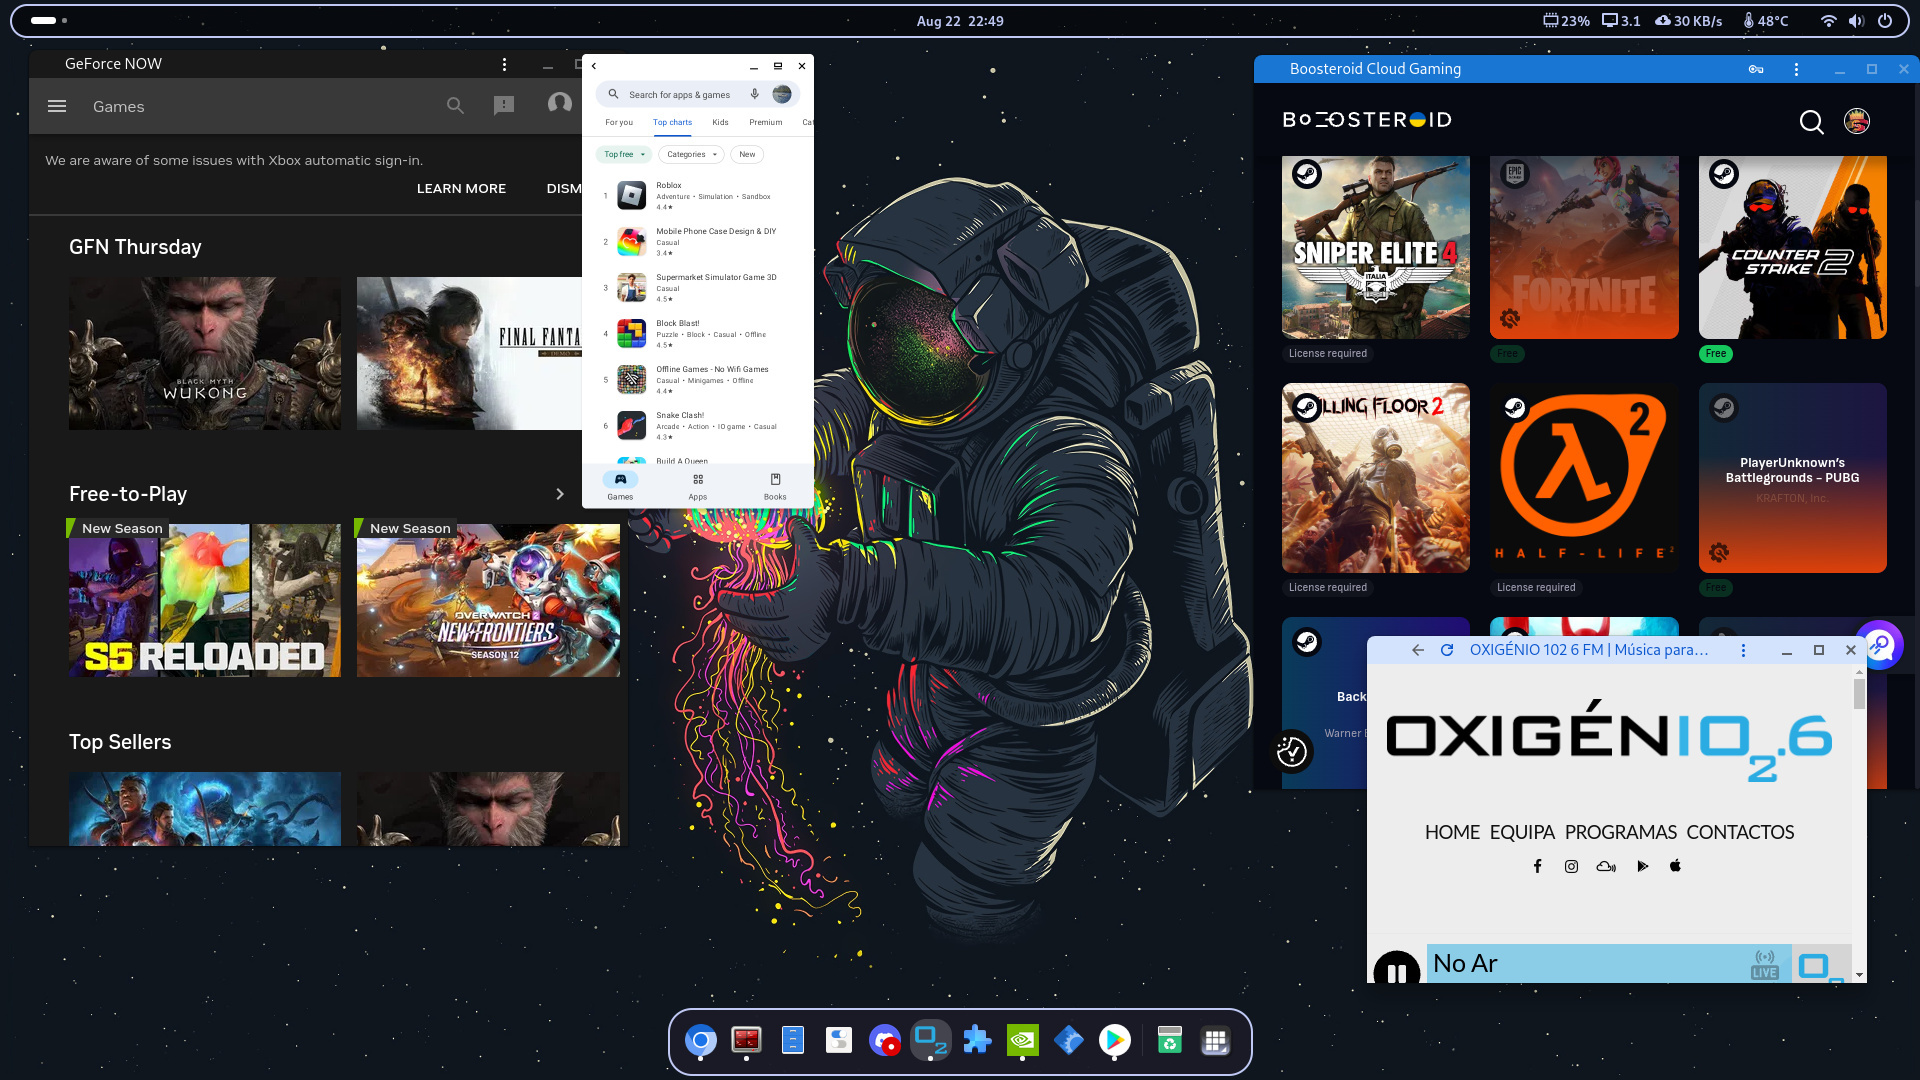
![]() Best Options - For a Rad’-/-'xa Rockchip Single Board Experience
Best Options - For a Rad’-/-'xa Rockchip Single Board Experience ![]()
📄 My Briefing:
I do not have enough knowledge yet to properly cover the “Graphics Acceleration and Performance” section. Most of what I hear is that mainline support will eventually fix things, and then it will just be a matter of enabling performance settings and avoiding proprietary components.
Steam and Android are still problematic. Steam updates suggest that a client for ARM64 will eventually work out of the box, but until that happens, both FEX and Box64 are hit or miss depending on the distribution and are not very reliable in my opinion.
On the Android side, Waydroid is not great in my view. Most guides point to a specific kernel setup, which makes it difficult for me to use. It would be better to have something that works across systems. Right now it feels limited. MaliorDroid was probably the best option, but the people who maintained it moved on to more powerful hardware, so it seems to be abandoned.
I still try to improve my guide over time. It is partly for my own learning and to keep track of things. Sometimes I reuse parts of it and adapt them for other guides or distributions. To be honest, I worry about losing it. Having to rebuild everything from memory would be frustrating.
I do enjoy organizing and improving the guide to make things clearer and easier for others and for myself. I hope people find it useful.
 Download Options
![]() More images to find here at the Radxa - Docs
More images to find here at the Radxa - Docs ![]()
📄 Notes:
- When downloading via
wget, use the--no-check-certificateoption to avoid download errors. Alternatively, consider using a download manager like JDownloader or Motrix . - After launching the system, you will likely need to open your disk storage settings and perform a disk resize to utilize the full capacity of your drive.
- Some systems may start with the X11 display server by default. If you notice poor performance or lack of visual polish, switch to Wayland to unlock the system’s full graphical capabilities.
- Very important: Use a high-quality USB Type-C charger and cable for your device to ensure proper power delivery and stable performance.
 Web Browsers
Browsers and their tricks.. basically flags and other shenenigans
 Official Chromium
Install the latest official Chromium from the repositories:
sudo apt -y install chromium-browser
Now.. to give it video acceleration you need to enable flags:
The whole soup in a command
sudo bash -c 'CONF=/etc/chromium/chromium.conf;
FLAGS="--show-component-extension-options --enable-gpu-rasterization --no-default-browser-check --disable-pings --media-router=0 --ozone-platform-hint=wayland --enable-features=AcceleratedVideoDecoder,AcceleratedVideoDecodeLinuxGL,AcceleratedVideoDecodeLinuxZeroCopyGL";
grep -q "CHROMIUM_FLAGS" "$CONF" && sed -i "s|^CHROMIUM_FLAGS=.*|CHROMIUM_FLAGS=\"$FLAGS\"|" "$CONF" || echo "CHROMIUM_FLAGS=\"$FLAGS\"" >> "$CONF"'
--show-component-extension-options
--enable-gpu-rasterization
--no-default-browser-check
--disable-pings
--media-router=0
--ozone-platform-hint=wayland
--enable-features=AcceleratedVideoDecoder,AcceleratedVideoDecodeLinuxGL,AcceleratedVideoDecodeLinuxZeroCopyGL
Chromium via Flatpak (Cross-Distro)
Set up Chromium using Flatpak :
sudo apt install flatpak -y
sudo flatpak remote-add --if-not-exists flathub https://dl.flathub.org/repo/flathub.flatpakrepo
sudo flatpak install flathub org.chromium.Chromium -y
sudo flatpak update -y
![]() Flatpak ensures a sandboxed, up-to-date Chromium experience across most Linux distributions.
Flatpak ensures a sandboxed, up-to-date Chromium experience across most Linux distributions.
🪁 Fan options
 Manual Fan Control on Rockchip (Armbian)
These instructions help you manually control the fan on a ROCK5B+ running Armbian .
 Set Fan Speed Manually
echo 204 | sudo tee /sys/devices/platform/pwm-fan/hwmon/hwmon*/pwm1
Note:
- Armbian uses
hwmon10for the ROCK5B+ - Armbian uses
hwmon8for the ROCK5B - You may need to adjust the
hwmon*wildcard accordingly based on your device.
 Enable Fan Heatsink Support (Optional for Armbian)
This may not be necessary in future Armbian releases, but to ensure proper fan control:
git clone https://github.com/lukaszsobala/fan-control-rock5b
cd fan-control-rock5b
make package
sudo dpkg -i fan-control*.deb
sudo systemctl enable fan-control
sudo systemctl start fan-control
![]() You’re now able to manage the fan manually.
You’re now able to manage the fan manually.
 Prevent System from Overriding Fan Control (Automatic Mode)
To stop the system from interfering with manual fan control:
sudo apt install i2c-tools -y
echo step_wise | sudo tee /sys/class/thermal/thermal_zone0/policy
echo user_space | sudo tee /sys/class/thermal/thermal_zone0/policy
sudo i2cset -y -f 2 0x18 0x8A 0x2
 Fan Speed Hex Values
| Hex Value | Fan Speed |
|---|---|
0x41 |
50% |
0x64 |
100% |
Wifi and BT Tricks 
 AX210 WiFi & Bluetooth Firmware Setup (Armbian)
To get AX210 WiFi and Bluetooth working on your rockchip borad, follow these steps.
Ethernet connection is required during setup.
 Install WiFi Firmware
# Download AX210 WiFi firmware
sudo wget -P /lib/firmware https://git.kernel.org/pub/scm/linux/kernel/git/firmware/linux-firmware.git/plain/iwlwifi-ty-a0-gf-a0-59.ucode

# Backup existing PNVM file (if present)
sudo mv /lib/firmware/iwlwifi-ty-a0-gf-a0.pnvm /lib/firmware/iwlwifi-ty-a0-gf-a0.pnvm.bak
 Install Bluetooth Firmware
# Download Intel Bluetooth firmware files
sudo wget -P /lib/firmware/intel https://git.kernel.org/pub/scm/linux/kernel/git/firmware/linux-firmware.git/plain/intel/ibt-0041-0041.sfi
sudo wget -P /lib/firmware/intel https://git.kernel.org/pub/scm/linux/kernel/git/firmware/linux-firmware.git/plain/intel/ibt-0041-0041.ddc
 Bluetooth Fix for Intel WiFi/BT Modules
- Edit the module blacklist file:
sudo nano /etc/modprobe.d/blacklist.conf
- Add the following lines at the bottom of the file:
blacklist pgdrv
blacklist btusb
blacklist btrtl
blacklist btbcm
#blacklist btintel
- Press
Ctrl+X, thenYto save and exit.
 Final Steps
# Optional: Install Bluetooth stack (may already be included in latest Armbian)
sudo apt install bluez  # or: sudo apt install bluetooth
# Check Bluetooth service status
systemctl status bluetooth  # Press Ctrl+C to exit
# Start Bluetooth service
sudo systemctl start bluetooth
Finally, reboot your device to apply changes:
sudo reboot
📢 Audio options
 Audio Tutorial for Bluetooth Devices
Note: This tutorial is not required for the latest Armbian versions, as audio support is built-in. However, if you’re facing issues with Bluetooth audio, feel free to explore the following steps.
Fix Audio Issues with PipeWire
1. Add PipeWire Repository
sudo add-apt-repository ppa:pipewire-debian/pipewire-upstream
2. Install PipeWire and Audio Dependencies
sudo apt install pipewire pipewire-audio-client-libraries gstreamer1.0-pipewire libpipewire-0.3-{0,dev,modules} libspa-0.2-{bluetooth,dev,jack,modules} pipewire{,-{audio-client-libraries,pulse,media-session,bin,locales,tests}} -y
3. Disable PulseAudio and Enable PipeWire
# Reload systemd user daemon
systemctl --user daemon-reload
# Disable PulseAudio services
systemctl --user --now disable pulseaudio.service pulseaudio.socket
# Enable PipeWire services
systemctl --user --now enable pipewire pipewire-pulse
4. Check PipeWire Status
pactl info
5. Reboot to Apply Changes
sudo reboot
💽 Flashing Software 
 Flashing Images via Rockchip Dev Tools App
This guide explains how to flash images using rkdevtools on Windows , and also includes a short terminal-based guide for flashing via SPI .

 Image Preparation
- Decompress Images
Use WinRAR to decompress.img.xzfiles to.img. Do not use the Windows “Extract All” option.
 Flashing via Rockchip Dev Tools
- Tick ‘Write by Address’
- Select the Rockchip Boot Loader SPL file:
rk3588_spl_loader_v1.15.113.bin .
- For SPI
- Select SPINOR and use the Loader Image for flashing.
 (Short Guide) Flashing via Terminal (SPI Flashing on the Board)
Follow these steps to flash the image via terminal on your device.
Step 1: Download and Prepare Image
# Download the zero.img.gz file
wget https://dl.radxa.com/rock5/sw/images/others/zero.img.gz

# Decompress the image
gzip -d zero.img.gz

# Flash to SPI with dd
sudo dd if=zero.img of=/dev/mtdblock0
Wait for approximately 5 minutes for the command to complete. Then, verify the checksum:
sudo md5sum /dev/mtdblock0
- The expected checksum should be:
2c7ab85a893283e98c931e9511add182
Step 2: Flash the Rock-5B SPI Image
# Download the Rock-5B SPI image
wget https://dl.radxa.com/rock5/sw/images/loader/rock-5b/release/rock-5b-spi-image-g49da44e116d.img

# Flash to SPI with dd
sudo dd if=rock-5b-spi-image-g49da44e116d.img of=/dev/mtdblock0
Wait for 5 minutes to complete, then verify the checksum:
sudo md5sum /dev/mtdblock0
- The expected checksum should be:
46de85de37b8e670883e6f6a8bb95776
Step 3: Finalize and Reboot
# Sync data to storage
sync

# Reboot the device
reboot
More Information
For additional information on SPI to NVME boot from SD card , refer to the official documentation.
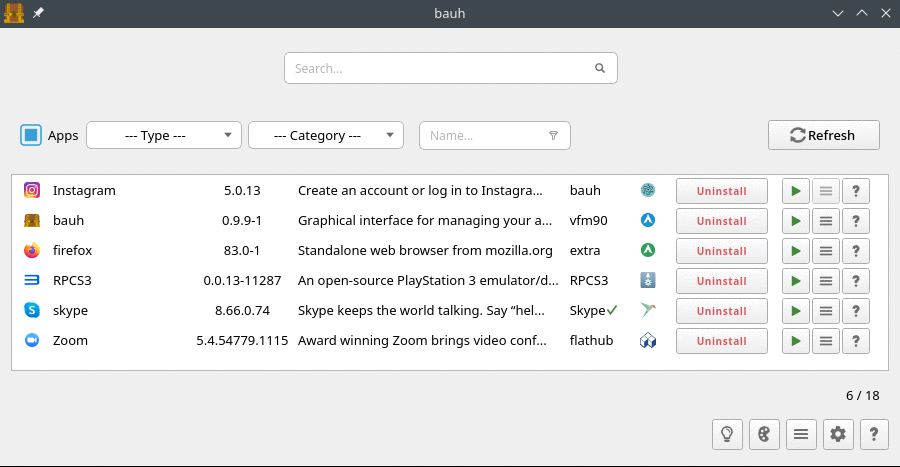
🥛 App Manager Hubs 
 Raspberry Pi App Store for Open Source Projects
- Install Raspberry Pi App Store :
wget -qO- https://raw.githubusercontent.com/Botspot/pi-apps/master/install | bash
FlatHub - Hundreds of Apps and Games for Linux
- Install Flatpak and Add FlatHub Repository :
sudo apt install flatpak -y
sudo flatpak remote-add --if-not-exists flathub https://dl.flathub.org/repo/flathub.flatpakrepo
sudo flatpak update -y
 Bauh – A Manager for Your Multi-Package Needs
- Install Dependencies :
sudo apt install git python3 python3-full pipx python3-pyqt5 python3-pyqt5.qtsvg python3-setuptools qtbase5-dev qtchooser qt5-qmake qttools5-dev-tools
- Set Up Virtual Environment and Install PyQt5 :
source venv/bin/activate
pip install pyqt5 --config-settings --confirm-license= --verbose
- Install Bauh Using Pipx :
pipx install bauh
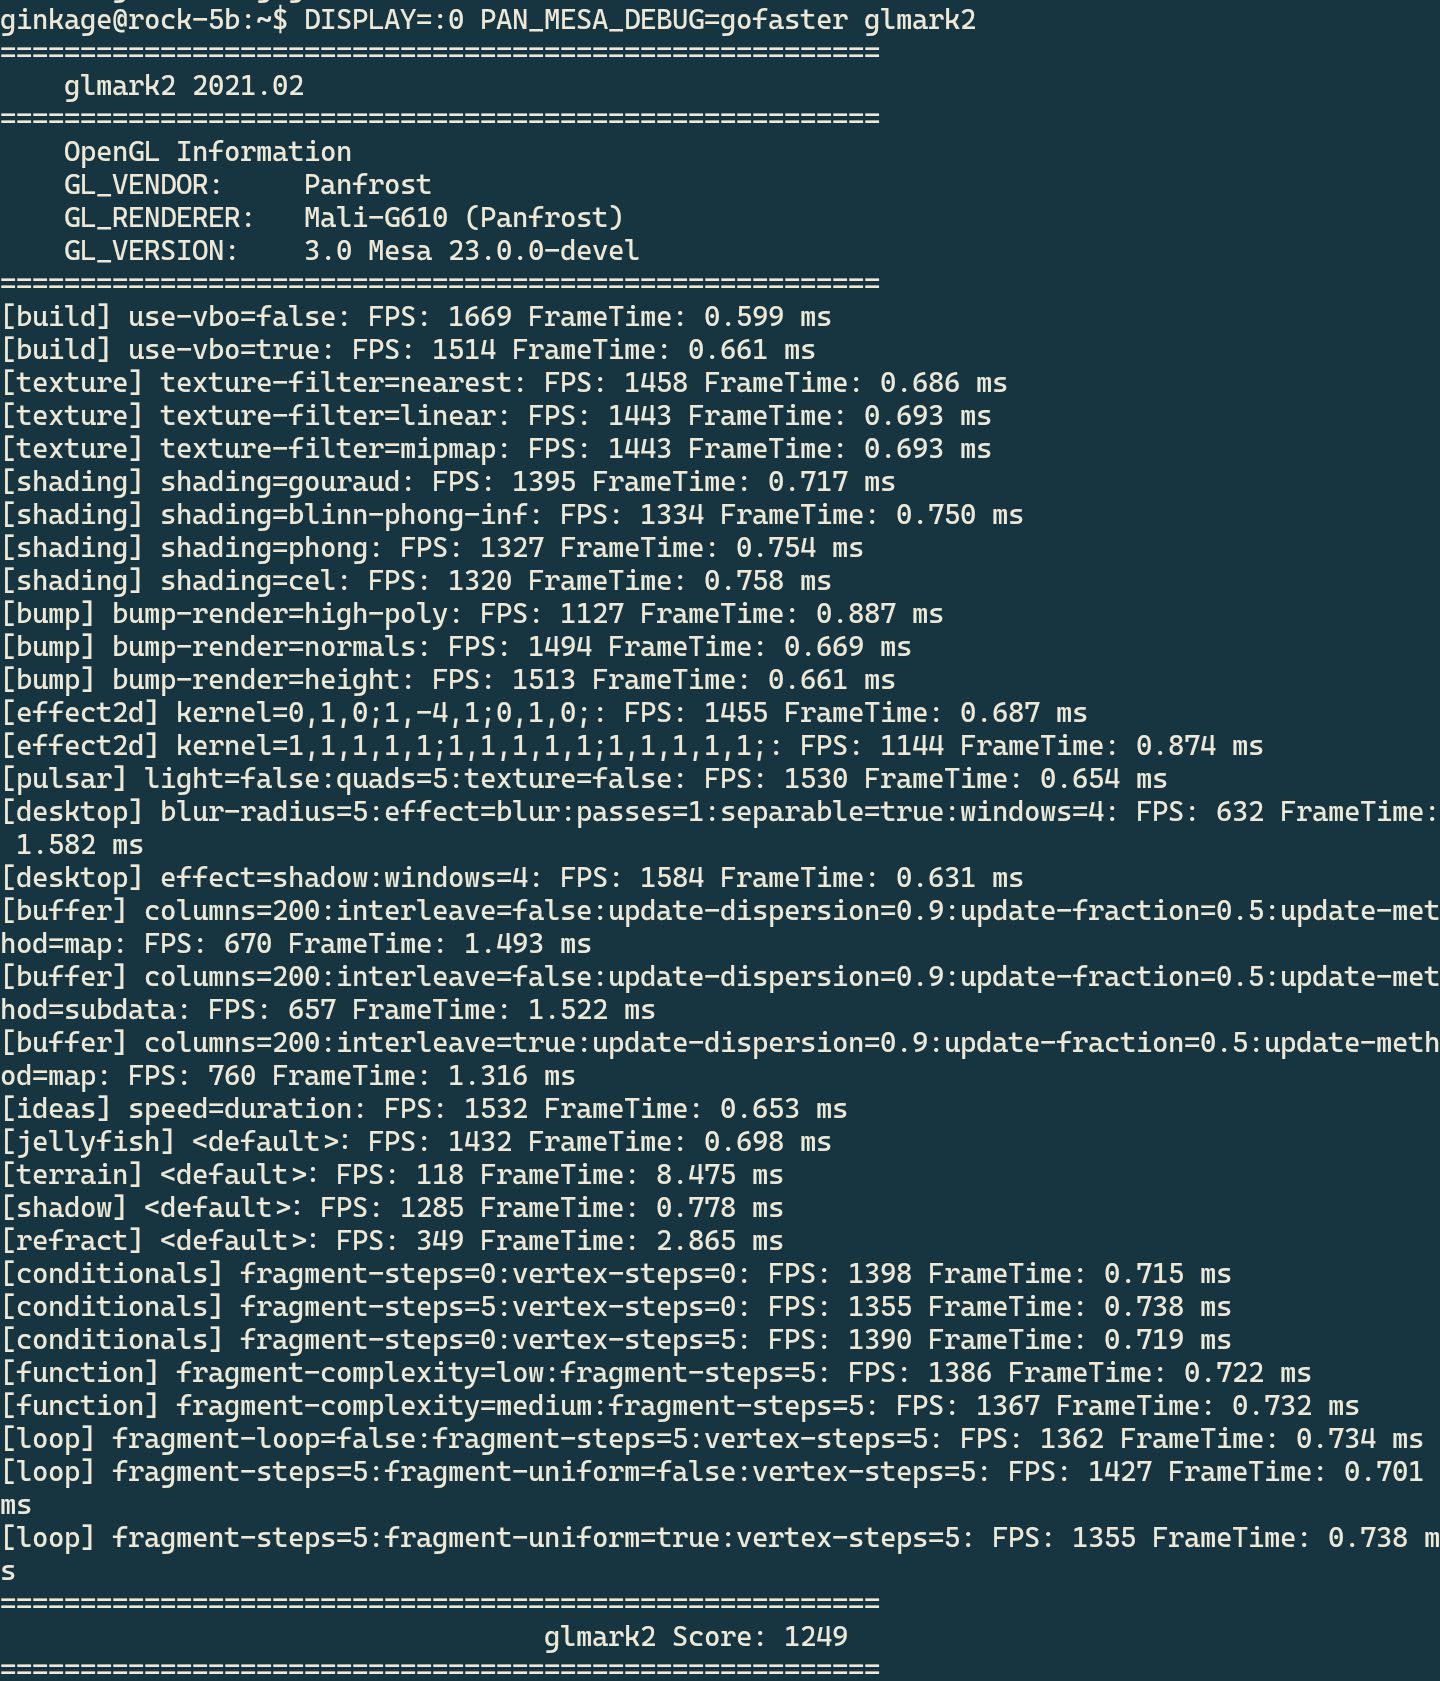
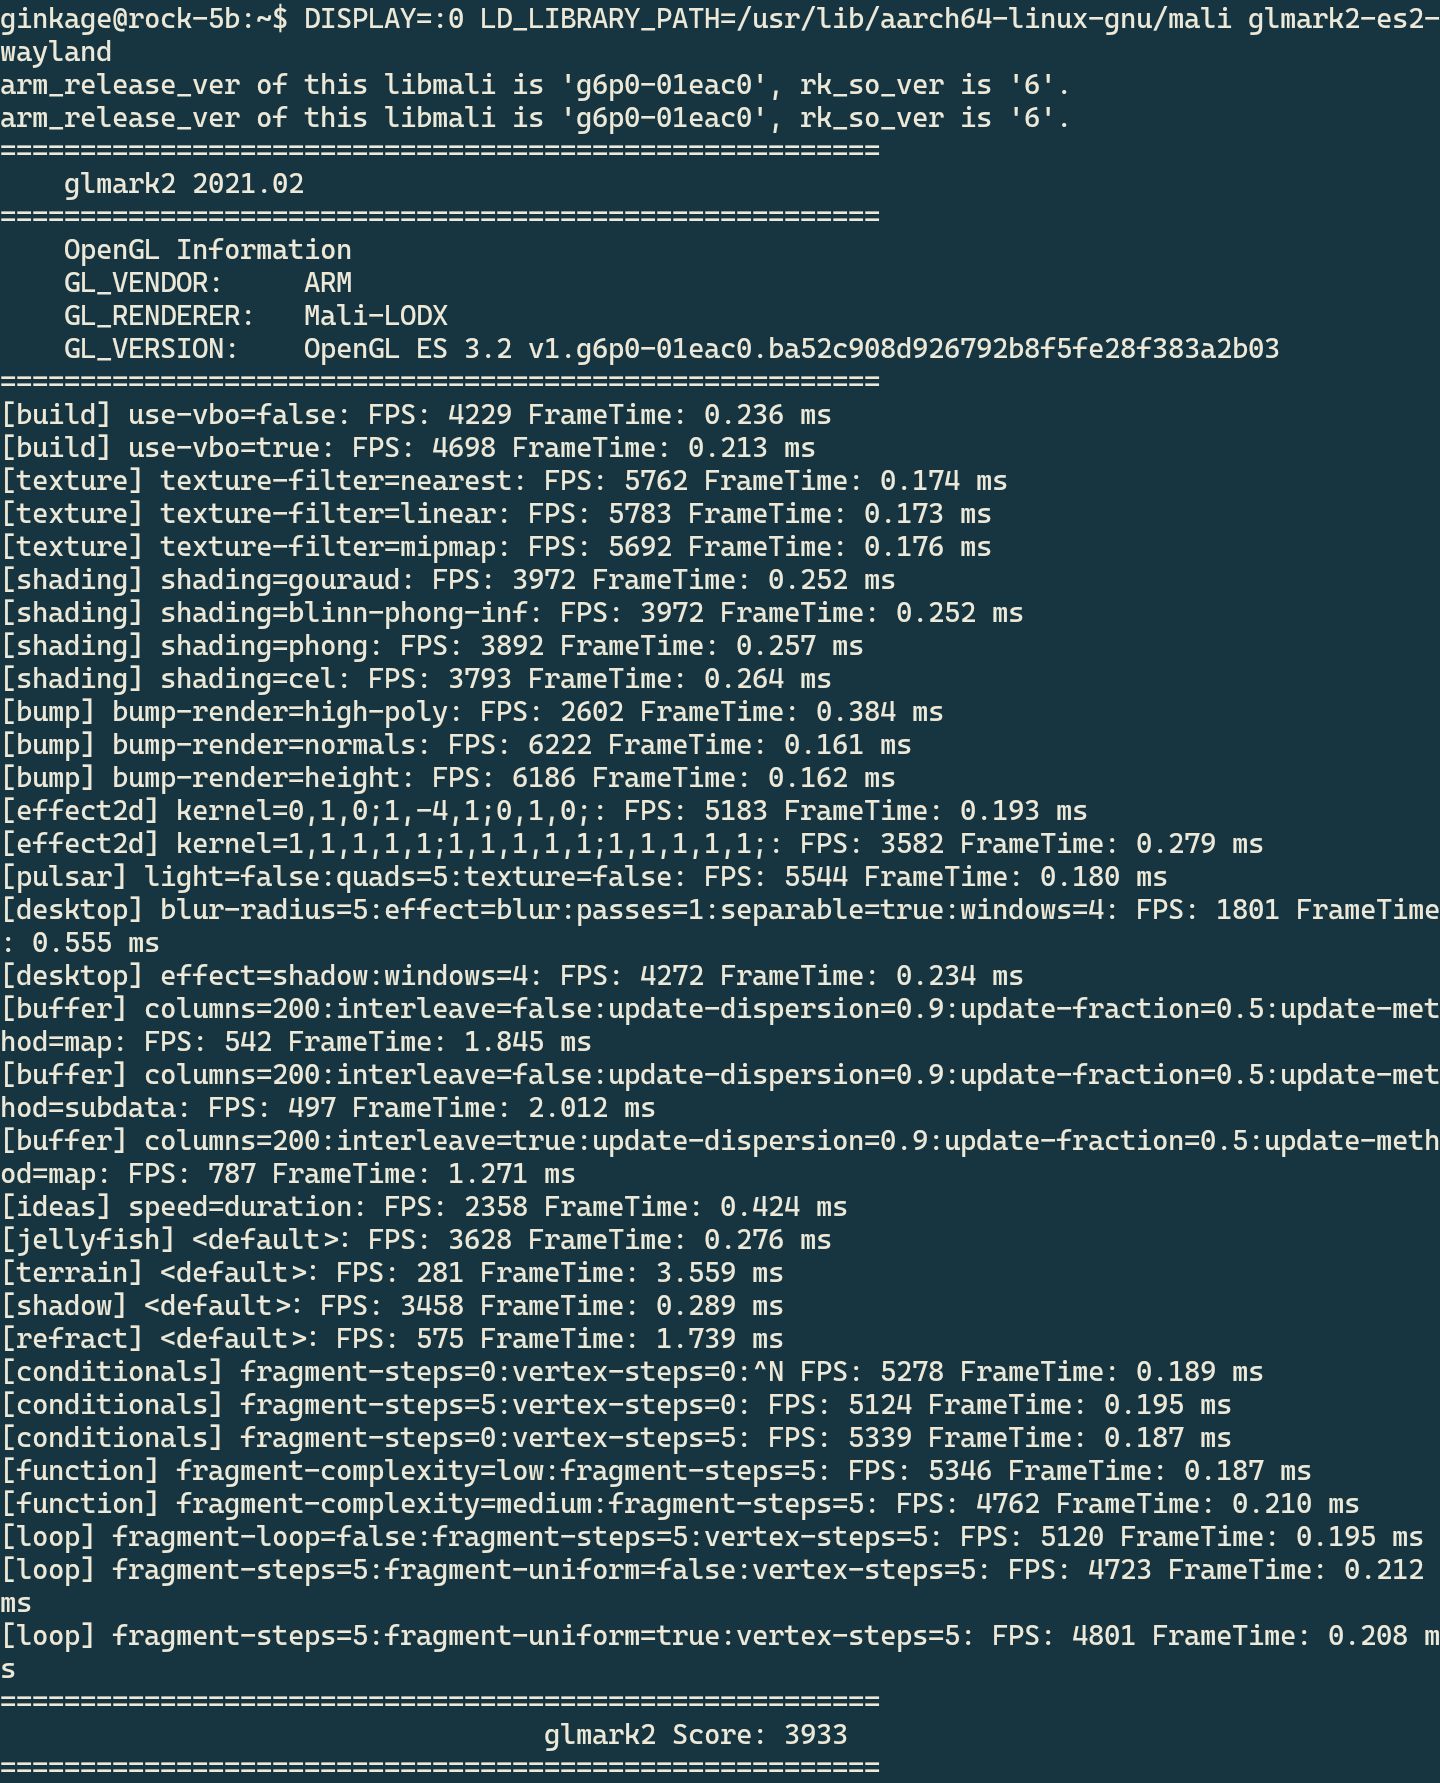
Graphics Acceleration / Performance
This guide helps you set up Graphics Acceleration on your system, using Panfork on Wayland and OpenCL runtime with libmali.
Install Graphics and OpenCL Dependencies
- Add Required PPAs :
sudo add-apt-repository ppa:rockchip-linux/ppa
sudo add-apt-repository ppa:liujianfeng1994/rockchip-multimedia
- Update and Install Required Packages :
sudo apt update
sudo apt install mali-g610-firmware rockchip-multimedia-config glmark2 glmark2-es2 glmark2-es2-wayland mesa-utils malirun -y
sudo apt upgrade -y
- Remove Unneeded PPAs :
sudo add-apt-repository --remove ppa:liujianfeng1994/panfork-mesa
sudo add-apt-repository --remove ppa:liujianfeng1994/rockchip-multimedia
- Check OpenGL Status :
glxinfo | grep OpenGL
 Install libmali for OpenCL
- Create a Directory for libmali :
mkdir -p ~/tmp/libmali && cd ~/tmp/libmali
- Download and Install libmali :
wget 'https://github.com/tsukumijima/libmali-rockchip/releases/download/v1.9-1-55611b0/libmali-valhall-g610-g13p0-gbm_1.9-1_arm64.deb'
sudo dpkg -i ./libmali-valhall-g610-g13p0-gbm_1.9-1_arm64.deb
 Max Out the SoC Performance (Optional)
Warning: This will provide maximum performance at the cost of higher temperature and power consumption.
- Set Performance Mode for CPU, GPU, and NPU :
echo performance | sudo tee /sys/devices/system/cpu/cpu*/cpufreq/scaling_governor
echo performance | sudo tee /sys/devices/platform/dmc/devfreq/dmc/governor
echo performance | sudo tee /sys/devices/platform/fb000000.gpu/devfreq/fb000000.gpu/governor
echo always_on | sudo tee /sys/devices/platform/fb000000.gpu/devfreq/fb000000.gpu/device/power_policy
echo performance | sudo tee /sys/devices/platform/fdab0000.npu/devfreq/fdab0000.npu/governor
echo performance | sudo tee /sys/module/pcie_aspm/parameters/policy
- (Optional) Add to Startup Script (
/etc/rc.local) for automatic performance on boot.
Create Aliases for Performance Modes
To easily switch between performance, ondemand, and powersave modes, add these aliases to your .bash_aliases file:
- Edit
.bash_aliases:
nano .bash_aliases
- Add the following aliases :
alias performance="echo performance | sudo tee /sys/bus/cpu/devices/cpu[046]/cpufreq/scaling_governor /sys/class/devfreq/dmc/governor /sys/class/devfreq/fb000000.gpu/governor"
alias ondemand="echo ondemand | sudo tee /sys/bus/cpu/devices/cpu[046]/cpufreq/scaling_governor && echo dmc_ondemand | sudo tee /sys/class/devfreq/dmc/governor && echo simple_ondemand | sudo tee /sys/class/devfreq/fb000000.gpu/governor"
alias powersave="echo powersave | sudo tee /sys/bus/cpu/devices/cpu[046]/cpufreq/scaling_governor /sys/class/devfreq/dmc/governor /sys/class/devfreq/fb000000.gpu/governor"
- Save and Restart :
PressCtrl + X, thenY, and restart your terminal.
Now, you can easily switch between the modes by typing performance , ondemand , or powersave in the terminal.
Mali Blobs / Vulkan WSI Layer
- Start with Noble / GNOME / Vendor
Make sure the gpu-panthor overlay is disabled and that you don’t have Mesa installed (especiallymesa-vulkan-drivers).
sudo apt install gcc gcc-c++ cmake wayland-devel wayland-protocols-devel libdrm-devel vulkan-headers vulkan-loader-devel vulkan-tools libxcb-devel libX11-devel libXrandr-devel
cd \~
rm -rf vulkan-wsi-layer
git clone https://github.com/ginkage/vulkan-wsi-layer.git
cd vulkan-wsi-layer
mkdir build
cd build
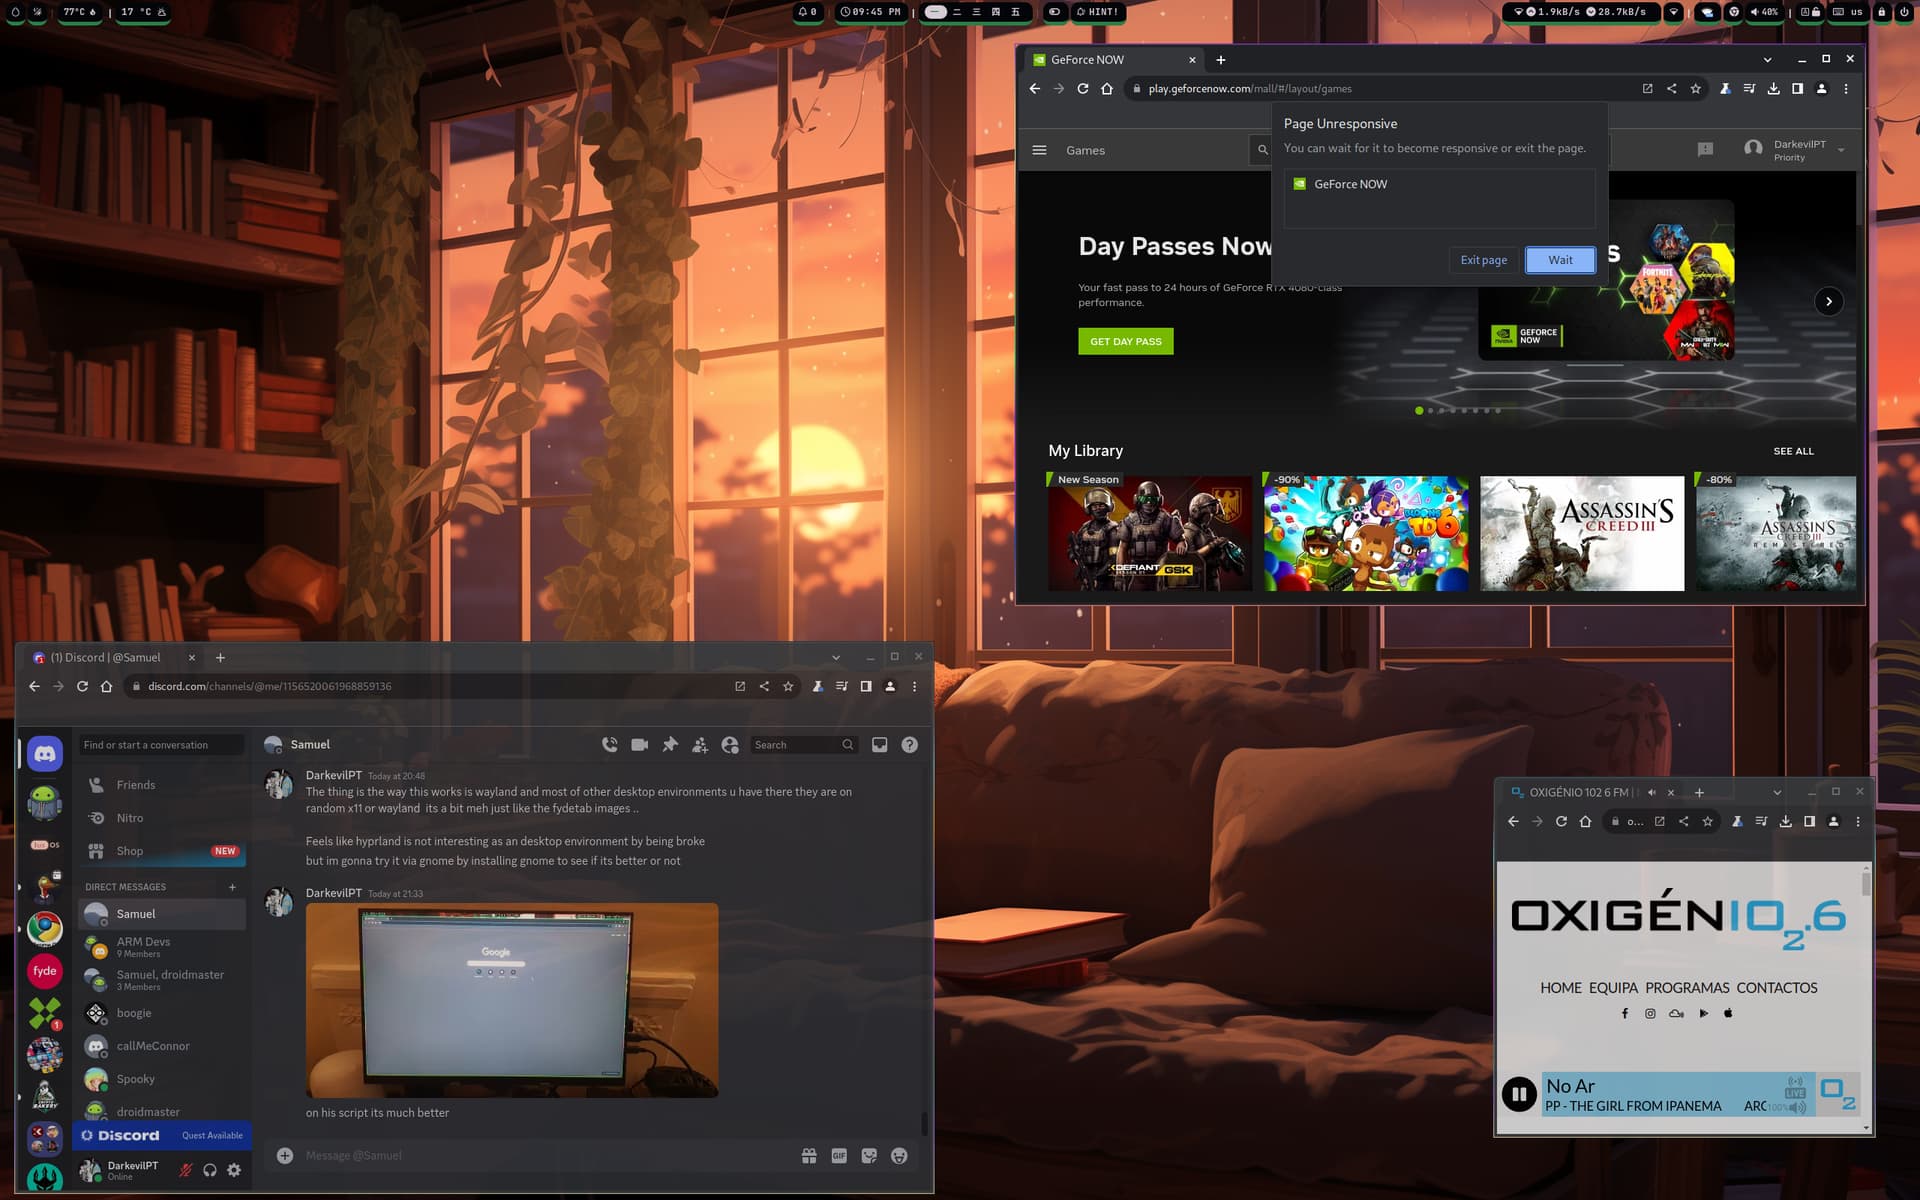
 Android Linux
Desktop Ricing #Unixporn
🎛️ Tweaks and Shell Extensions🎚️
Install GNOME Tweaks and Extension Tools
sudo apt install gnome-tweaks gnome-shell-extension-manager chrome-gnome-shell -y
Open GNOME Tweaks
Launch Tweaks , and under the “Titlebar” section:

 Enable Titlebar Buttons (e.g., minimize/maximize)
(Why is this even disabled by default…)
 Install and Manage Extensions
Visit extensions.gnome.org to browse and install GNOME Shell extensions.
You can now install popular extensions like:


 User Themes – Load custom GTK/Shell themes.
 Dash to Panel or Dash to Dock – Enhance the GNOME panel/dock experience.
 Vitals – Show temperature, CPU/GPU/RAM usage, and more.
 Compiz-like Wobbly Windows – Add window wobble effects for nostalgia.
- Burn My Windows – Add animated window closing effects to spice things up.
Rice your Desktop
Rice Your Desktop – Themes, Icons, and Shell Style
Customize the look and feel of your Linux desktop using themes, icon packs, and wallpapers.
Step 1: Download Customization Files
Save them to your Downloads directory.
 Step 2: Extract Themes and Icons
cd Downloads

# Extract theme
sudo tar -xf Graphite-teal-nord-rimless.tar.xz -C /usr/share/themes

# Extract icon pack
sudo tar -xf Zafiro-Nord-Black.tar.xz -C /usr/share/icons

# Optional: Use another theme
sudo tar -xf Cold-Metal-No-Logo-GTK.tar.xz -C /usr/share/themes
 Step 3: Create User Theme & Icon Folders (If Needed)
mkdir -p ~/.themes ~/.icons
![]() You can also change ownership/permissions if needed for easier access:
You can also change ownership/permissions if needed for easier access:
sudo chown -R $USER:$USER ~/.themes ~/.icons
Step 4: Enable User Themes Extension
Use GNOME Tweaks and GNOME Shell Extensions to enable the User Themes extension.

 Step 5: Apply Themes in GNOME Tweaks
- Open the Tweaks application
- Go to the “Appearance” section
- Select your desired:
- Applications theme
- Shell theme
- Icon pack
- Cursor
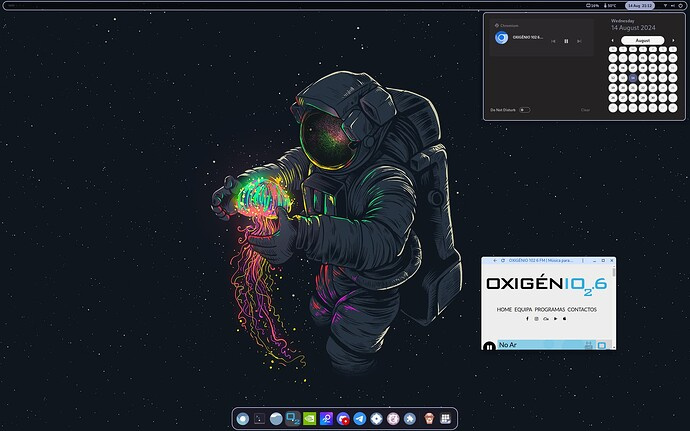
![]() Your desktop is now riced and stylish!
Your desktop is now riced and stylish!
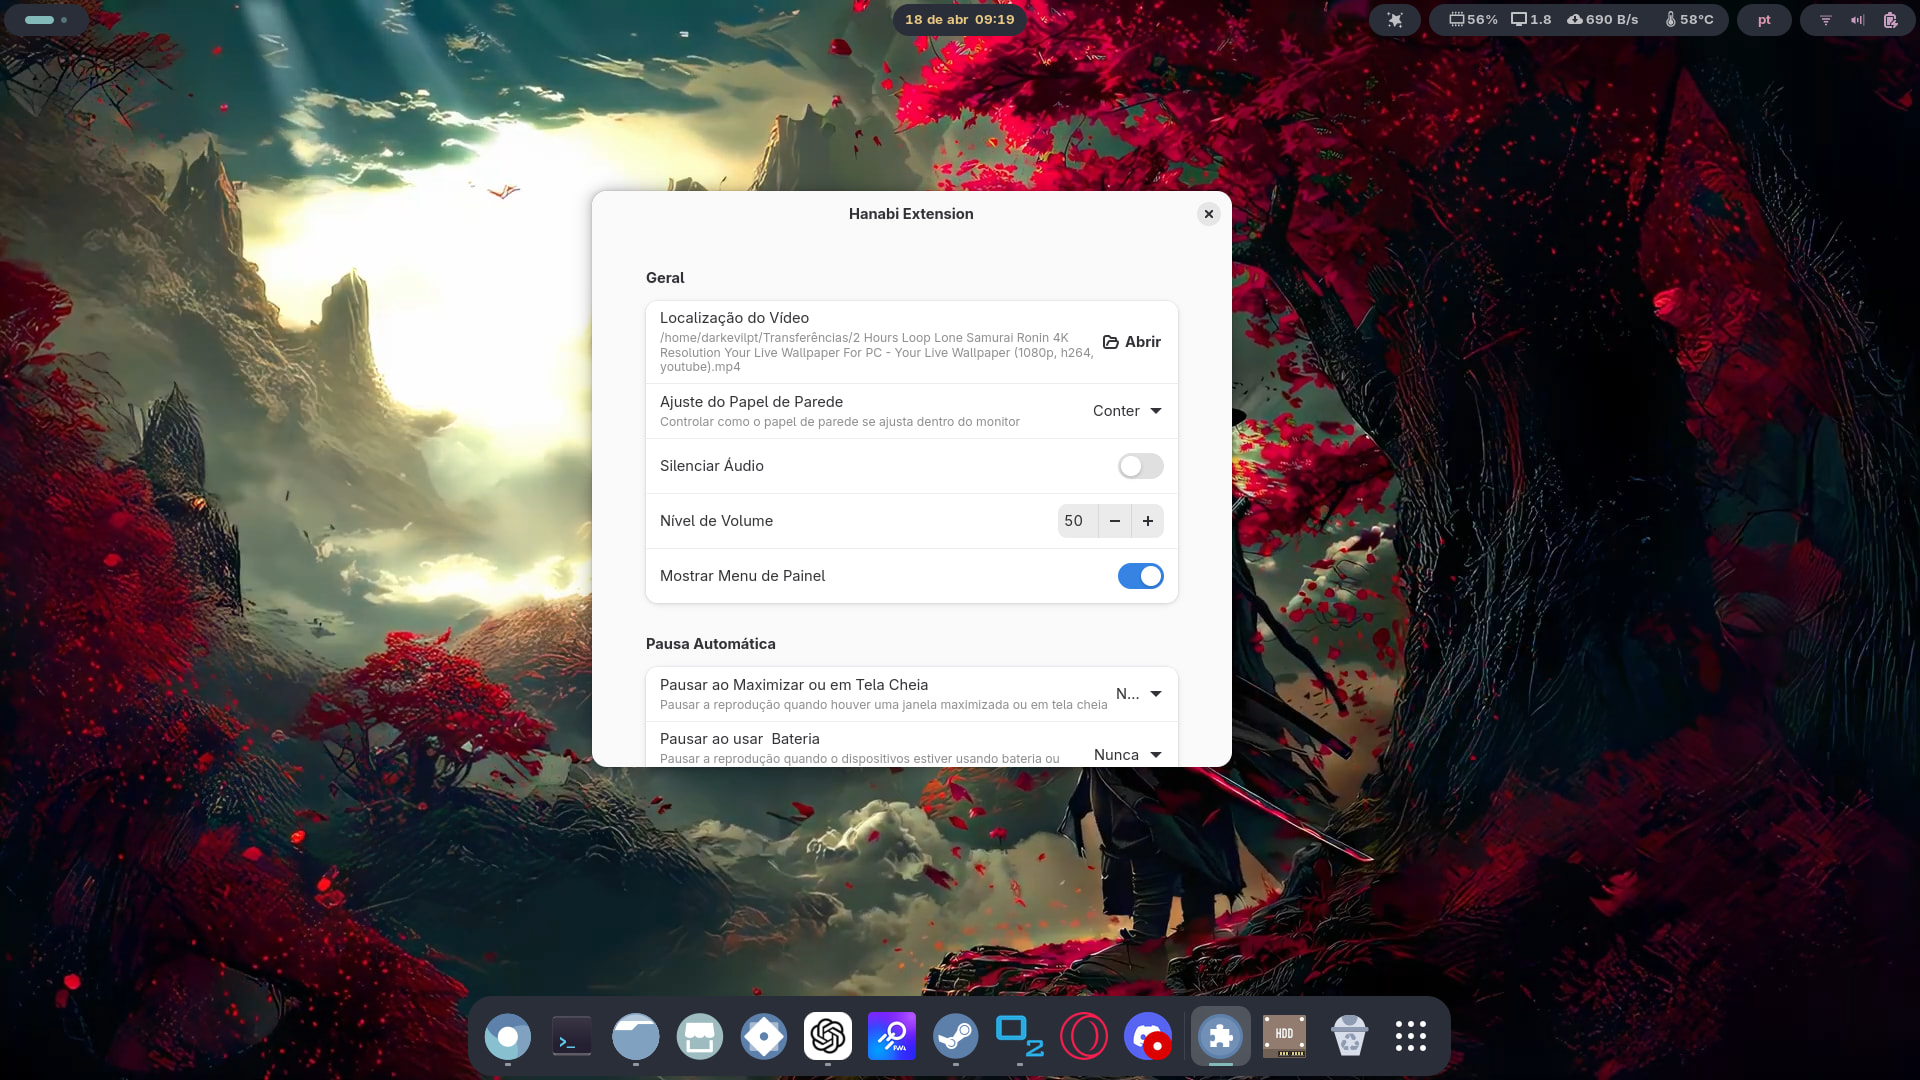
 Gnome Live Wallpaper
Well not “live” but video wallpaper in gnome is possible with Hannabi extension
sudo apt install git meson ninja-build build-essential gnome-shell-extension-prefs gstreamer1.0-plugins-base gstreamer1.0-plugins-good gstreamer1.0-plugins-bad gstreamer1.0-libav clapper
git clone https://github.com/jeffshee/gnome-ext-hanabi.git
cd gnome-ext-hanabi
./run.sh install
sudo reboot
gnome-extensions enable [email protected]
#or
sudo flatpak install flathub com.mattjakeman.ExtensionManager
https://flathub.org/en/apps/com.mattjakeman.ExtensionManager
Your Login Manager 
Install Requirements for Different Distros
sddm qt6-svg qt6-virtualkeyboard qt6-multimedia-ffmpeg     # Arch
sddm qt6-svg qt6-virtualkeyboard qt6-multimedia            # Void
sddm qt6-qtsvg qt6-qtvirtualkeyboard qt6-qtmultimedia      # Fedora
sddm-qt6 libQt6Svg6 qt6-virtualkeyboard qt6-virtualkeyboard-imports qt6-multimedia qt6-multimedia-imports        # OpenSUSE
Install Requirements for Debian/Ubuntu
(Note: This may not work for all systems, but give it a try!)
sudo apt install -y sddm qtdeclarative5-dev qml-module-qtgraphicaleffects qml-module-qtquick-controls qtquickcontrols2-5-dev libqt5svg5-dev qt6-wayland-dev qt6-5compat-dev qtcreator -y
sudo apt install --reinstall sddm qtbase5-dev qtdeclarative5-dev qml-module-qtquick-controls qml-module-qtquick-controls2 qml-module-qtgraphicaleffects qml-module-qtquick2 -y
Fix: Login Manager going black randomly by typing or mouse pressing Debian/Ubuntu 
If SDDM (Simple Desktop Display Manager) causes the screen to go black when entering input (especially with virtual keyboards or IMEs), apply this fix:
sudo sed -i '1iInputMethod=' /etc/sddm.conf
reboot
![]() This clears the
This clears the InputMethod variable that might be misconfigured or conflicting, which is a common issue on ARM systems or custom builds.
 Enable SDDM and Disable Other Display Managers
Make sure only SDDM is active to ensure proper functionality:
sudo systemctl disable display-manager.service ; sudo systemctl enable sddm
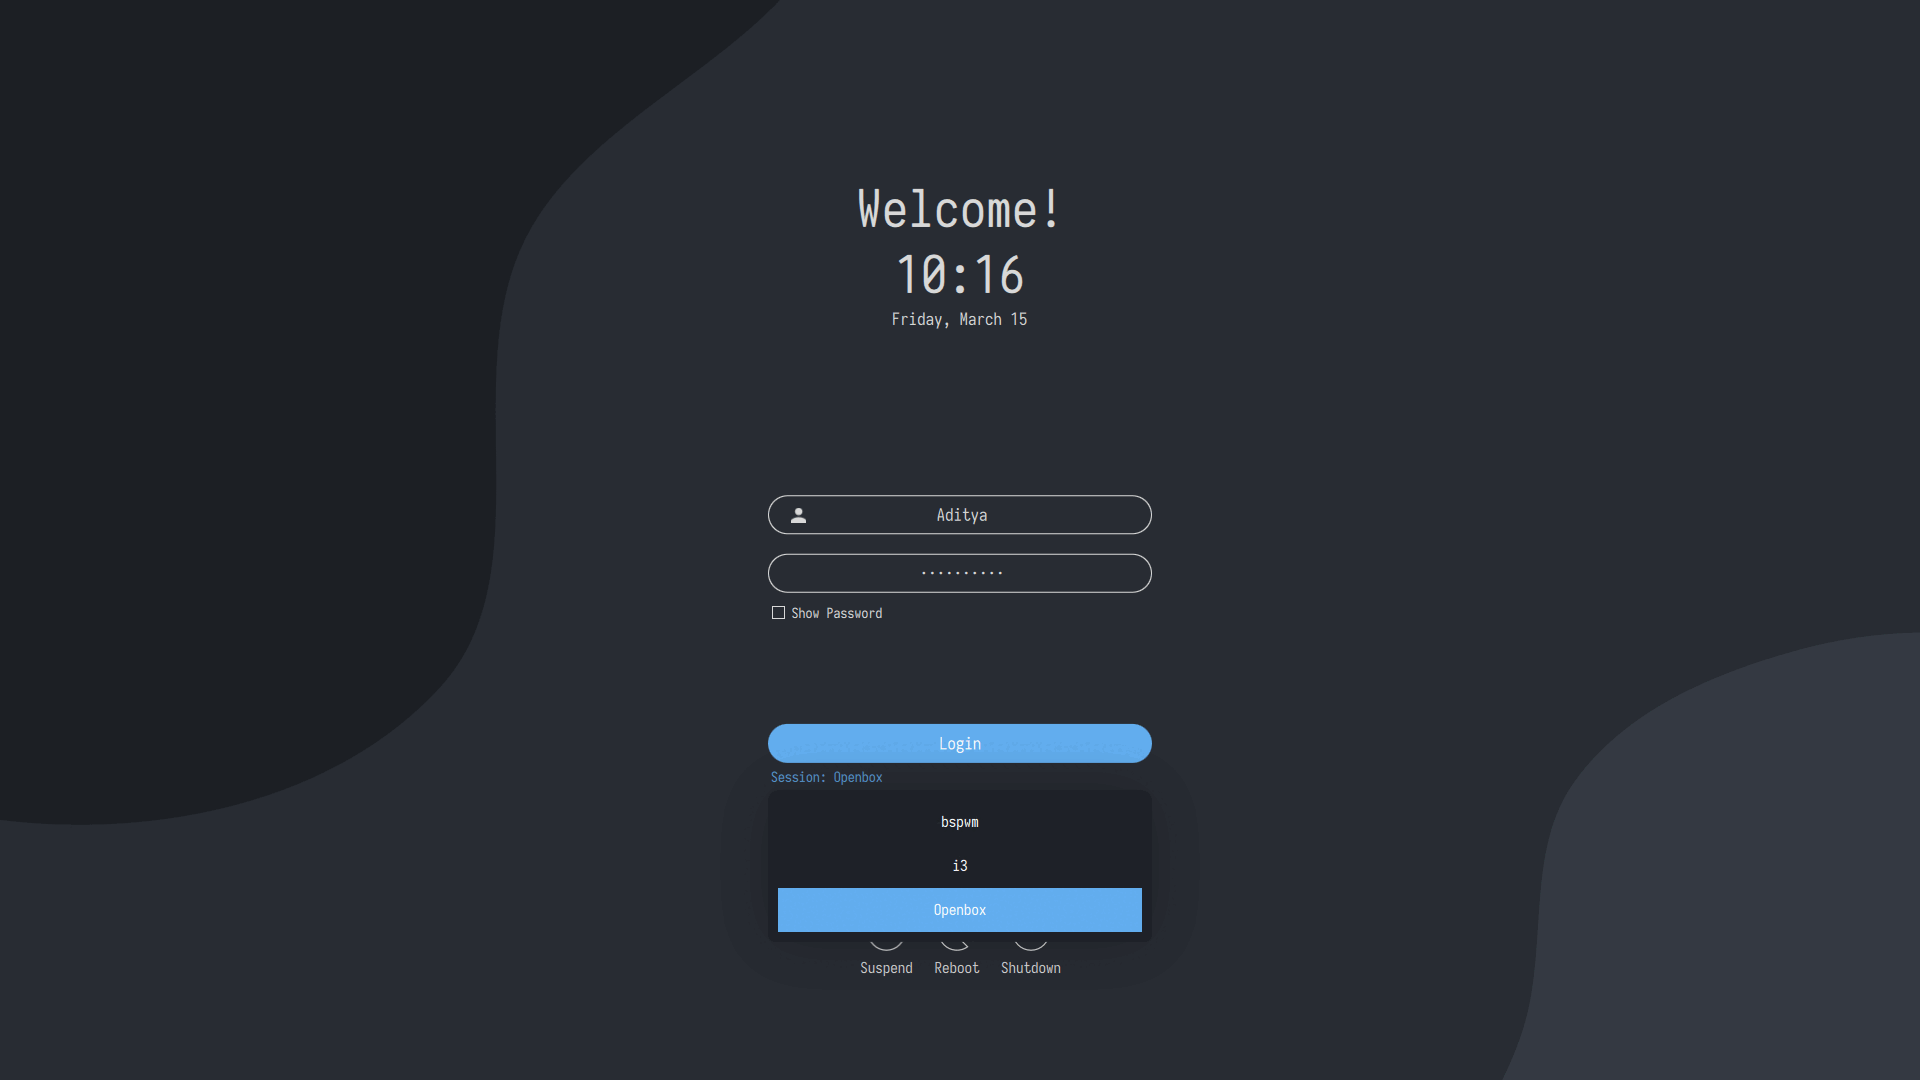
 Test Your SDDM Themes (Before Applying)
Preview how themes will look with the greeter:
sddm-greeter --test-mode --theme /usr/share/sddm/themes/maya
sddm-greeter-qt6 --test-mode --theme /usr/share/sddm/themes/sddm-astronaut-theme
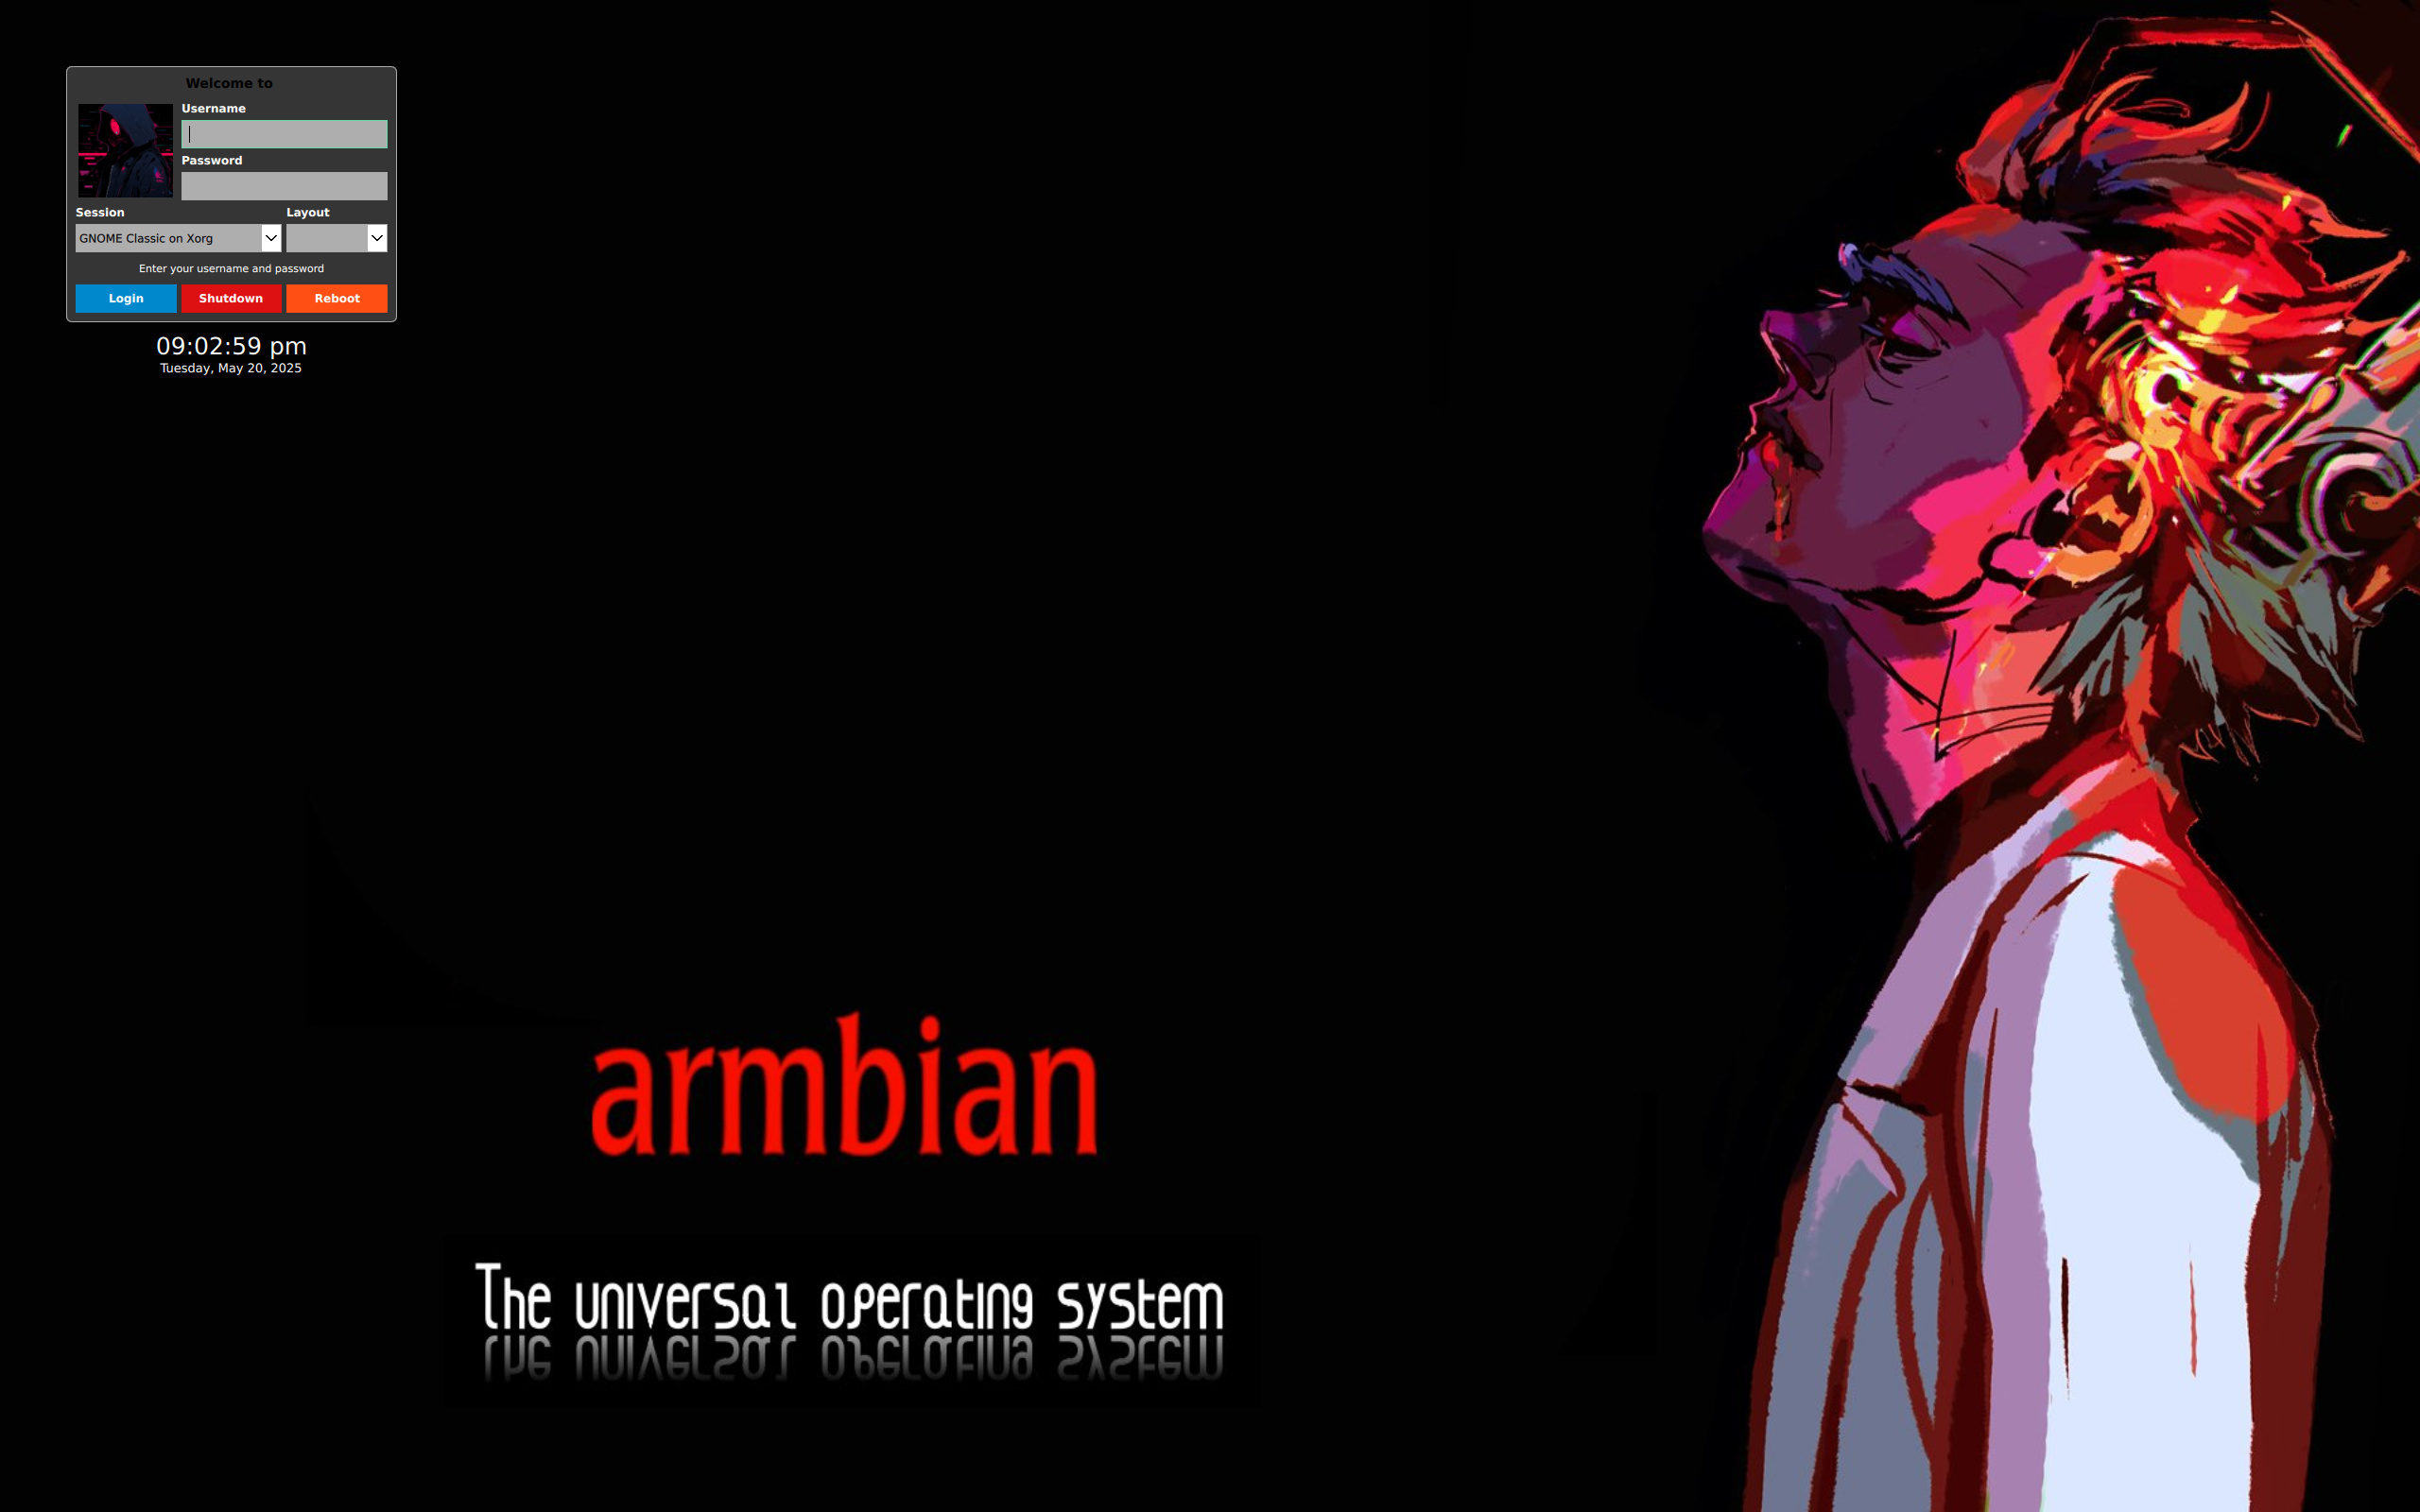
 Recommended Theme: SDDM Astronaut Theme by KeyitDev

KeyitDev’s Astronaut theme is highly recommended for a stunning login screen!
sudo rm -rf /usr/share/sddm/themes/sddm-astronaut-theme
sudo git clone https://github.com/Keyitdev/sddm-astronaut-theme.git /usr/share/sddm/themes/sddm-astronaut-theme
sudo cp /usr/share/sddm/themes/sddm-astronaut-theme/Fonts/* /usr/share/fonts/
sudo tee /etc/sddm.conf > /dev/null <<EOF
InputMethod=
[Theme]
Current=sddm-astronaut-theme
EOF
sddm-greeter-qt6 --test-mode --theme /usr/share/sddm/themes/sddm-astronaut-theme
![]() KeyitDev’s work delivers an elegant, modern login experience.
KeyitDev’s work delivers an elegant, modern login experience.
sudo rm -rf /usr/share/sddm/themes/sddm-themes
sudo git clone https://github.com/DarkevilPT/sddm-themes.git /usr/share/sddm/themes/sddm-themes
sudo tee /etc/sddm.conf > /dev/null <<EOF
InputMethod=
[Theme]
Current=sddm-themes
EOF
sddm-greeter --test-mode --theme /usr/share/sddm/themes/sddm-themes

sudo rm -rf /usr/share/sddm/themes/simple-sddm-2
sudo git clone https://github.com/JaKooLit/simple-sddm-2.git /usr/share/sddm/themes/simple-sddm-2
sudo tee /etc/sddm.conf > /dev/null <<EOF
InputMethod=
[Theme]
Current=simple-sddm-2
EOF
sddm-greeter --test-mode --theme /usr/share/sddm/themes/simple-sddm-2
Your Linux Terminal 
Installing Zsh and Oh My Zsh
1. Install Zsh and set it as the default shell:
sudo apt install zsh nano -y
chsh -s $(which zsh)
2. Install Oh My Zsh :
Run the following command to install Oh My Zsh :
sh -c "$(curl -fsSL https://raw.github.com/ohmyzsh/ohmyzsh/master/tools/install.sh)"
When prompted, type Y to set Oh My Zsh as your default shell. This will also create a ~/.zshrc file in your home directory. You can edit this file later.
Make Zsh the Default Shell for Bash
If you’re still using Bash, you can set Zsh as the default by running:
echo 'exec /usr/bin/zsh' >>~/.bashrc
 Install Powerlevel10k Theme
- Clone the Powerlevel10k repository :
git clone --depth=1 https://github.com/romkatv/powerlevel10k.git ~/powerlevel10k
- Add the Powerlevel10k theme to your
~/.zshrc
echo 'source ~/powerlevel10k/powerlevel10k.zsh-theme' >>~/.zshrc
- Change Zsh theme :Open your
~/.zshrcfile:
nano ~/.zshrc
Change the ZSH_THEME line to:
ZSH_THEME="powerlevel10k/powerlevel10k"
Save and exit by pressing Ctrl + X , then Y .
Final Steps
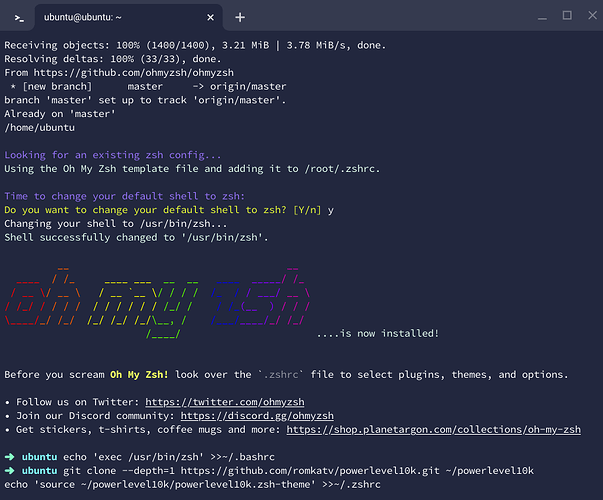
- Open a new terminal window with Ctrl + T and type
zsh.Your terminal should now look something like this:
Configure Powerlevel10k
To enter the Powerlevel10k configuration wizard, run:
p10k configure
Update Powerlevel10k
To update Powerlevel10k , run:
git -C ~/powerlevel10k pull
 Uninstalling Zsh and Oh My Zsh
If you want to remove Zsh , Oh My Zsh , and Powerlevel10k :
- Remove Installations & Configurations :
sudo rm -f ~/.p10k.zsh
sudo rm -rf -- ${ZSH_CUSTOM:-$HOME/.oh-my-zsh/custom}/themes/powerlevel10k
sudo sh ~/.oh-my-zsh/tools/uninstall.sh -y
- Remove Zsh and related packages :
sudo apt remove zsh -y
sudo apt autoremove -y
- Delete Zsh Configuration Files :
sudo rm -Rf ~/.zsh*
With this setup, your terminal should now look sleek and modern with the Powerlevel10k theme. Enjoy!
 Desktop Environments
Installing UbuntuCraft (Unofficial) on ARM
ubuntucraftfor ARM isn’t officially released yet. Use with caution.
Step-by-Step Installation
- Extract the archive:
tar -xzvf ubuntucraft.tar.gz
cd ubuntucraft
- (Optional) Edit the customization script:
nano customize.sh
- Run the installer (default username/password is
archcraft):
sudo bash ./install.sh
sddmwhen prompted — notgdm3.
Fix Polybar Top Bar Modules
To customize the top bar modules for your Openbox theme (e.g., default), follow these steps:
- Open the Polybar config file:
nano ~/.config/openbox/themes/default/polybar/config.ini
- Find the line that begins with:
modules-right =
This is typically line 147.
- Replace the
batterymodule withtemperature.
Example Updated Line:
modules-right = temperature dot volume dot network dot LD sysmenu RD
 JaKooLit - Ubuntu Hyprland Setup
Installation Steps
Clone the repository and run the installer:
git clone -b 24.04 --depth=1  https://github.com/JaKooLit/Ubuntu-Hyprland.git ~/Ubuntu-Hyprland-24.04
cd ~/Ubuntu-Hyprland-24.04
chmod +x install.sh
./install.sh
Adjusting SUPER Key for Compatibility
Some environments may require using FN+SUPER instead of just SUPER .
 Edit Hyprland Config Files
Open these two config files:
nano ~/.config/hypr/hyprland.conf
nano ~/.config/hypr/configs/Keybinds.conf
 Find and Replace
Locate the following line:
$mainMod = SUPER
Replace it with:
$mainMod = FN+SUPER


