
 Armbian setup some features and more!
Go to the Armbian Supported Boards page for Radxa
Download the latest version of @igorp operative system > Flash it into your Storage, boot your board with it and then… look here for some options if you feel the need off course.
In hope this helps everyone like it does to me so here goes some tips.

 A bit in respect of Armbian 💸
The controversial phenomenon.

The controversy around Armbian is nothing but the open-source financial cliché that most developers face in order to pursue bigger goals in achieving the happiness of others. You will often see requests for donations and developers’ grey hairs in their attempts to make us understand that the reward per demand is sometimes neither fair nor feasible.

🔌Things to consider 
Sometimes reboot will not work and if in due update it will brick… I suggest that you opt by doing shutdown and then start the system again for safety.
- RK3588 Type C DP requires hot-unplug/hot-plug.
- Armbian do set the system to automatic login.
- The system runs better on Wayland.
- Cloud Gaming is amazing on these boards.
- Steam with the @Ptitseb master box64/box86 works.
- Talented Armbian users keep supporting:
– Kernel updates / GPU and HW Acceleration / Chromium Browser integrations at bay. - The Armbian framework is by far the most atractive for many developers to learn and support their projects on ARM.
🪁 Fan options 
 Armbian already has this shorted ages ago but I will leave it here for further notice.
For the fan heatsink to work: (Armbian)
Manual fan control for rock5b+
echo 204 | sudo tee /sys/devices/platform/pwm-fan/hwmon/hwmon*/pwm1
Armbian uses hwmon10 for rock5b+ and hwmon8 for rock5b so hwmon needs to be played out accordingly.
Older kernels used to need this control but recent ones already have it working normaly:
git clone https://github.com/lukaszsobala/fan-control-rock5b
cd fan-control-rock5b
make package
sudo dpkg -i fan-control*.deb
sudo systemctl enable fan-control
systemctl start fan-control
Or Non-GPIO 4012 Fan Fix (Archlinux) (not for armbian).
git clone https://github.com/XZhouQD/Rock5B_Naive_Pwm_Fan
cd Rock5B_Naive_Pwm_Fan/
cp fan_pwm /usr/local/bin/.
chmod +x /usr/local/bin/fan_pwm
cp fan_pwm.service /etc/systemd/system/.
systemctl daemon-reload
systemctl start fan_pwm
systemctl enable fan_pwm
Manage the fan manually 
Prevent the system to take over fan control - Automatically.
sudo apt install i2c-tools -y
echo user_space | sudo tee /sys/class/thermal/thermal_zone0/policy
sudo i2cset -y -f 2 0x18 0x8A 0x20
(Fan speed 0x41 = 50%, 0x64 = 100%)
📱Bluetooth options 
 Some Wifi BT modules require an blacklist in order to work so here is the basics.
A8 Module Bluetooth:
sudo nano /etc/modprobe.d/blacklist.conf
then add these lines somewhere (at the bottom of the file is fine):
blacklist pgdrv
blacklist btusb
blacklist btrtl
blacklist btbcm
#blacklist btintel
Then press Ctrl+X, then Y.
sudo apt install bluez -y or bluetooth – not needed to install since latest armbian version
systemctl status bluetooth CTRL+ C
systemctl start bluetooth
Then reboot .
🌐 Wifi options 
Armbian already has this shorted ages ago but I will leave it here for further notice.
For AX210 Wifi and BT to Work - Not sure if we can activate this without internet at all.
#wifi
sudo wget -P /lib/firmware https://git.kernel.org/pub/scm/linux/kernel/git/firmware/linux-firmware.git/plain/iwlwifi-ty-a0-gf-a0-59.ucode
sudo mv /lib/firmware/iwlwifi-ty-a0-gf-a0.pnvm /lib/firmware/iwlwifi-ty-a0-gf-a0.pnvm.bak

#bt
sudo wget -P /lib/firmware/intel https://git.kernel.org/pub/scm/linux/kernel/git/firmware/linux-firmware.git/plain/intel/ibt-0041-0041.sfi
sudo wget -P /lib/firmware/intel https://git.kernel.org/pub/scm/linux/kernel/git/firmware/linux-firmware.git/plain/intel/ibt-0041-0041.ddc
📢 Audio options 
Audio Tutorial for Bluetooth devices: – (not required since armbian latest versions)
Some valid information on how to fix issues with audio be free to explore.
sudo add-apt-repository ppa:pipewire-debian/pipewire-upstream
sudo nala install pipewire pipewire-audio-client-libraries gstreamer1.0-pipewire libpipewire-0.3-{0,dev,modules} libspa-0.2-{bluetooth,dev,jack,modules} pipewire{,-{audio-client-libraries,pulse,media-session,bin,locales,tests}} -y

systemctl --user daemon-reload
systemctl --user --now disable pulseaudio.service pulseaudio.socket
systemctl --user --now enable pipewire pipewire-pulse
pactl info
reboot
💽 Flashing by Terminal 
(Short guide) SPI flashing on the board itself would be:
wget https://dl.radxa.com/rock5/sw/images/others/zero.img.gz
gzip -d zero.img.gz
sudo dd if=zero.img of=/dev/mtdblock0
Wait ~5 minutes for the command to complete, check that sudo md5sum /dev/mtdblock0 returns 2c7ab85a893283e98c931e9511add182. Then:
wget https://dl.radxa.com/rock5/sw/images/loader/rock-5b/release/rock-5b-spi-image-g49da44e116d.img
sudo dd if=rock-5b-spi-image-g49da44e116d.img of=/dev/mtdblock0
Wait ~5 minutes for the command to complete, check that this time sudo md5sum /dev/mtdblock0 returns 46de85de37b8e670883e6f6a8bb95776. Then:
sync
reboot
For more info: https://wiki.radxa.com/Rock5/install/spi
More info (Spi to NVME boot from SD Card):
http://www.fieldday.io/armbian-rock5b/
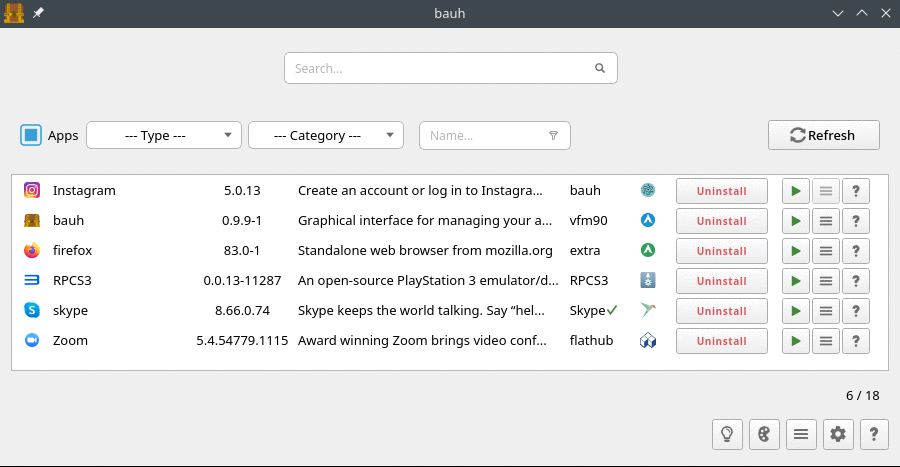
🥛 App Manager Hubs 
Raspberry Pi App Store for Open Source Projects.
wget -qO- https://raw.githubusercontent.com/Botspot/pi-apps/master/install | bash
FlatHub - Hundreds of apps and games for Linux.
sudo apt install flatpak -y ; sudo flatpak remote-add --if-not-exists flathub https://dl.flathub.org/repo/flathub.flatpakrepo ; sudo flatpak update -y
More flathub apps
Chromium Browser & Extension Manager
sudo flatpak install flathub org.chromium.Chromium -y
sudo flatpak install flathub com.mattjakeman.ExtensionManager -y
Some random apps
sudo flatpak install flathub org.gnome.Boxes -y
sudo apt install libvirt -y
sudo flatpak install flathub io.github.ungoogled_software.ungoogled_chromium -y
sudo flatpak install flathub io.github.realmazharhussain.GdmSettings -y
sudo flatpak install flathub tv.kodi.Kodi -y
sudo flatpak install flathub io.github.dosbox-staging -y
sudo flatpak install flathub com.dosbox_x.DOSBox-X -y
Emulation stuff for old school games
sudo flatpak install flathub org.ryujinx.Ryujinx -y
sudo flatpak install flathub org.libretro.RetroArch -y
sudo flatpak install flathub net.kuribo64.melonDS -y
sudo flatpak install flathub org.ppsspp.PPSSPP -y
sudo flatpak install flathub org.duckstation.DuckStation -y
sudo flatpak install flathub org.DolphinEmu.dolphin-emu -y
sudo flatpak install flathub com.github.Rosalie241.RMG -y
sudo flatpak install flathub io.mgba.mGBA -y
sudo flatpak install flathub io.github.simple64.simple64 -y
sudo flatpak install flathub com.vba_m.visualboyadvance-m -y
Bauh – a Manager for Your Multi-Package Needs
sudo apt install python3 python3-pip python3-yaml python3-dateutil python3-pyqt5 python3-packaging python3-requests -y ; sudo pip3 install bauh ; sudo pip3 install bauh --upgrade
💫 Graphics Acceleration / Performance 
LiuJianFeng & PPA Graphics Panfrost/fork on Wayland
OpenCL runtime (libmali)
sudo add-apt-repository ppa:rockchip-linux/ppa
sudo add-apt-repository ppa:liujianfeng1994/rockchip-multimedia
sudo apt update ; sudo apt install mali-g610-firmware rockchip-multimedia-config glmark2 glmark2-es2 glmark2-es2-wayland mesa-utils malirun -y ; sudo apt upgrade -y
sudo add-apt-repository --remove ppa:liujianfeng1994/panfork-mesa
sudo add-apt-repository --remove ppa:liujianfeng1994/rockchip-multimedia

glxinfo|grep OpenGL -- check actual status of things
mkdir -p ~/tmp/libmali && cd ~/tmp/libmali
wget 'https://github.com/tsukumijima/libmali-rockchip/releases/download/v1.9-1-55611b0/libmali-valhall-g610-g13p0-gbm_1.9-1_arm64.deb'
sudo dpkg -i ./libmali-valhall-g610-g13p0-gbm_1.9-1_arm64.deb
Max out the SoC performance (Optional) - That’s if you want some real performance at the cost of being hot and power-hungry.
sudo echo performance | sudo tee /sys/devices/system/cpu/cpufreq/policy6/scaling_governor
sudo echo performance | sudo tee /sys/class/devfreq/fb000000.gpu/governor
sudo echo performance | sudo tee /sys/class/devfreq/dmc/governor
sudo echo performance | sudo tee /sys/class/devfreq/fdab0000.npu/governor
Once you’re done with your benchmarks, you may want to go back:
echo ondemand | sudo tee /sys/bus/cpu/devices/cpu[046]/cpufreq/scaling_governor
echo dmc_ondemand | sudo tee /sys/class/devfreq/dmc/governor
echo simple_ondemand | sudo tee /sys/class/devfreq/fb000000.gpu/governor
Or add to startup script /etc/rc.local
Or if you want a shortcut for performance / ondemand and powersave do nano .bash_aliases and add these instructions - save it Ctrl X, Yes, restart and after just type the governor you desire Terminal: performance to trigger it.
alias performance="echo performance | sudo tee /sys/bus/cpu/devices/cpu[046]/cpufreq/scaling_governor /sys/class/devfreq/dmc/governor /sys/class/devfreq/fb000000.gpu/governor"
alias ondemand="echo ondemand | sudo tee /sys/bus/cpu/devices/cpu[046]/cpufreq/scaling_governor && echo dmc_ondemand | sudo tee /sys/class/devfreq/dmc/governor && echo simple_ondemand | sudo tee /sys/class/devfreq/fb000000.gpu/governor"
alias powersave="echo powersave | sudo tee /sys/bus/cpu/devices/cpu[046]/cpufreq/scaling_governor /sys/class/devfreq/dmc/governor /sys/class/devfreq/fb000000.gpu/governor"
🧙🏼♂️ Mesa / Panthor & Panfork Benchmarks 🏄🏼♂️
Older values tested on Panfrost 🧗🏼♂️
PAN_MESA_DEBUG=gofaster glmark2
Expected results: 1st Line - 1669fps - Score: 1249fps - you are good.

PAN_MESA_DEBUG=gofaster glmark2-es2-wayland
Expected results: 1st Line - 3527fps - Score: 4067fps - you are sorted.

LD_LIBRARY_PATH=/usr/lib/aarch64-linux-gnu/mali glmark2-es2-wayland
Expected results: 1st Line - 4229fps - Score: 3933fps - what a legend.
Panthor 6.1-rkr3 (Mesa 24.1.4) - Score beats 3000 - Panthor is now faster than Panfrost.
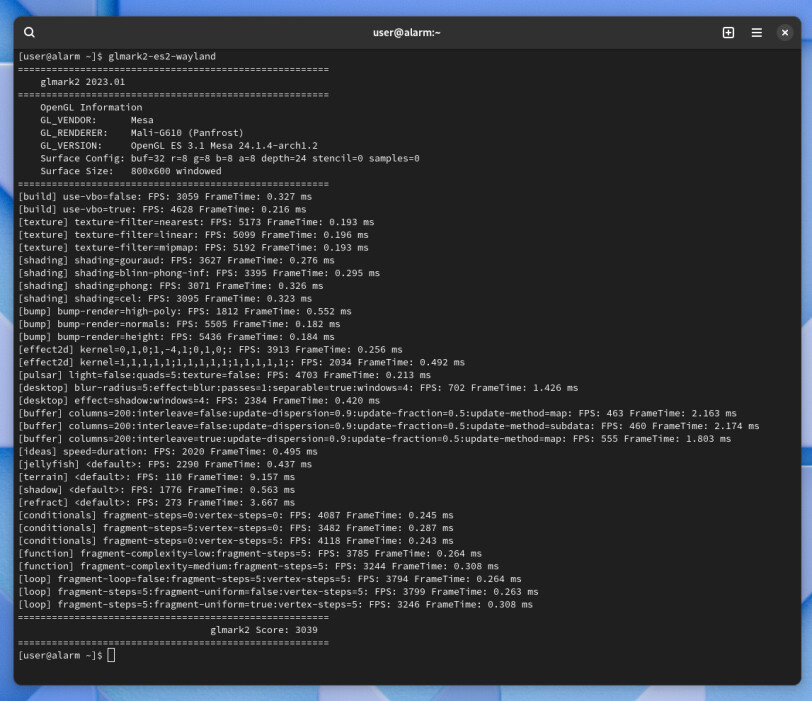
Terrain - 110 & Refract - 273
Panfork on 6.1-rkr3 - Scored 2274
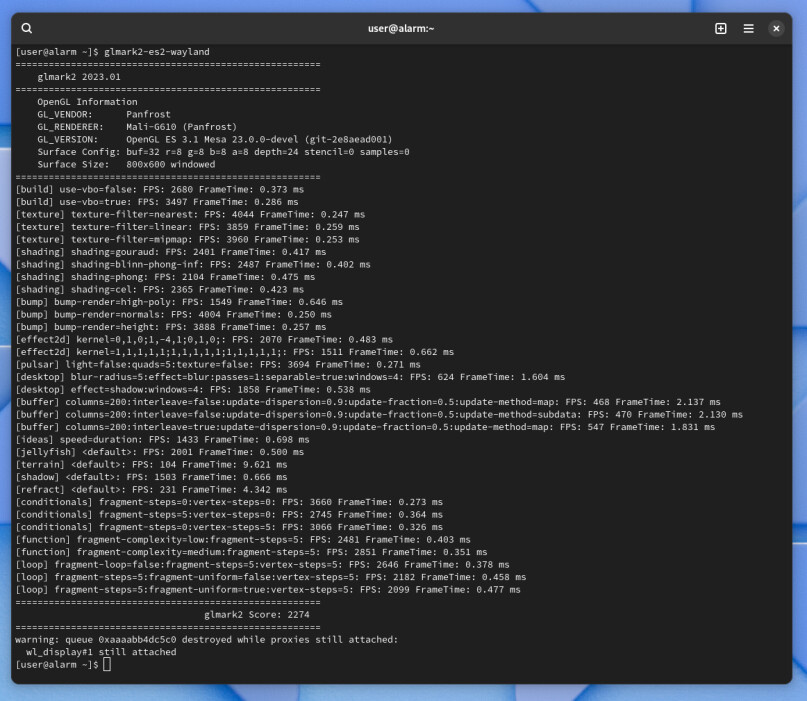
Terrain - 104 & Refract - 231
Panfork with gofaster on 6.1-rkr3 - Score 4324
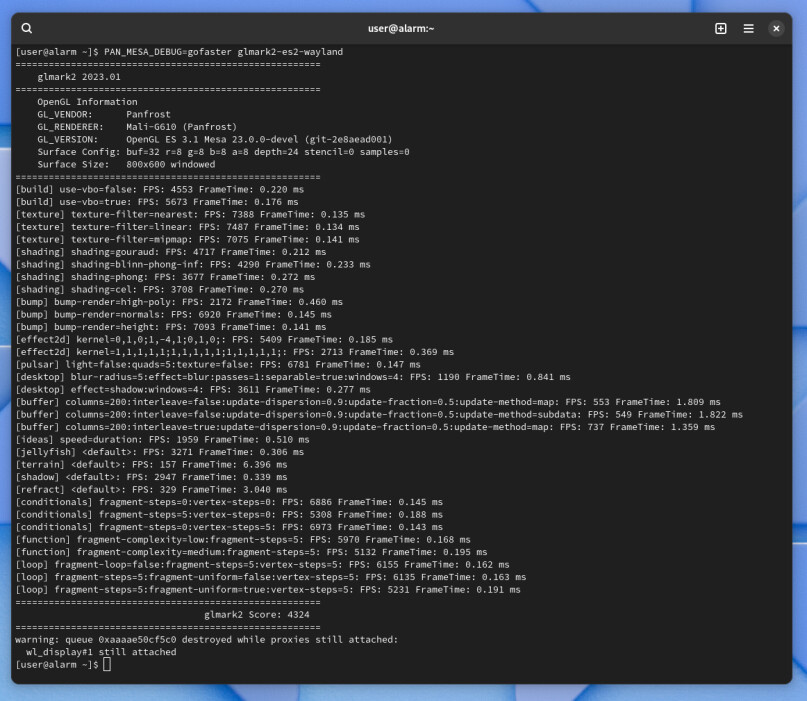
Terrain - 157 & Refract - 329
Mali Blob G13P0 - Vendor Finest - Score 3866 

Terrain - 341  & Refract - 583
Tested with soc set to performance
sudo nano /sys/class/devfreq/dmc/governor
Not everyones values will be the same.
Cores should be @ the same values of frequency ~2256.00 MHz.
Rockchips RK3588/S.
🚧 OpenCL Libmali Malirun 'Hack' 
OpenCL runtime (libmali) For Mali to Work on Armbian Panfrost
Do a performance boost on apps with malirun as trigger !
malirun chromium-browser #do this to other apps too
🕹️ NicoD gaming script 
@nicod Has also a gaming script that works for all rockchip single boards:
git clone https://github.com/NicoD-SBC/armbian-gaming.git
cd armbian-gaming
bash ./armbian-gaming.sh
🤖 Redroid for Rockchip ARM64 
Only works on Panfrost kernel 5.10
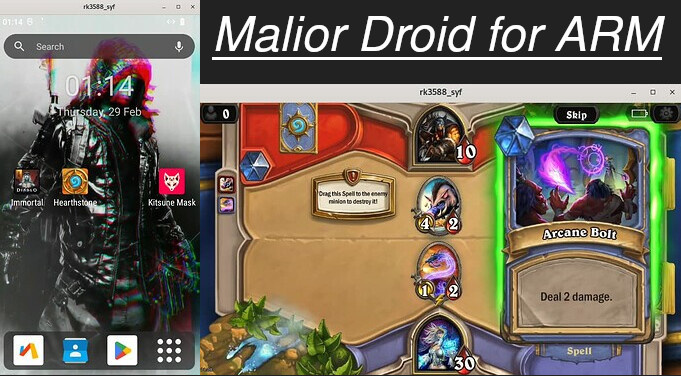
Android Emulator to your ARM system (ReDroid with Scrcpy and Docker):
sudo apt install docker.io scrcpy android-tools-adb -y
sudo docker run -d -p 5555:5555 -v ~/redroid-data:/data --restart unless-stopped --name redroid --privileged cnflysky/redroid-rk3588:13.0.0-latest androidboot.redroid_height=1920 androidboot.redroid_width=1080
Currently only working on Panfrost.
adb disconnect localhost:5555 ; adb connect localhost:5555 ; scrcpy -s localhost:5555
Just add this alias in nano .bash_aliases and run it as malior each time:
alias malior="malior-droid stop ; adb disconnect localhost:5555 ; malior-droid start ; adb connect localhost:5555 ; scrcpy -s localhost:5555 ; malior-droid resize 720x1280"
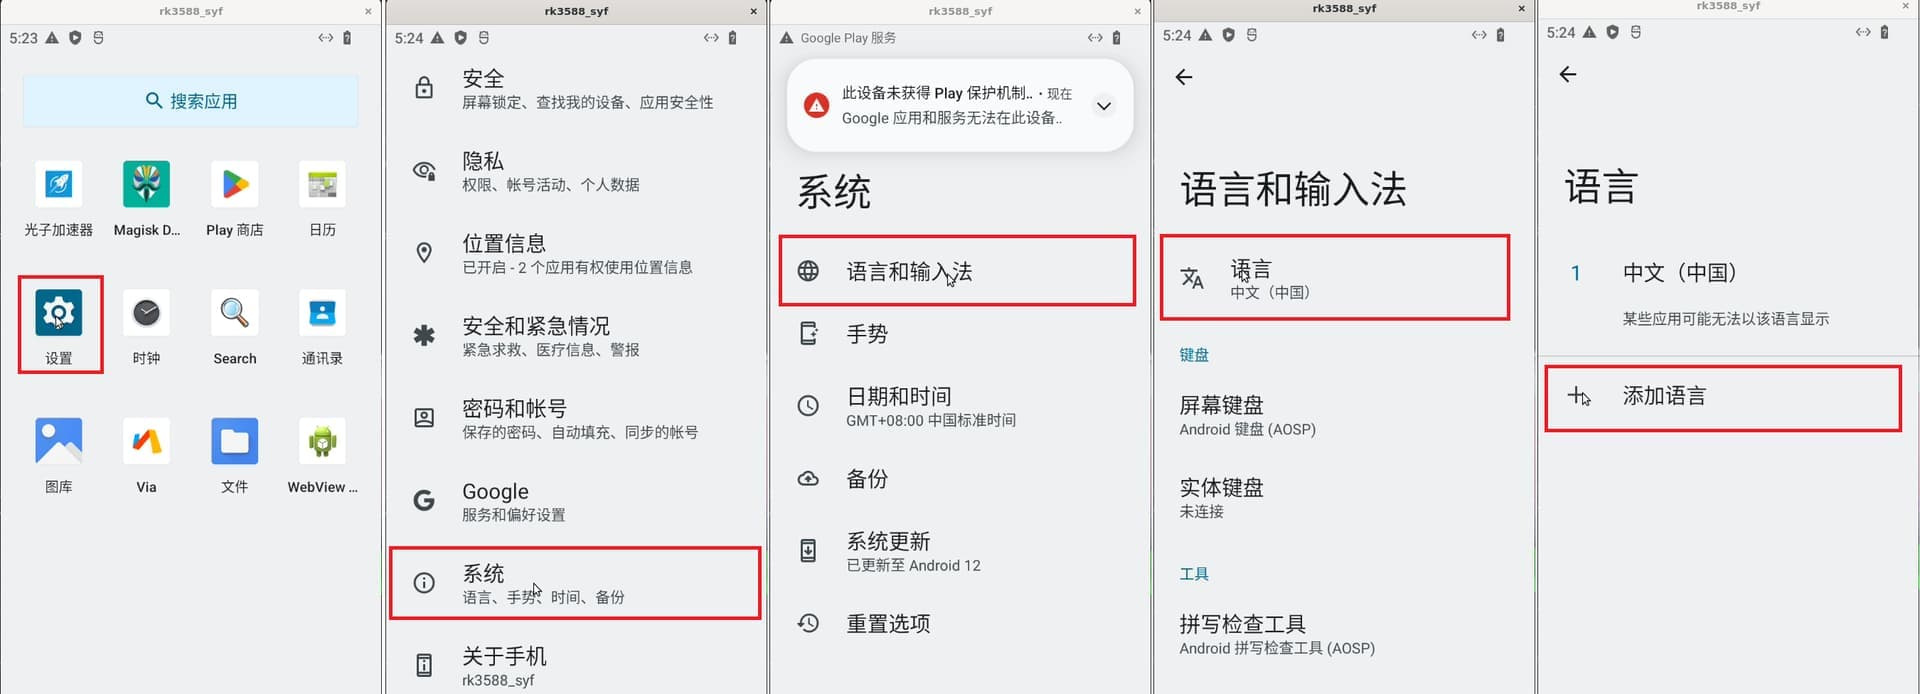
Change it to english this way. Just drag and drop your .apk file into the android window it will auto install it .
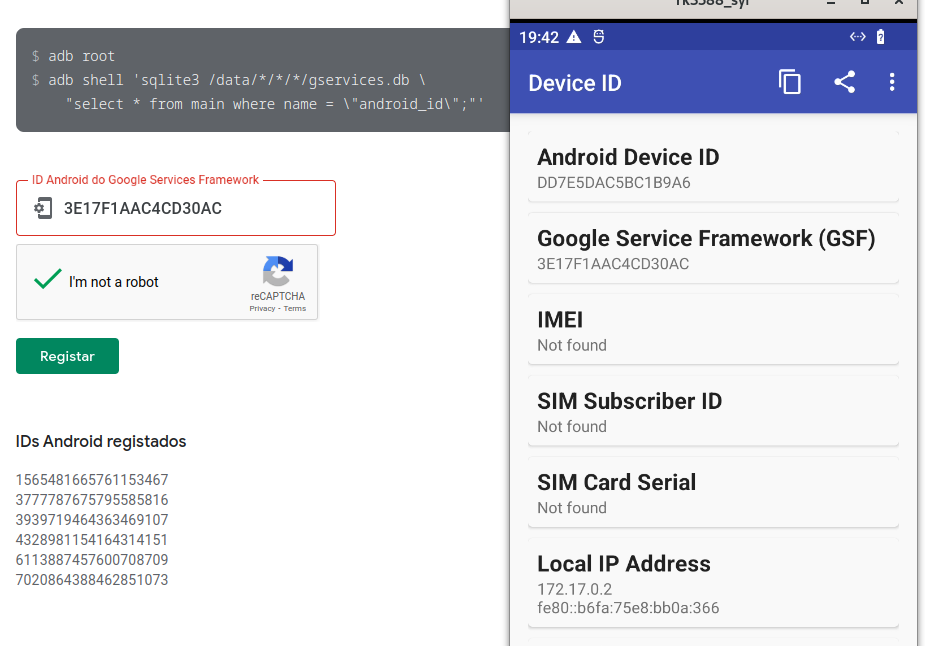
🧑🏻🔧 Fix the google play store by doing this
To become certified with access to the play store you have to:
1 - Install a device ID apk to get this Device ID and register it on your google account.
2 - Register it here: https://www.google.com/android/uncertified/
3 - Restart Malior-Droid again and add your google account manually on settings.
4 - Send apkpure the emulator window and start installing apps like a boss !
🧑🏻🔬 Kernel modules required
``` CONFIG_STAGING=y CONFIG_ASHMEM=y CONFIG_ANDROID_BINDER_IPC=y # CONFIG_ANDROID_BINDERFS is not set CONFIG_ANDROID_BINDER_DEVICES="binder,hwbinder,vndbinder" # CONFIG_ANDROID_BINDER_IPC_SELFTEST is not set CONFIG_ESD_FS=y ``` 🪀 Waydroid for Panthor 
Credits to @Willzen - The Armbian vendor kernel version now includes Panthor, and will soon be able to run it as well.
Works with the current Panthor Install it!
sudo apt install curl ca-certificates -y
curl https://repo.waydro.id | sudo bash
sudo apt install waydroid -y
sudo wget -P https://github.com/WillzenZou/armbian_fork_build/releases/download/willzen-armbian-24.5.0/2.waydroid-panthorv10-240416-v1.img.tar.gz
cd /usr/share ; sudo mkdir waydroid-extra ; cd waydroid-extra ; sudo mkdir images ; cd
sudo tar -xf 2.waydroid-panthorv10-240416-v1.img.tar.gz -C /usr/share/waydroid-extra/images
sudo waydroid init -f -i /usr/share/waydroid-extra/images
Apps will be re-sizable but never the show-full-gui
sudo waydroid container stop ; waydroid session stop ; sudo waydroid prop set persist.waydroid.multi_windows true ; sudo waydroid session start ; waydroid show-full-ui
Supposedly resizes the full-gui
sudo waydroid container stop ; waydroid session stop ; sudo waydroid prop set persist.waydroid.multi_windows true ; sudo waydroid prop set persist.waydroid.width 720 ; sudo waydroid prop set persist.waydroid.height 1280 ; systemctl restart waydroid-container ; waydroid session start
Install Google Store
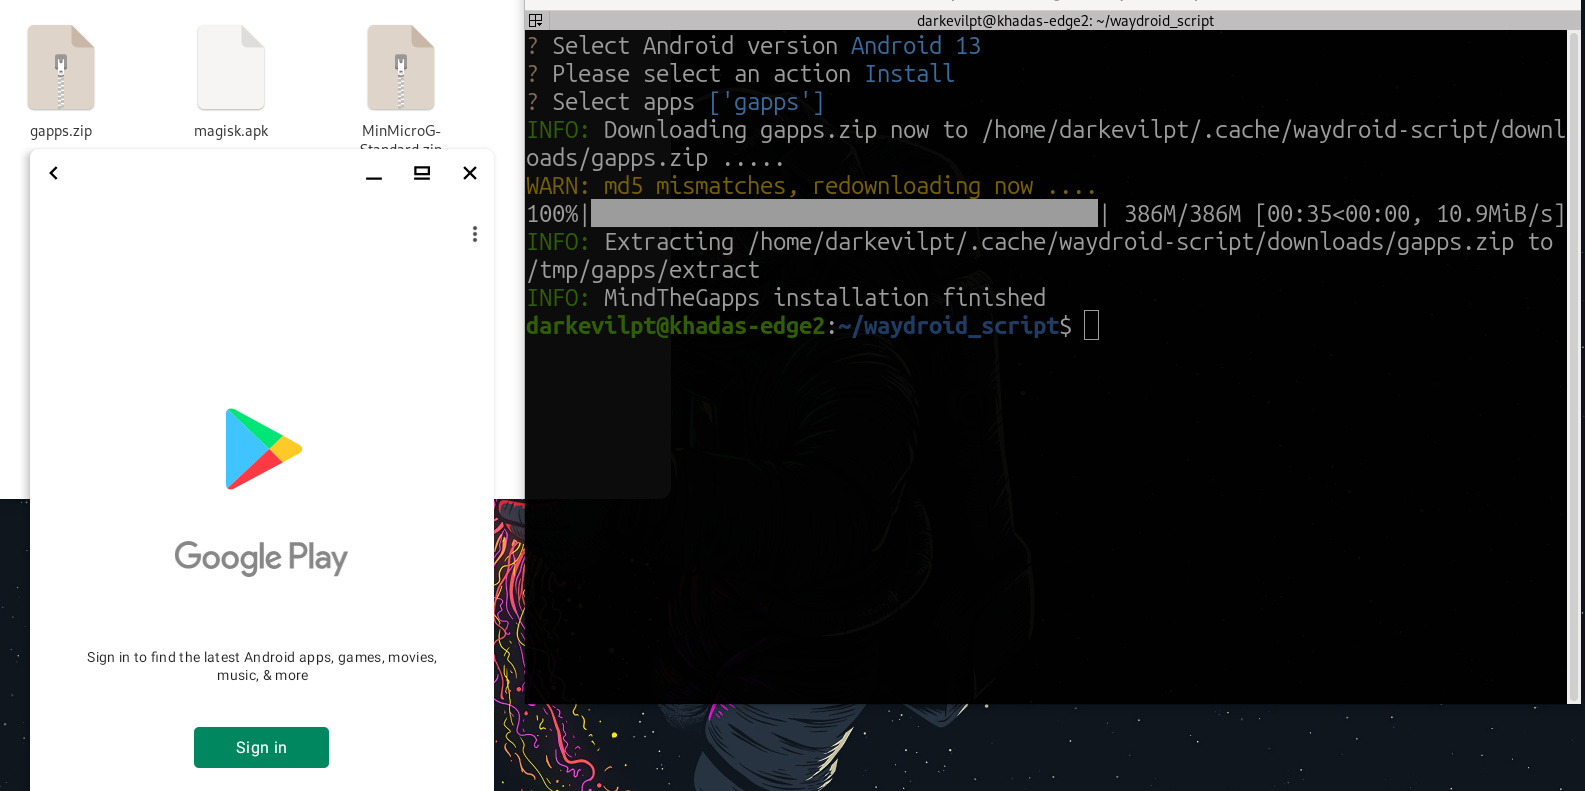
Select gapps and microG from Android 13 off the Script - For your Waydroid Android 11
sudo apt install lzip -y
git clone https://github.com/casualsnek/waydroid_script
cd waydroid_script
python3 -m venv venv
venv/bin/pip install -r requirements.txt
sudo venv/bin/python3 main.py
Other commands
waydroid app install com.app.apk
waydroid app launch com.app
waydroid app list
🎮 Steam Installation Tutorial 
Steam Installation Tutorial
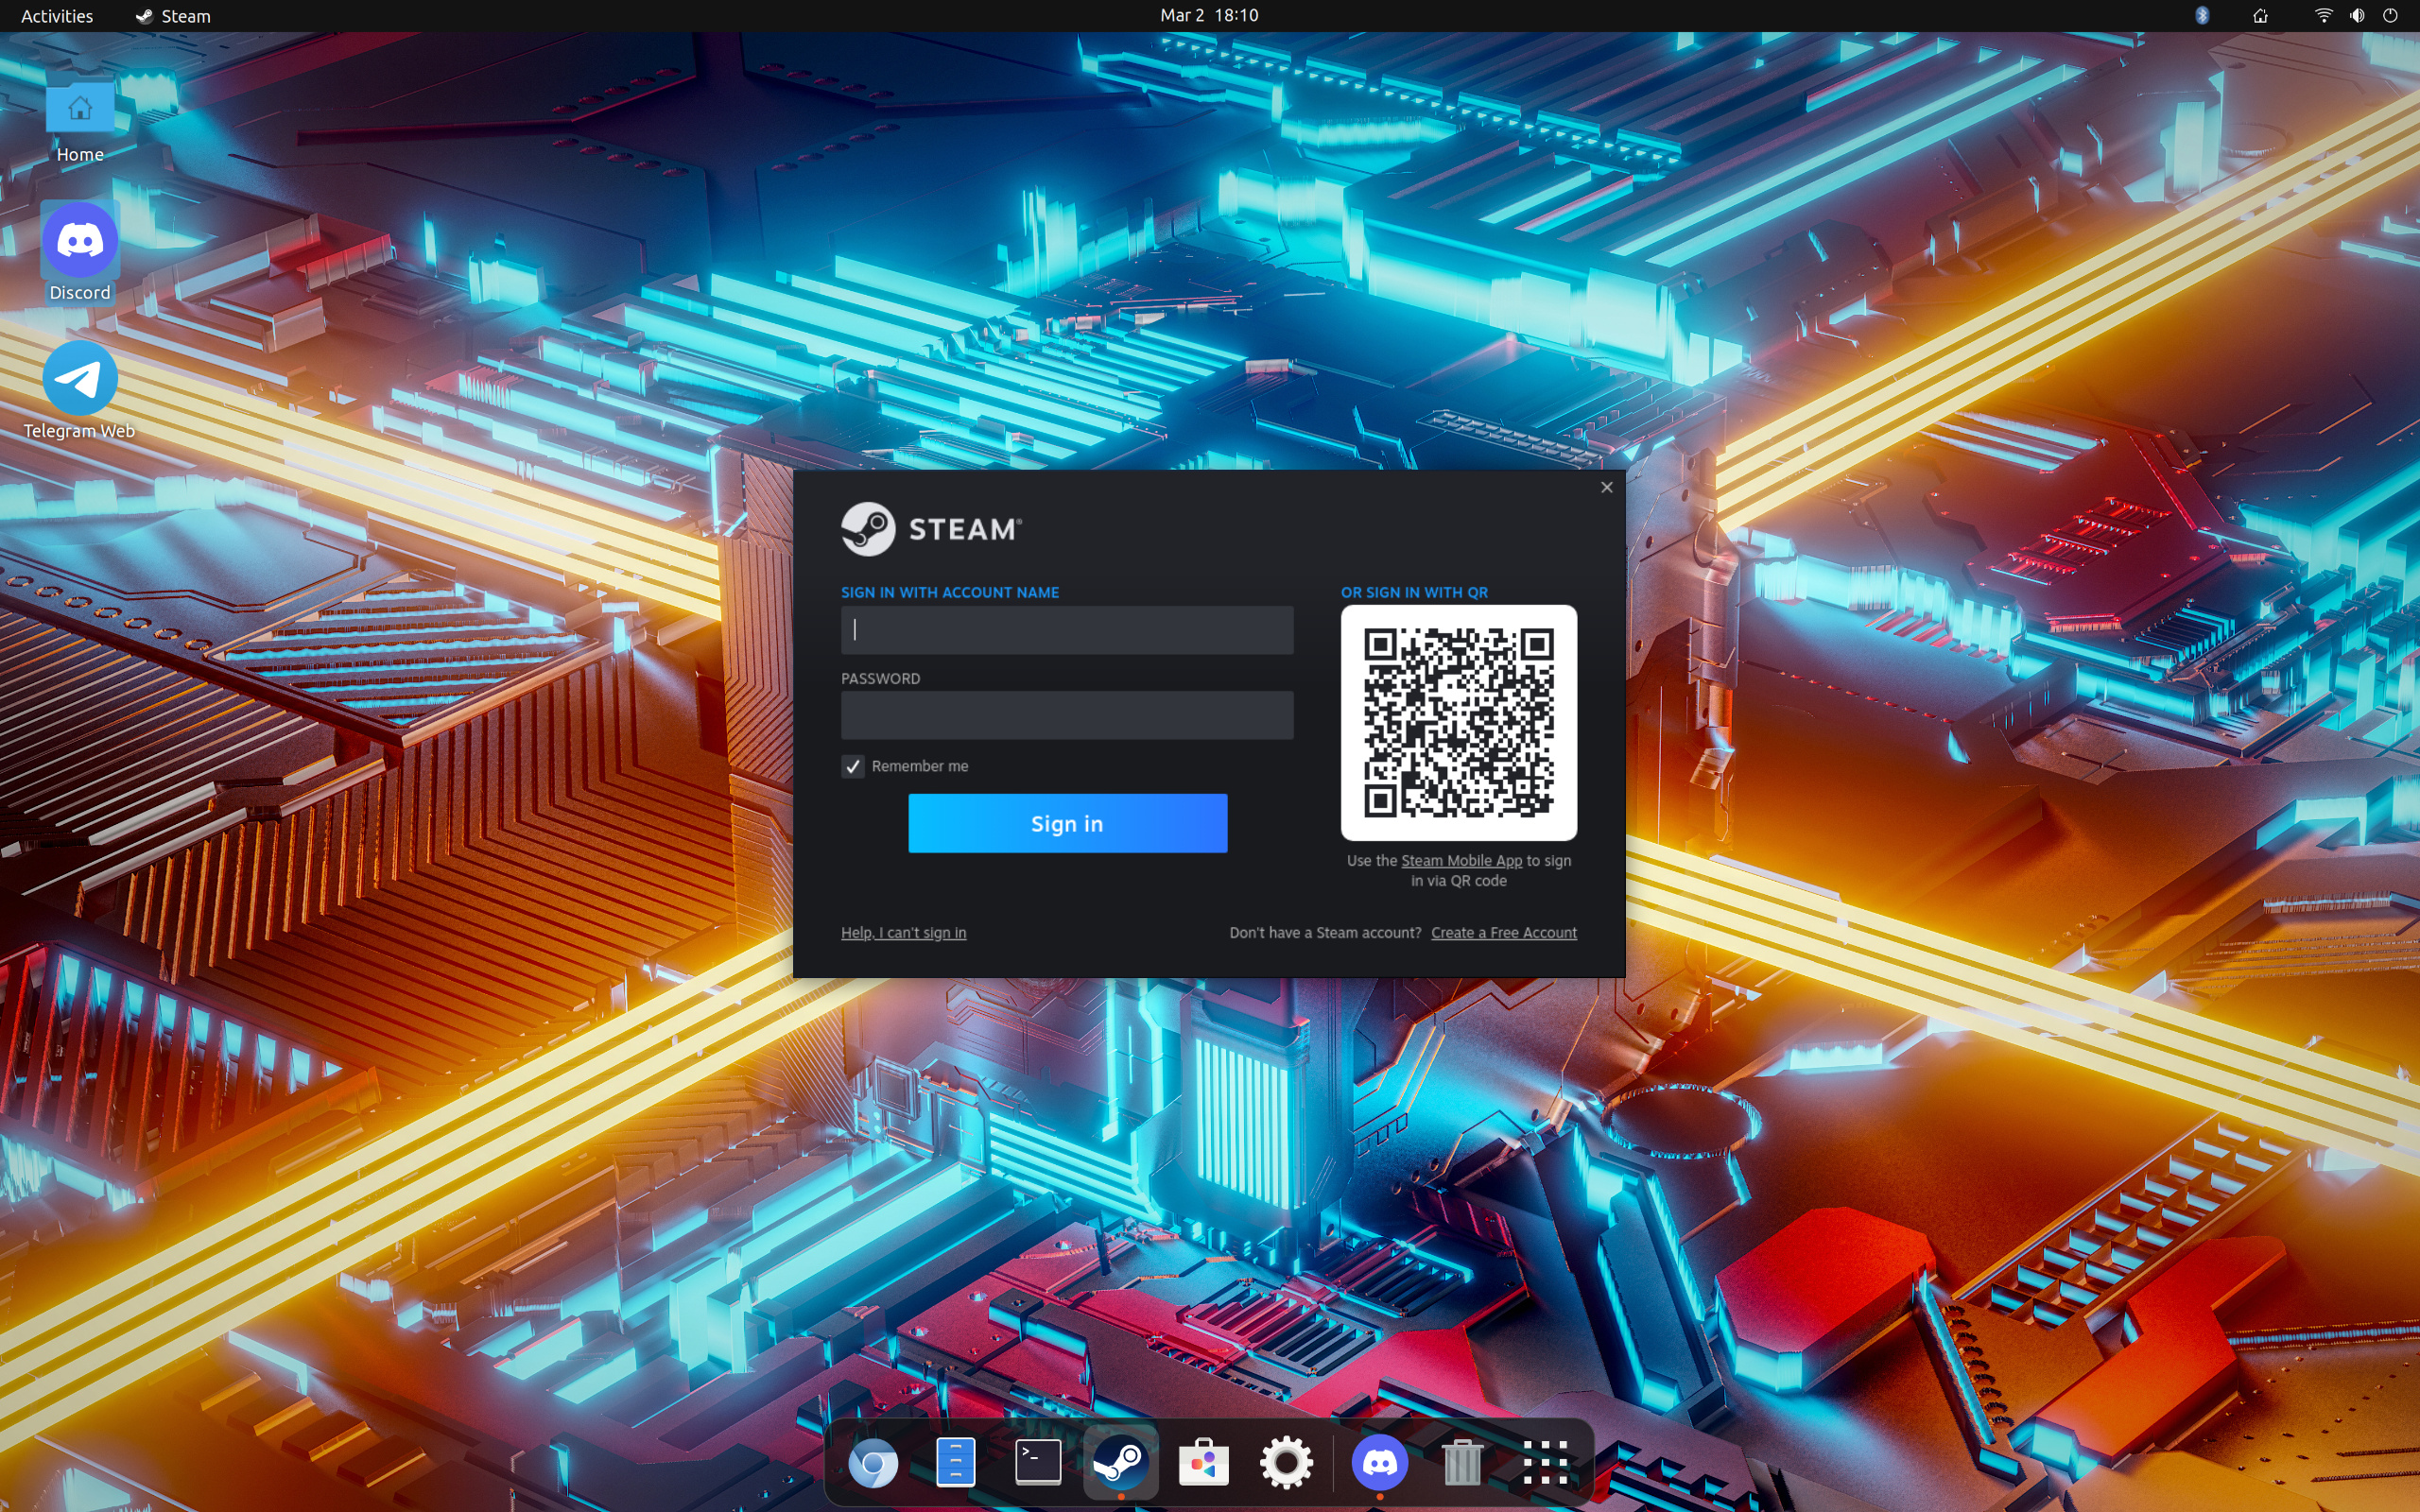
sudo dpkg --add-architecture armhf && sudo apt update && sudo apt install aptitude -y
sudo apt install gcc-arm-linux-gnueabihf libc6 binfmt-support cmake nano lsof gedit git cabextract neofetch -y && neofetch
#sudo aptitude install -y zenity build-essential git cmake cabextract gcc-arm-linux-gnueabihf libgdm1:armhf libudev1:armhf libgl1-mesa-dri:armhf libglapi-mesa:armhf libglu1-mesa:armhf libglx-mesa0:armhf mesa-va-drivers:armhf mesa-vdpau-drivers:armhf mesa-vulkan-drivers:armhf libsdl1.2debian:armhf libegl-mesa0:armhf
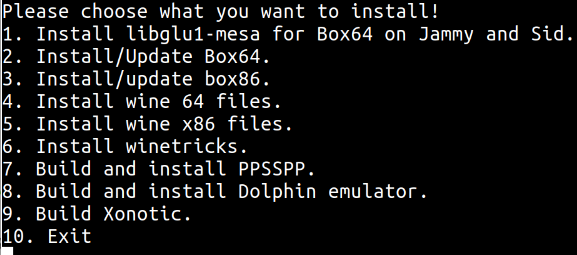
git clone --depth 1 https://github.com/ptitSeb/box64
git clone --depth 1 https://github.com/ptitSeb/box86
cd ~/box64; mkdir build; cd build; cmake ../ -DRK3588=1; make -j$(nproc); sudo make install
cd ~/box86; mkdir build; cd build; cmake ../ -DRK3588=1; make -j$(nproc); sudo make install; cd
#cd /usr/lib/arm-linux-gnueabihf/ && sudo ln -sfv libpng16.so.16 libpng12.so.0 && cd
#Hold a beer it will take a while.
sudo nano /usr/share/binfmts/box86.conf
package box86
interpreter /usr/local/bin/box86
magic \x7fELF\x01\x01\x01\x00\x00\x00\x00\x00\x00\x00\x00\x00\x02\x00\x03\x00
mask \xff\xff\xff\xff\xff\xff\xff\x00\xff\xff\xff\xff\xff\xff\xff\xff\xfe\xff\xff\xff
sudo nano /usr/share/binfmts/box64.conf
package box64
interpreter /usr/local/bin/box64
magic \x7fELF\x02\x01\x01\x00\x00\x00\x00\x00\x00\x00\x00\x00\x02\x00\x3e\x00
mask \xff\xff\xff\xff\xff\xff\xff\x00\xff\xff\xff\xff\xff\xff\xff\xff\xfe\xff\xff\xff
sudo update-binfmts --import box86.conf
sudo update-binfmts --import box64.conf
sudo update-binfmts --enable
sudo update-binfmts --display
sudo systemctl restart systemd-binfmt
cd ~/box86
./install_steam.sh
Installation is now finished EnJoy!
Easier method: Just install steam via Pi-Apps
wget -qO- https://raw.githubusercontent.com/Botspot/pi-apps/master/install | bash ; pi-apps
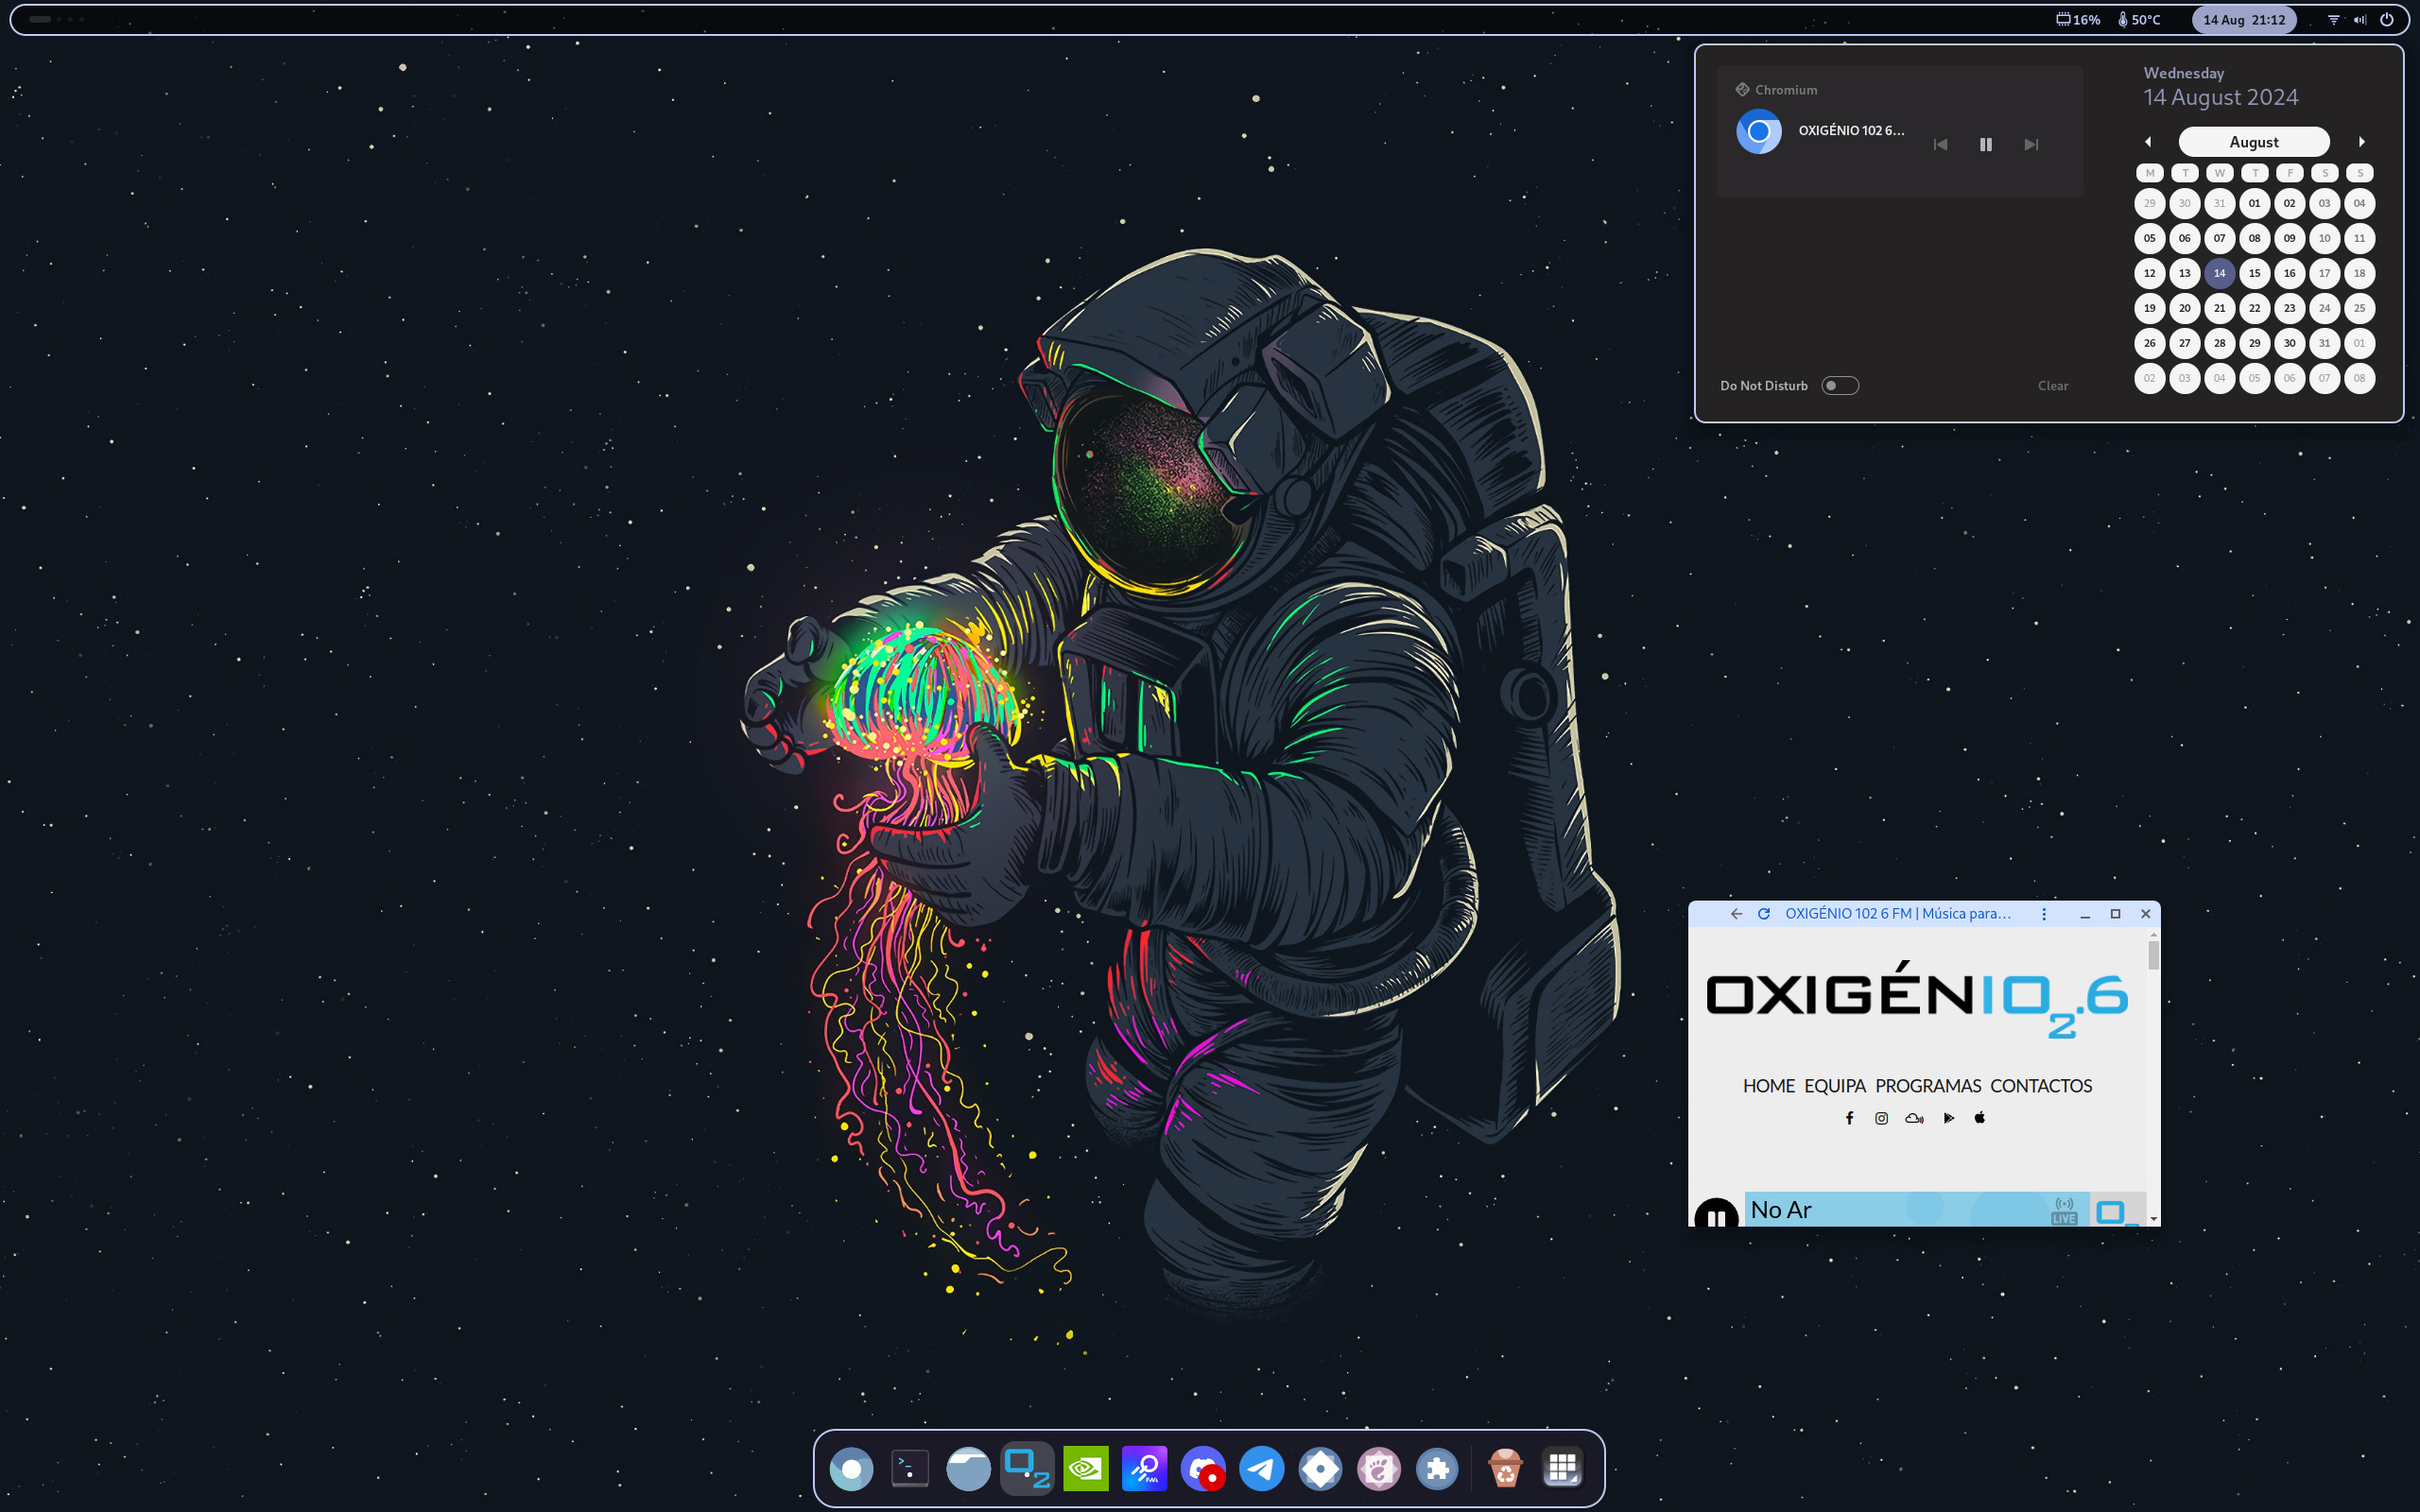
 Desktop Ricing #Unixporn
🎛️ Tweaks and Shell Extensions🎚️
Getting the Gnome Shell Extensions
sudo apt install gnome-tweaks gnome-shell-extension-manager chrome-gnome-shell -y
Open Tweaks and enable the dam Titlebar buttons (Why is this even disabled -.-’ )

You can now install ‘el’ gnome extensions:


- Enable User Themes
- Dash to Panel or Dash to Dock
- Freon or Vitals
- Compiz for an wobble effect.
-
Burn my Windows to keep your system lit.
- Screenshot Tool
 Rice your Desktop
Themes / Icons - Shell - The Rice
Download this .themes
Download these .icons
Download this Wallpaper
sudo tar -xf Graphite-teal-nord-rimless.tar.xz -C /usr/share/themes
sudo tar -xf Zafiro-Nord-Black.tar.xz -C /usr/share/icons
/home/$USER/.themes & /home/$USER/.icons (if they dont exist just mkdir them).
Giving /home/.themes & .icons writting permissions can work.
You can also use /usr/share/themes by sudo tar -xf Cold-Metal-No-Logo-GTK.tar.xz -C /usr/share/themes
Then user themes extension from gnome shell extensions has to be enabled by sudo apt install chrome-gnome-shell -y and when user themes is enabled we can then apply shell themes on Tweaks.
Open Tweaks application and select these themes.

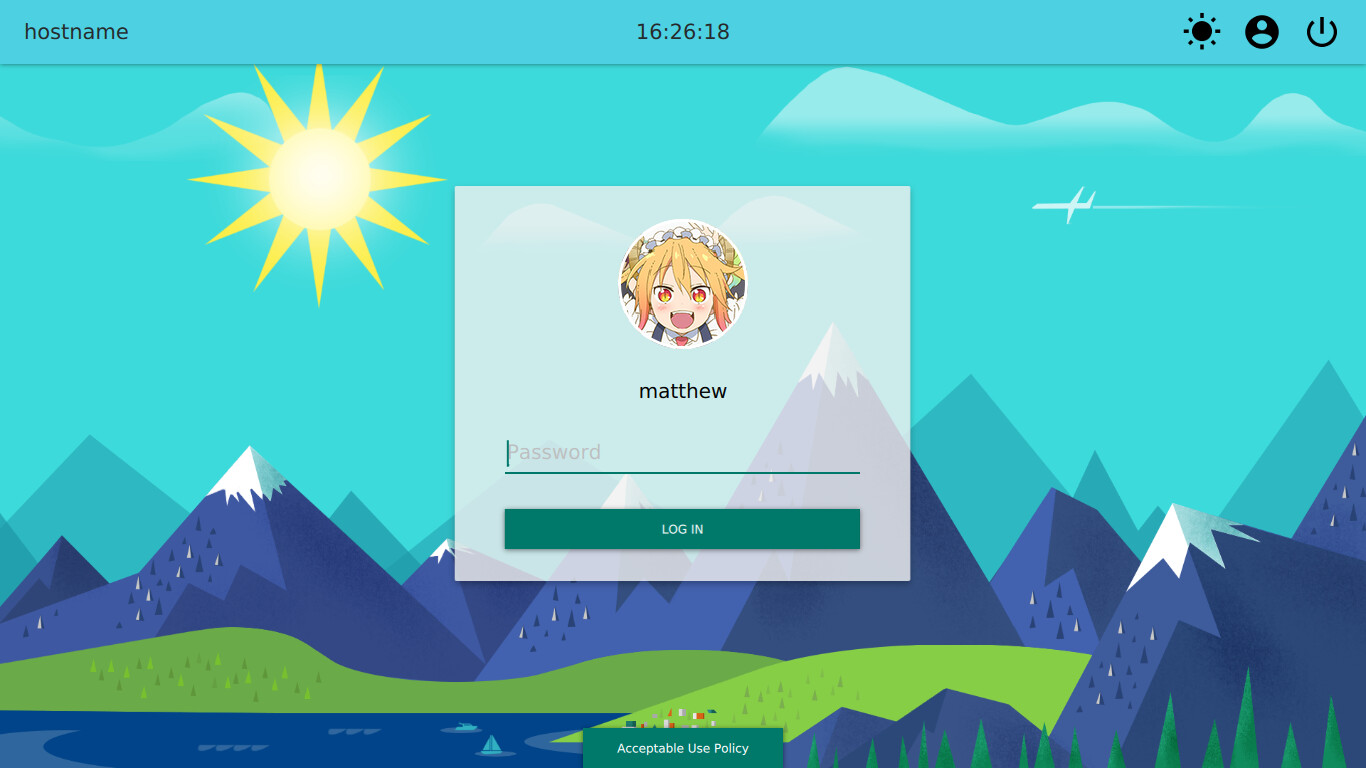
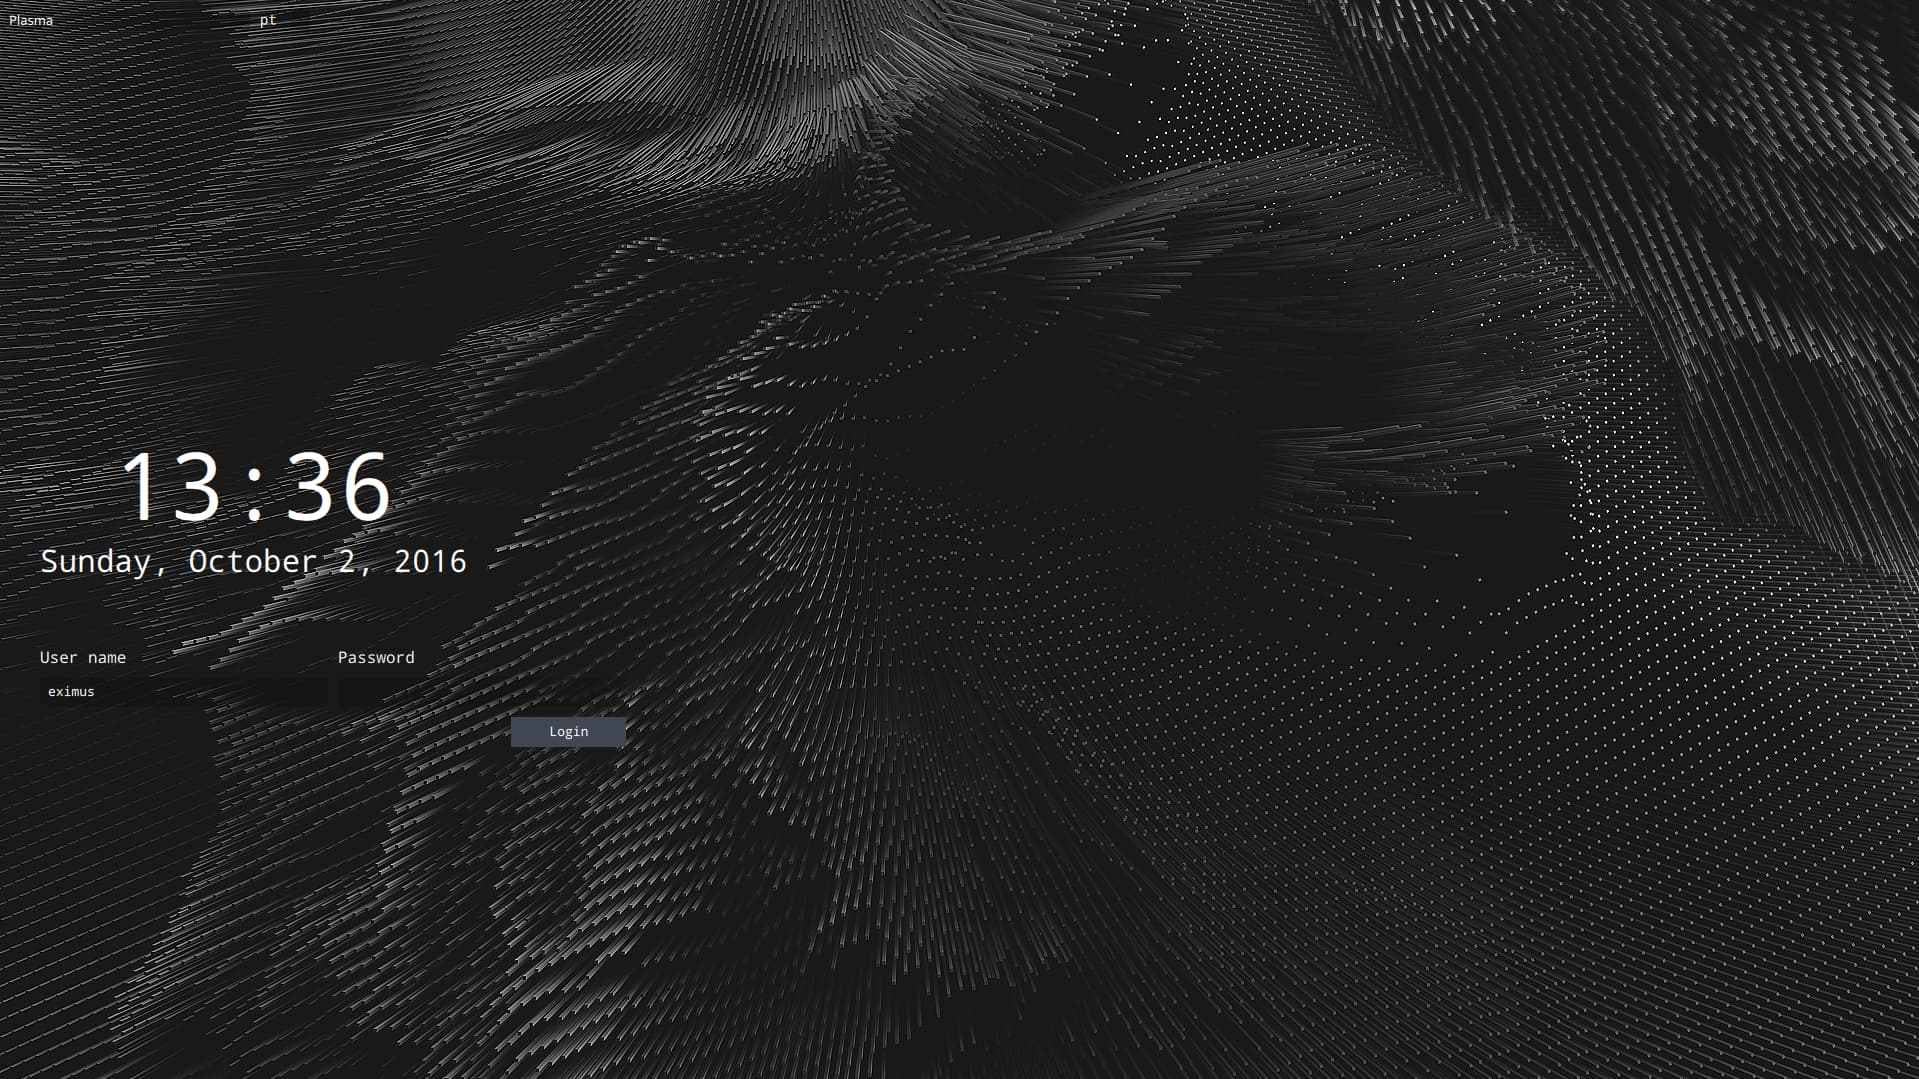
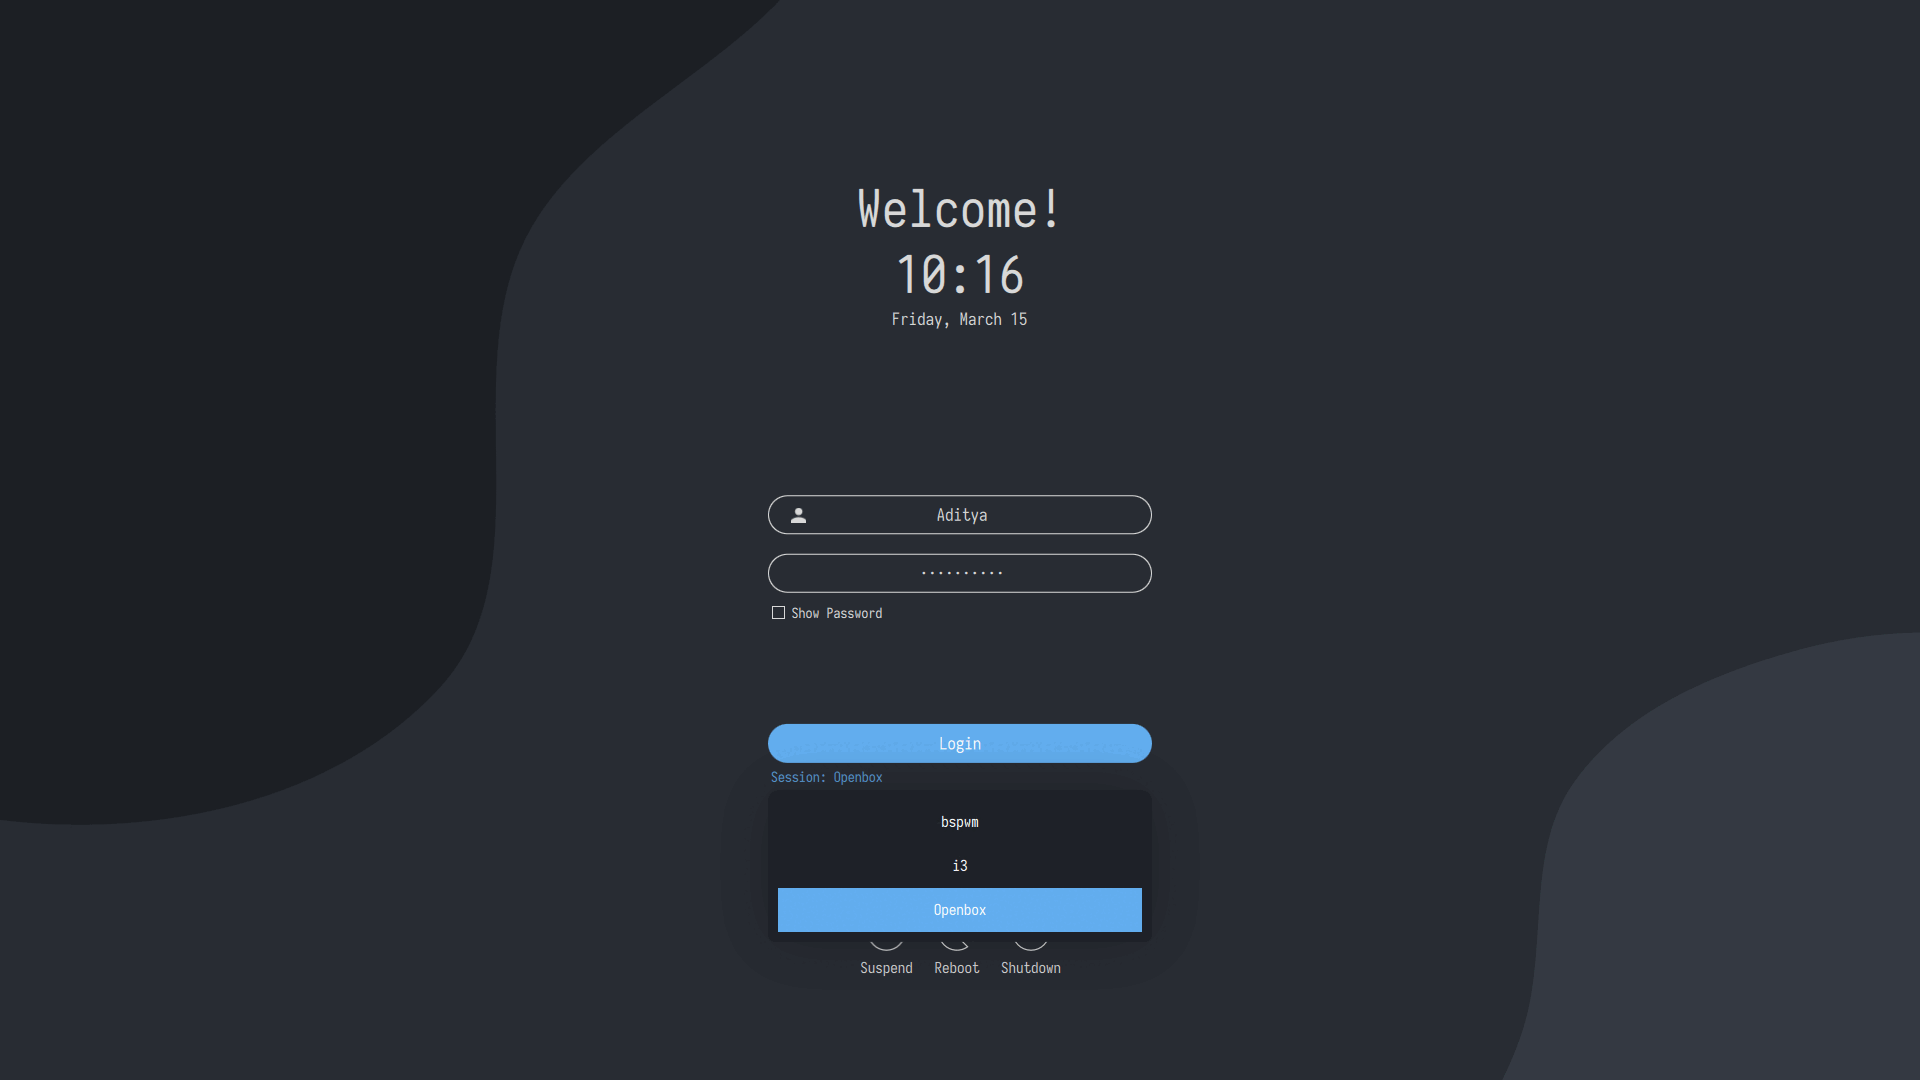
☄️ Rice your Login Manager 🌍 ▼
Not all SDDM themes found on github works on non archlinux systems. If you find a way let me know
Install these requirements
sudo apt install -y sddm qtdeclarative5-dev qml-module-qtgraphicaleffects qml-module-qtquick-controls qml-module-qtquick-controls2 libqt5svg5 qt6-wayland qt6-5compat-dev qtcreator ; QT_QPA_PLATFORM=xcb
#systemctl disable gdm
#systemctl disable lightdm
#systemctl enable sddm
For theme setting:
sudo nano /etc/sddm.conf.d/theme.conf.user
or
sudo nano /etc/sddm.conf
Theme folders for installing and ls:
cd /usr/share/sddm/themes/
Test your themes before applying:
sddm-greeter --test-mode --theme /usr/share/sddm/themes/maya
sddm-greeter-qt6 --test-mode --theme /usr/share/sddm/themes/sddm-astronaut-theme
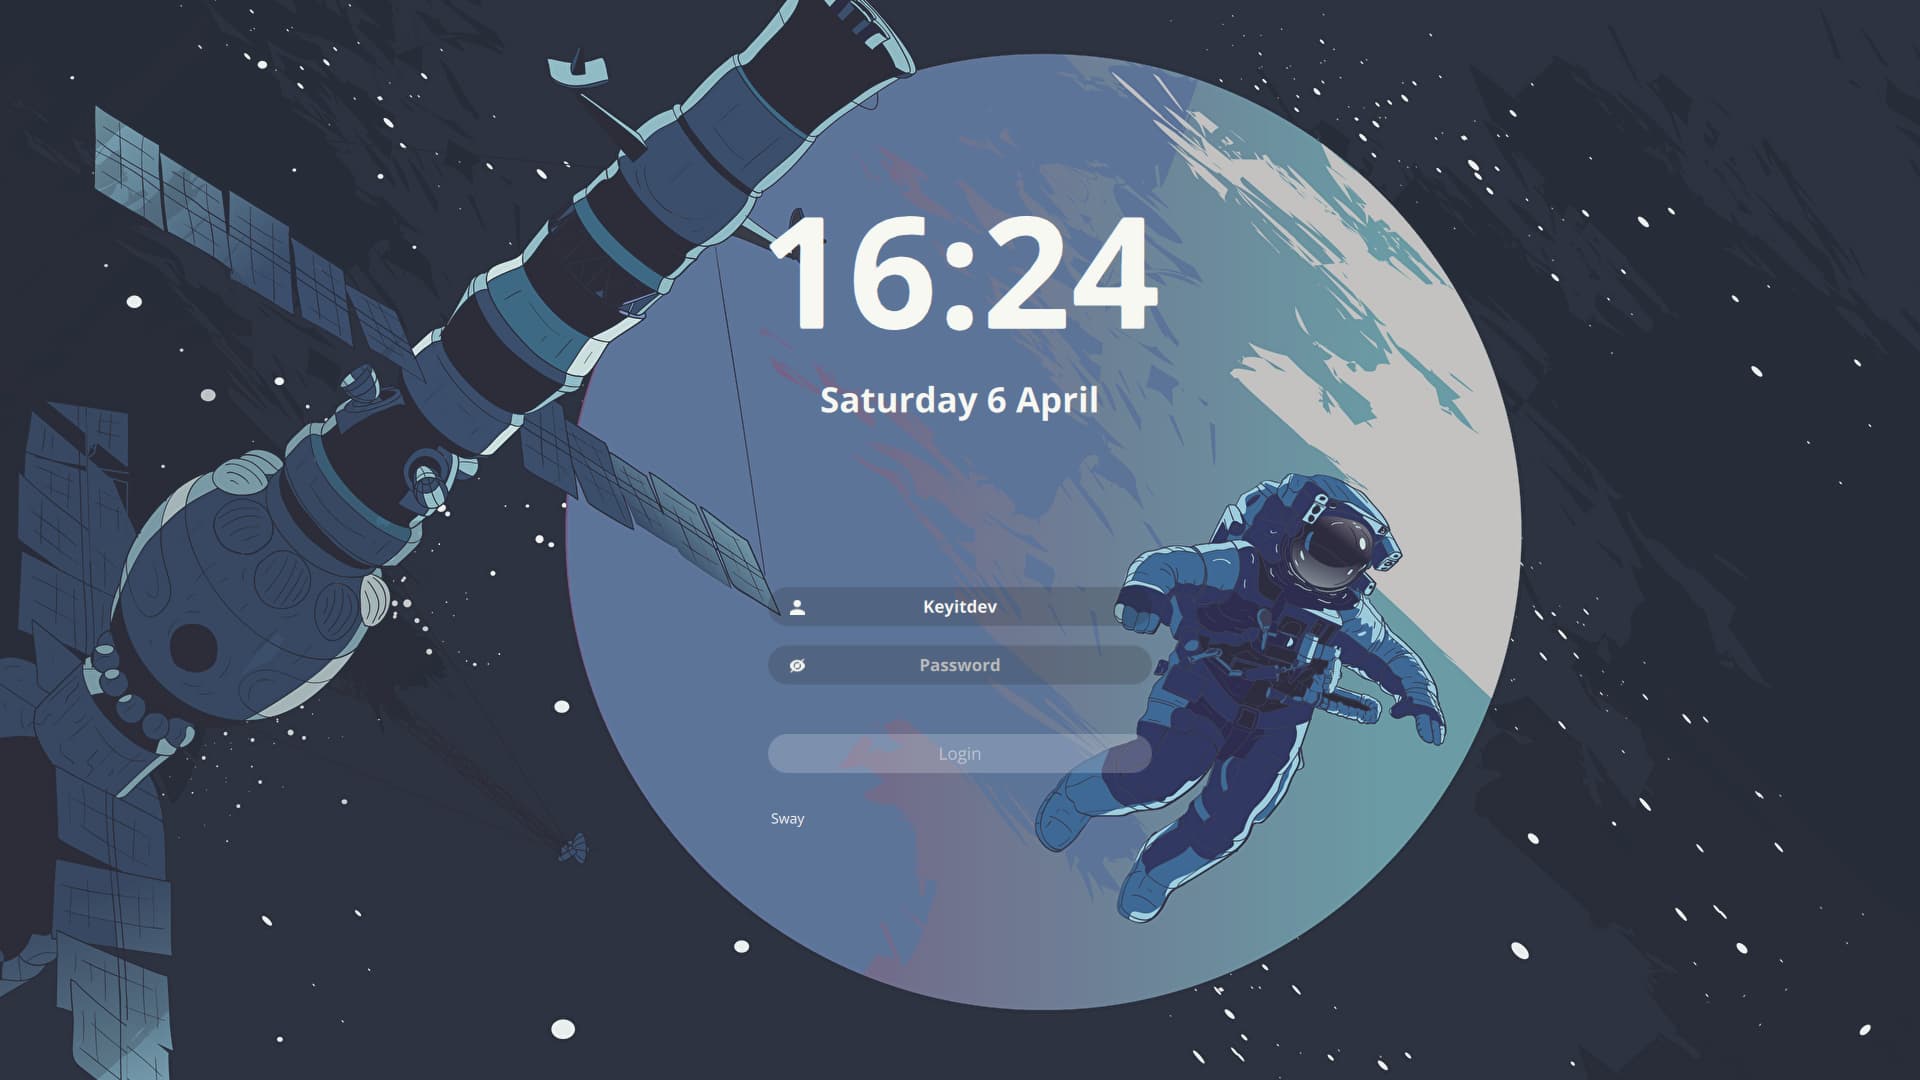
sudo git clone https://github.com/Keyitdev/sddm-astronaut-theme.git /usr/share/sddm/themes/sddm-astronaut-theme
sudo cp /usr/share/sddm/themes/sddm-astronaut-theme/Fonts/* /usr/share/fonts/
echo "[Theme]
Current=sddm-astronaut-theme" | sudo tee /etc/sddm.conf
sddm-greeter-qt6 --test-mode --theme /usr/share/sddm/themes/sddm-astronaut-theme

sudo git clone https://github.com/JaKooLit/simple-sddm-2.git /usr/share/sddm/themes/simple-sddm-2
echo "[Theme]
Current=simple-sddm-2" | sudo tee /etc/sddm.conf
sddm-greeter --test-mode --theme /usr/share/sddm/themes/simple-sddm-2
sudo git clone https://github.com/RadRussianRus/sddm-slice.git /usr/share/sddm/themes/sddm-slice
echo "[Theme]
Current=sddm-slice" | sudo tee /etc/sddm.conf
sddm-greeter --test-mode --theme /usr/share/sddm/themes/sddm-slice
sudo git clone https://github.com/JiayuanWen/sddm-sugar-steamOS.git /usr/share/sddm/themes/sddm-sugar-steamOS
echo "[Theme]
Current=sddm-sugar-steamOS" | sudo tee /etc/sddm.conf
sddm-greeter --test-mode --theme /usr/share/sddm/themes/sddm-sugar-steamOS
sudo git clone https://github.com/Match-Yang/sddm-deepin.git
cd sddm-deepin
bash ./install.sh
sddm-greeter --test-mode --theme /usr/share/sddm/themes/deepin
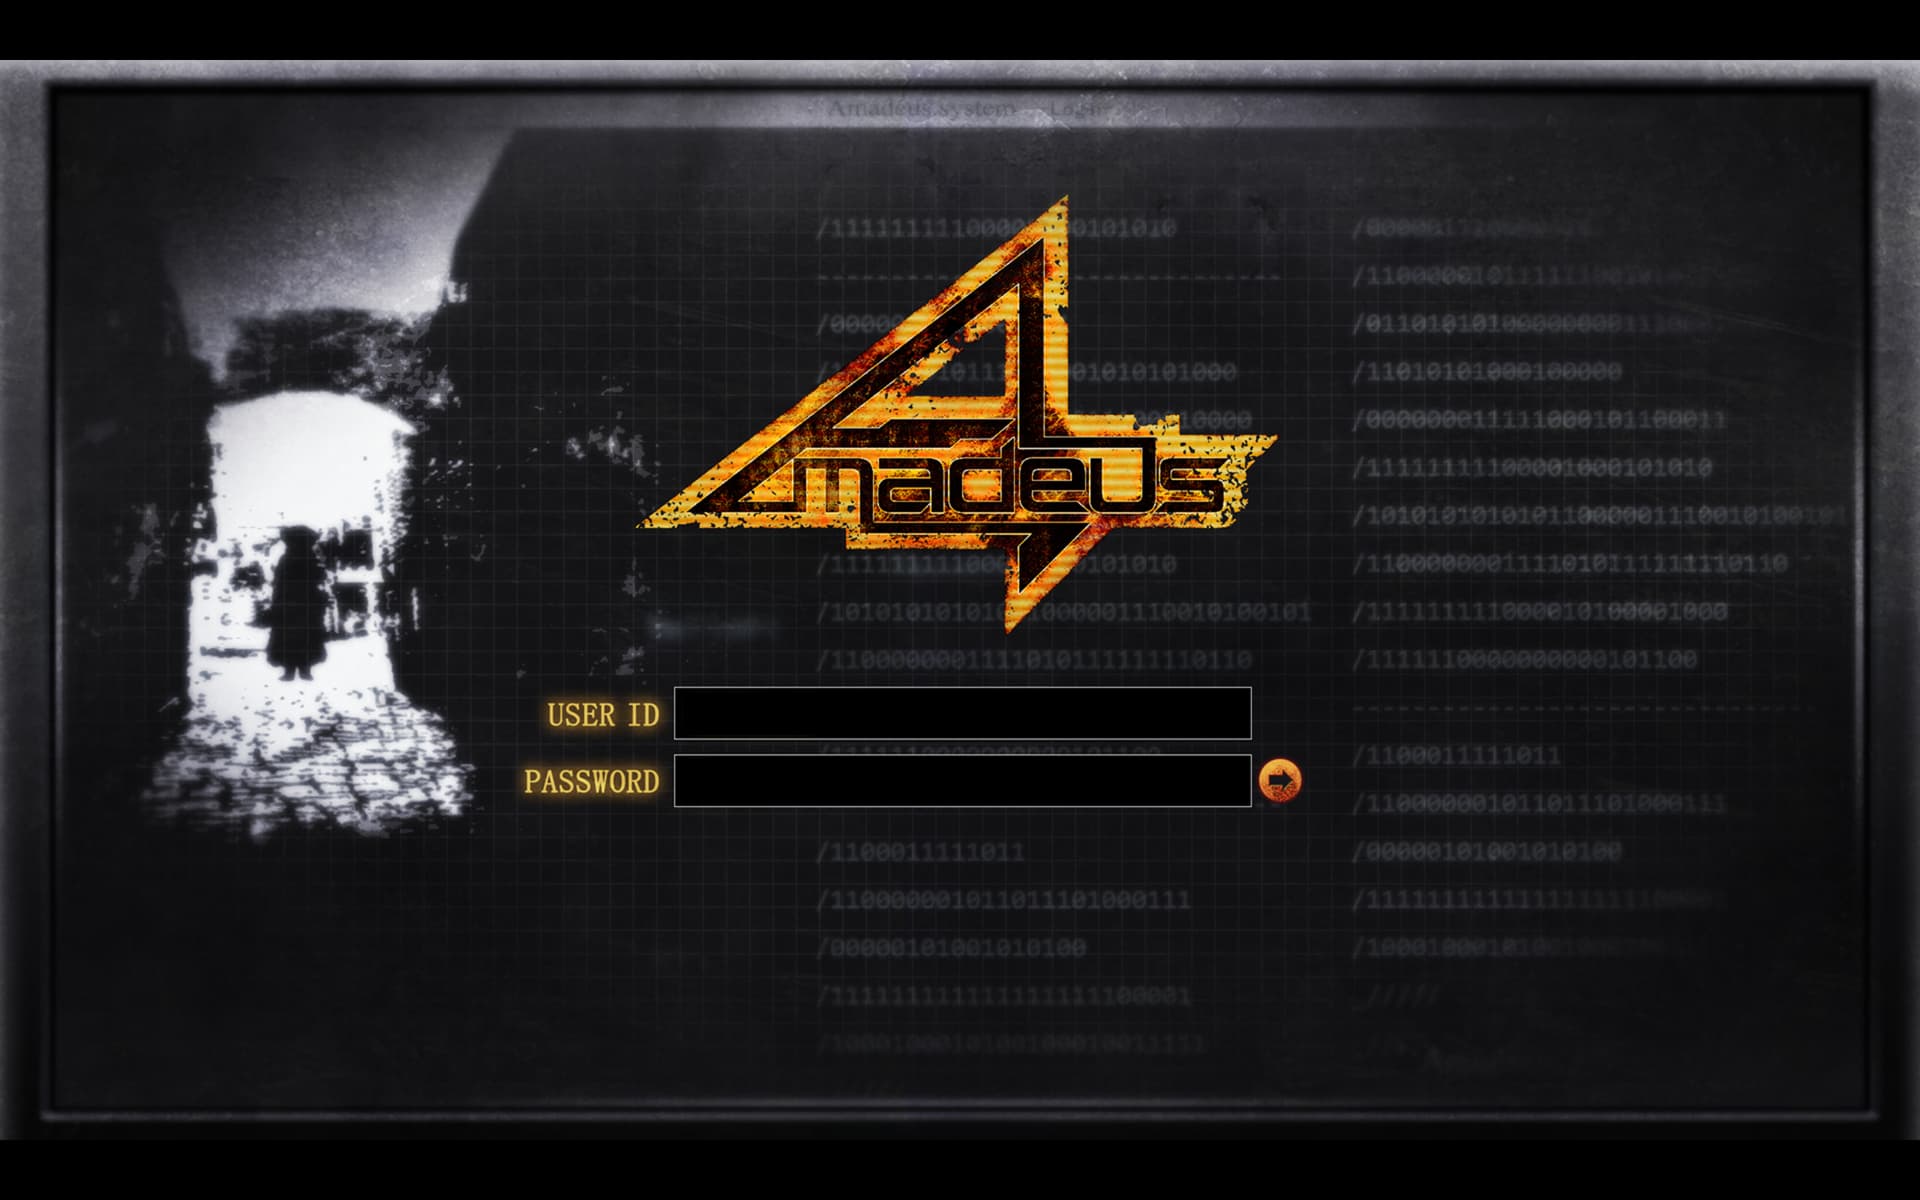
sudo git clone https://github.com/Michal-Szczepaniak/sddm-theme-amadeus.git /usr/share/sddm/themes/sddm-theme-amadeus
echo "[Theme]
Current=sddm-theme-amadeus" | sudo tee /etc/sddm.conf
sddm-greeter --test-mode --theme /usr/share/sddm/themes/sddm-theme-amadeus
sudo git clone https://github.com/m-wynn/sddm_wynn-theme.git /usr/share/sddm/themes/sddm_wynn-theme
echo "[Theme]
Current=sddm_wynn-theme" | sudo tee /etc/sddm.conf
sddm-greeter --test-mode --theme /usr/share/sddm/themes/sddm_wynn-theme
sudo git clone https://github.com/3ximus/abstractdark-sddm-theme.git /usr/share/sddm/themes/abstractdark-sddm-theme
echo "[Theme]
Current=abstractdark-sddm-theme" | sudo tee /etc/sddm.conf
sddm-greeter --test-mode --theme /usr/share/sddm/themes/abstractdark-sddm-theme
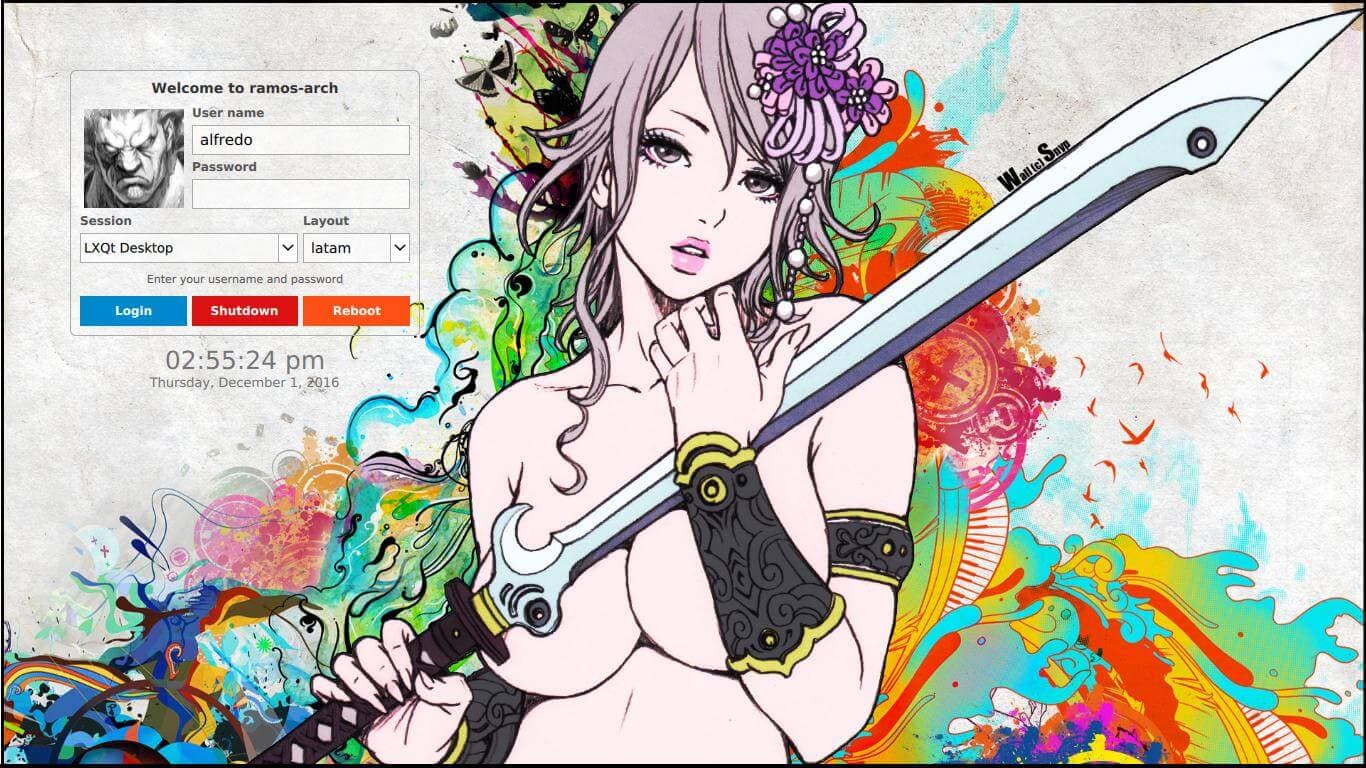
sudo git clone https://github.com/AlfredoRamos/urbanlifestyle-sddm-theme.git /usr/share/sddm/themes/urbanlifestyle
echo "[Theme]
Current=urbanlifestyle" | sudo tee /etc/sddm.conf
sddm-greeter --test-mode --theme /usr/share/sddm/themes/urbanlifestyle
🏝️ Try Other Desktop Environments for ARM 🦅
#ubuntucraft for arm isnt there yet..
#curl -LO https://github.com/archcraft-os/archcraft-arm/releases/download/1.0/archcraft-arm.tar.gz
tar -xzvf ubuntucraft.tar.gz
cd ubuntucraft
# nano customize.sh (optional)
# user/pass archcraft
sudo bash ./install.sh
#choose sddm not gdm3
Fix the top bar modules for each theme being on this example the “default” one:
1 - nano ~/.config/openbox/themes/default/polybar/config.ini
2 - Find the line modules-right =. This should be line 147.
3 - Remove the “battery” module, replacing it with “temperature”
Paste this instead:
modules-right = temperature dot volume dot network dot LD sysmenu RD
git clone --depth=1 -b Ubuntu-24.04-LTS https://github.com/JaKooLit/Debian-Hyprland.git ~/Ubuntu-Hyprland
cd ~/Ubuntu-Hyprland
chmod +x install.sh
./install.sh
SUPER Environments often needs changed from SUPER to FN+SUPER
# Look for $mainMod = SUPER
nano ~/.config/hypr/hyprland.conf
nano ~/.config/hypr/configs/Keybinds.conf
# Change it to $mainMod = FN+SUPER
 Try Cloud Gaming its perfect!


The credits are not mine this soup was given by the most talented members of this community so thanks to everyone that help me as I am new to all of this.
@GinKage @incognito @rauxon @Googulator @amazingfate @student RadxaYuntian hipboi
