
this is the mod im doing!!!
AirFlow on SATA HAT quad
Whilst I said I didn’t need it, intrigue got the best of me and I’ve ordered one on the slow boat. I’m in no rush, but I should be able to post results in a few weeks. I welcome anyone elses test results though while I’m waiting.
Any luck with the fan stand (still got a few weeks until mine arrives)?
It reduces the temperature by 1-2 degrees from the testing that I have done. However, I intend to add better sealing between the top hat and the cover as suggested by others, to see if it can improve the airflow drawn from the inside of the case as well.
1 Like
Wow. I happened to have a 80mm fan laying around and jurry rigged a similar set up. Another 2-3 degrees C shaved off. A trip to the hardware store for some of those rubber feet and I’m all set! Nice idea!
1 Like
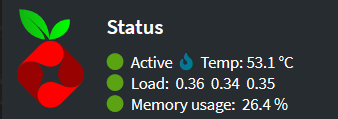
That’s cool, I’m still waiting on mine but then I’ll have a play…! To update on mine with the better seals around the top, noctua top fan replacement, passive XL cpu heatsink and the bottom dremelled out… I’m sitting around 53C and almost silent (RasPi 4 8GB).


1 Like
Hello everyone!
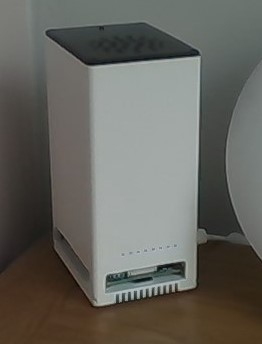
Here is my setup :

I use this fan at the bottow, on the lowest speed :
http://www.eluteng.com/module/fan/8cm/details001.html
I have also flip the top fan.
I’m between 45°c and 50°c when not in use, noise is ok.
When I upload bunch of photos with nextcloud, I’m around 50°c and 55°c after 2-3 minutes. But it’s getting louder.
I’m planning to make bigger holes on the bottom plate.
1 Like
Thanks Tom, out of interest have you considered trying to seal the bottom around the fan and the vents in the case to try and push/pull more air through? Maybe an inch of electricians or duct tape?
Also, is that pushing in or out? If the bottom and the top one are both inward, it may cause negative airflow?
I’ve been looking at these 3d printed adapters like this…
If you cut it out, you could actually turn the 120mm adapter into a pretty “cool”, cooling stand. My 3d printer is broken so I may buy one in black (or maybe I’m just going OTT)… but I think with the fan stand it’d look pretty neat, increase airflow & reduce the fan noise. Not sure yet how I’d handle cabling though…


38.9 now… Though the noise needs fixing… Hmmm…
give and take… lol… but the theory of the chasis being a large heat sink seems to be validated… the heat comes mainly from the bottom plate cos its the closest to the raspi board…
1 Like
What I ended up with:

I noted after putting this together that the fan, just a standard 80mm case fan, is a 12v fan. USB delivers 5v so it’s not at full speed but it spins and is quiet. It also drops the temps. At idle I’m at 41-42C. In use about 45-46C.
I have also drilled the holes in the bottom plate to be larger. I had thought about going larger still but if the bottom plate acts as a heat sink I would think taking away too much material would not be a good thing. Leaving it as is for now. I also use the stock heat sink on the CPU, the one that used to have the 30mm fan attached. It seems to work Ok and I wonder if the larger ones would do that much better. Most look to be 30x40mm I think?
The USB adapter is from a Noctua fan. Many Noctua fans come with a “Low Noise Adapter”; a resistor that slows the fan. Maybe this could be useful to help cut some noise?
2 Likes
I haven’t made any cut-outs, just got a USB powered 80mm fan with feet, slapped it underneath and plugged it into the Pi. Temperature dropped ~3C. Keeping an eye on it to see how much it fluctuates.
After some trial and error, I ended up using the white weather strips to improve the seal.

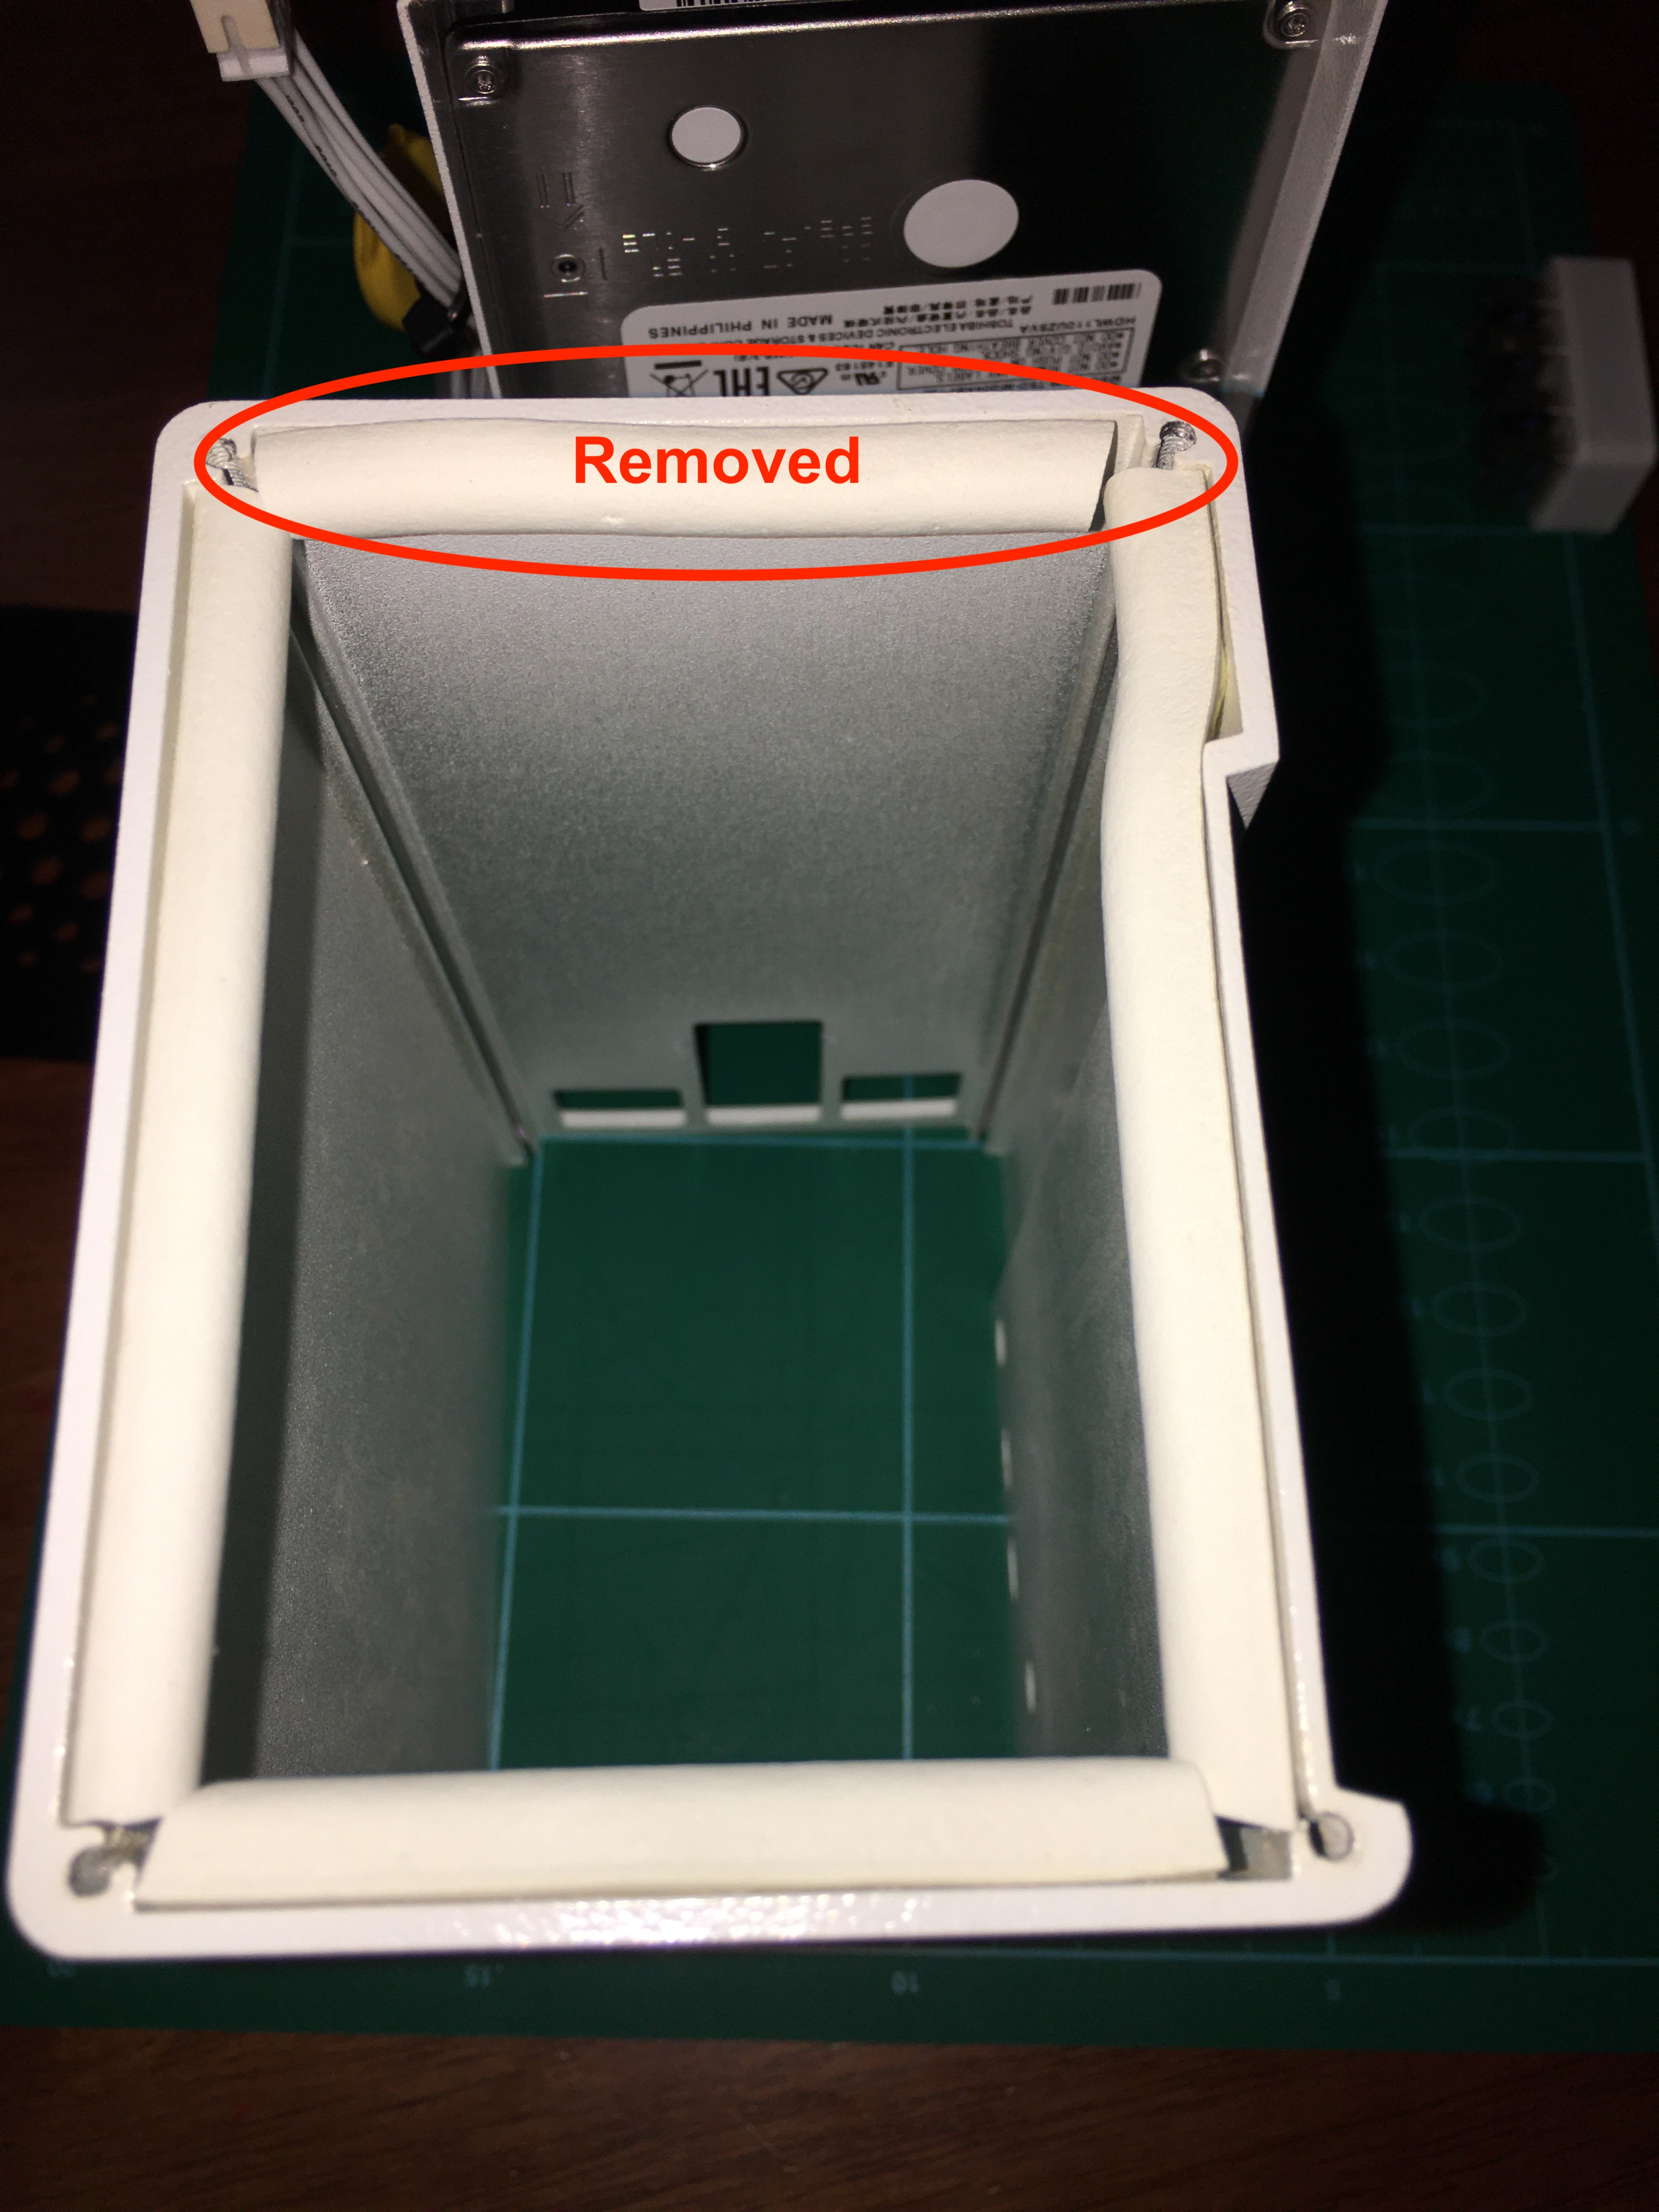
I remove the top strip after attempting to reassemble the enclosure, as it was too thick and interfered with the top plate and also the push button.
Without the seal, the temperature drop was only 1-2 deg C using a 120 mm bottom fan stand.
Now, together with the 120 mm bottom fan stand, the temperatures has dropped from a nominal 50 deg C (prior to all the modifications) to 45 deg C (though it fluctuates a bit).
However, there is not much play for the enclosure when removing and attaching it to the base, so I hope to not have to do it too often, since realigning the enclosure while making sure that the push button play is not affected takes some work.
Cutting holes in the wall of the metal case: - 3 deg C
Next project: adding a quiet sunon 12v 60mm fan under the case by using the usb-type c connector with a step-up converter and control it by using a transistor with a 4,7k Ohm resistor before connecting it to a gpio-pin (there should be some free pins according to the pin-layout on the radxa-wiki)
Hello
Could you help me, please? I want to make my built quieter.
From what I read above I’m ready to change the upper fan to Noctua NF-A4x10 PWM, also add the bottom fan (Noctua also?) connected by USB and weather strips for seal.
What is not clear to me:
Do I have to drill some holes in the bottom?
What is better to do with the CPU fan?
Which way should the fans run?
I will greatly appreciate any advice and guidance!
Thanks in advance)
Some experimentation will probably be needed. In my case I
- replaced the top fan with a Noctua PWM fan. Mine blows out of the case. At the time I did this, blowing into the case made no difference for me. If I get really bored I may try reversing it again with the other changes I had made but I have no definite plans to change it at this time.
- added weather stripping around the top board.
- drilled the holes in the bottom plate to a larger diameter.
- I removed the CPU fan entirely. It was noisy. Mine may have been broken from the start or I may have messed it up while moving things around. I don’t really know.
- added an external 80mm fan that the whole unit sits on. Mine is a 12v case fan plugged into the USB port. Not all 12v fans will start and run on 5v. Mine does and it’s quiet, slow, but quiet. It also noticeably helps temps. It blows up, in theory, though and along the side of the case. If I switch the top fan I would probably switch this one too.
The things that made the most temperature difference for me were numbers 2, 4 and 5. I was surprised that removing the CPU fan made a big positive difference. Number 2 probably channels the air though where it is needed most. Number 1 and 4 probably make the most difference in noise level.
I may yet reverse the fans (again, I’m going to have to be really bored). I may also replace the heat sink on the CPU. I use the one that came with the unit with the fan removed. There are some large, possibly better quality, heat sinks out there. I may try one if I get the urge to take the unit apart again.
2 Likes
Thank you very much for the clarification!
I will share the results when I finish building.
What kind of tool and size of that tool do you need to unscrew the screws for the fan that is at the top?
Europe measurement if possible!
I did the airflow mod and ran some CPU benchmarks. My temps dropped by 10 °C when the CPU is under load! Just want to add my experience as a data point in the conversation.
I used some sticky tack to improvise a gasket:
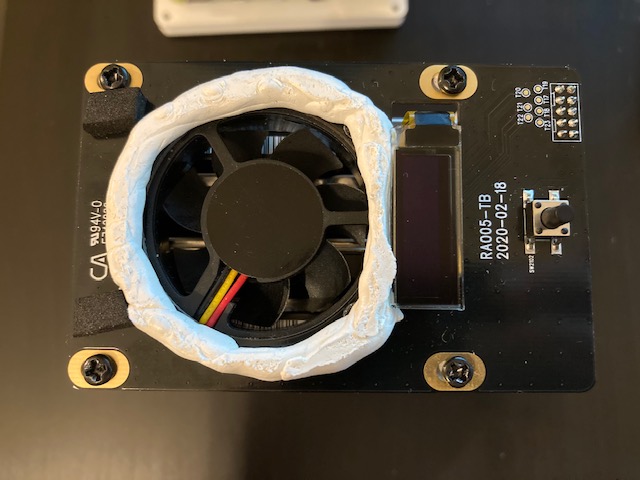
For context, I’m using a Raspberry Pi 4 Model B 8 GB. My top fan is sucking air out of the case.
I’ll share some details on how I ran CPU benchmarks. I used sysbench:
sudo apt-get install sysbench
Open two SSH sessions to the device. In the first session, run this:
sysbench --test=cpu --cpu-max-prime=200000 run
Wait for about 15 minutes for the temps to stabilize.
Then, run this command in the second SSH session for about 15 minutes:
while true; do cat /sys/class/hwmon/hwmon0/temp1_input >> example.log; sleep 1; done
Stop both processes. Run this to get the average temperature:
awk '{ total += $1; count++ } END { print total/count }' example.log
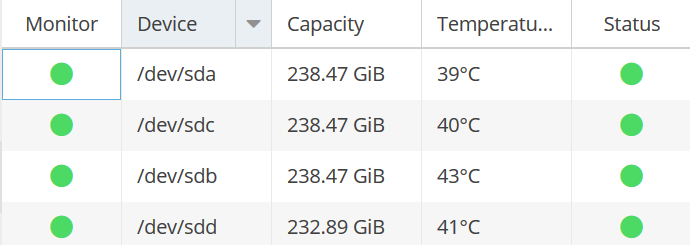
Additionally, you can get the hard drive temps with the following commands:
sudo apt-get install smartmontools
sudo smartctl -d sat -A /dev/sda | grep Temperature_Celsius | awk '{print $10}'
sudo smartctl -d sat -A /dev/sdb | grep Temperature_Celsius | awk '{print $10}'
sudo smartctl -d sat -A /dev/sdc | grep Temperature_Celsius | awk '{print $10}'
sudo smartctl -d sat -A /dev/sdd | grep Temperature_Celsius | awk '{print $10}'
There’s probably a shorter way of getting hard drive temps, but oh well.
Without the gasket, my temperatures were as follows:
- CPU: 59.39 °C
- HDDs: 41 °C
With the gasket:
- CPU: 49.33 °C
- HDDs: 38 °C
I recognize that this is benchmarking CPU load, not hard drive load, but still, I’m happy with the results.
I’m currently trying one more mod, which I’m not as sure about: covering the ventilation holes on the side with tape. Running the same benchmarks, I’m seeing a 1-3 °C drop with this mod:
- CPU: 47.59 °C
- HDDs: 38 °C
I know this seems counter-intuitive, so I’ll try to describe my thoughts behind this mod.
As I mentioned, my fan is in pull mode, i.e. it’s sucking hot air out of the case. I figure that with the side holes open, much of the air that gets sucked out of the case actually comes from the side. I’m guessing that a lot of that air just flows upwards along one of the hard drives, and out of the top.
Taping the side holes forces air to to be sucked into the case via the holes on the bottom. As such, almost all of the air coming into the case is forced to contact the RPi. Arguably, there’s more air flowing along the full length of the hard drives, too.
Anyway, I’m still experimenting with temperatures. Waiting for some parts to try a couple more things.
Edit #1: I tried removing the CPU fan, too. Here are the benchmarks:
- CPU: 49.33 °C
- HDDs: 37 °C
So for me at least, I lost a few degrees there. I could hear the top fan kick on at the 50 °C mark a few times, too, which wasn’t the case during my previous test.
Edit #2: In the interest of experimentation, I tried adding a “skirt” of polyamide tape (Kapton) around the SATA PCB:
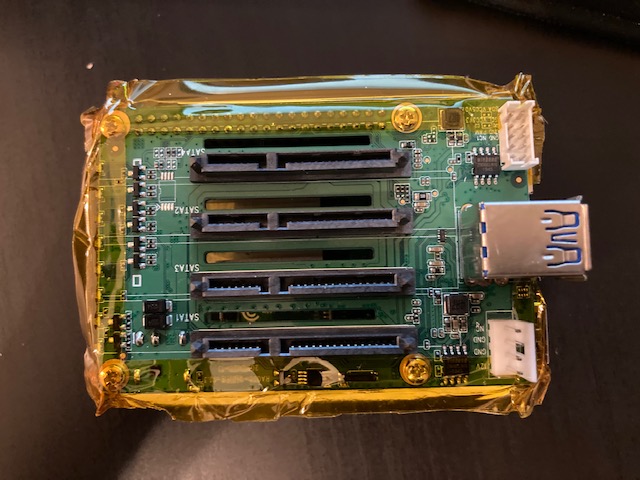
(The top “gasket” of sticky tack is still there, and the CPU fan is still removed.)
My idea was that this skirt could serve as a gasket, forcing air to be drawn through the slots in the SATA PCB, visible in the photo above. As the air was drawn through the slots, it would pass over the CPU heatsink. I figured that the cooling effect in this configuration might be more than if the air was allowed to pass on the outside of the SATA PCB.
To reinforce this effect, I taped the top row of the three rows of holes on the side. The top row of holes is above the SATA PCB, but the bottom two rows are below it.
Unfortunately, the benchmarks weren’t great:
- CPU: 49.89 °C
- HDDs: 38 °C
I taped the bottom two rows of holes on the side, and ran the benchmarks again:
- CPU: 49.79 °C
- HDDs: 38 °C
Not great. These tests make me wonder if maybe what’s happening is that the CPU fan blows air on the CPU, which gets pushed outward, towards the edge of the enclosure. The enclosure then absorbs some of that heat, and then, the fan on the top hat sucks the hot air upwards. Whether the hot air travels up through the middle or along the sides doesn’t matter as long as it gets sucked out.
I know that all of this testing is pretty crude, but I thought I’d share my results, even if they weren’t positive. Maybe this will save someone some time, if they get the same idea!
1 Like