AirFlow on SATA HAT quad

I have found that Noctua has an official distributor list that includes an eBay store that has most Noctua products in stock.

Just sharing some thoughts and my own theory on the Noctua fans… You should be buying the 4pin noctua A4x10 PWM version of the fan… looking at the circuitry diagram below, the yellow cable in the 3 pin version is RPM speed signal and not PWM signal… The PWM signal cable is carried in the blue wire on the 4pin version…

So, you need to buy the 4pin version and map the wires like this to the original fan adaptor:

  • Noctua Blue > Original Yellow
  • Noctua Yellow > Original Red
  • Noctua Black > Original Black
  • Noctua Green > (to cut away)

Following the above rewiring, you should be able to achieve PWM speed control…

2 Likes

I started with a 4-pin fan but used the green instead of the blue. So, has anyone tried this yet? I’m tired of soldering on this thing but may give it a try sometime.

I’m pretty sure the blue one works and is the correct wire… the green one is the RPM speed signal… give it a try, its only 2 colours that u have to try… the other two wires are +5V and grnd…

I gave it a try today and the 4 pin PWM fan with the wiring noted above does seem to work!

I tried @eskimo’s solution and it works perfectly. Here’s my setup:

Main steps:

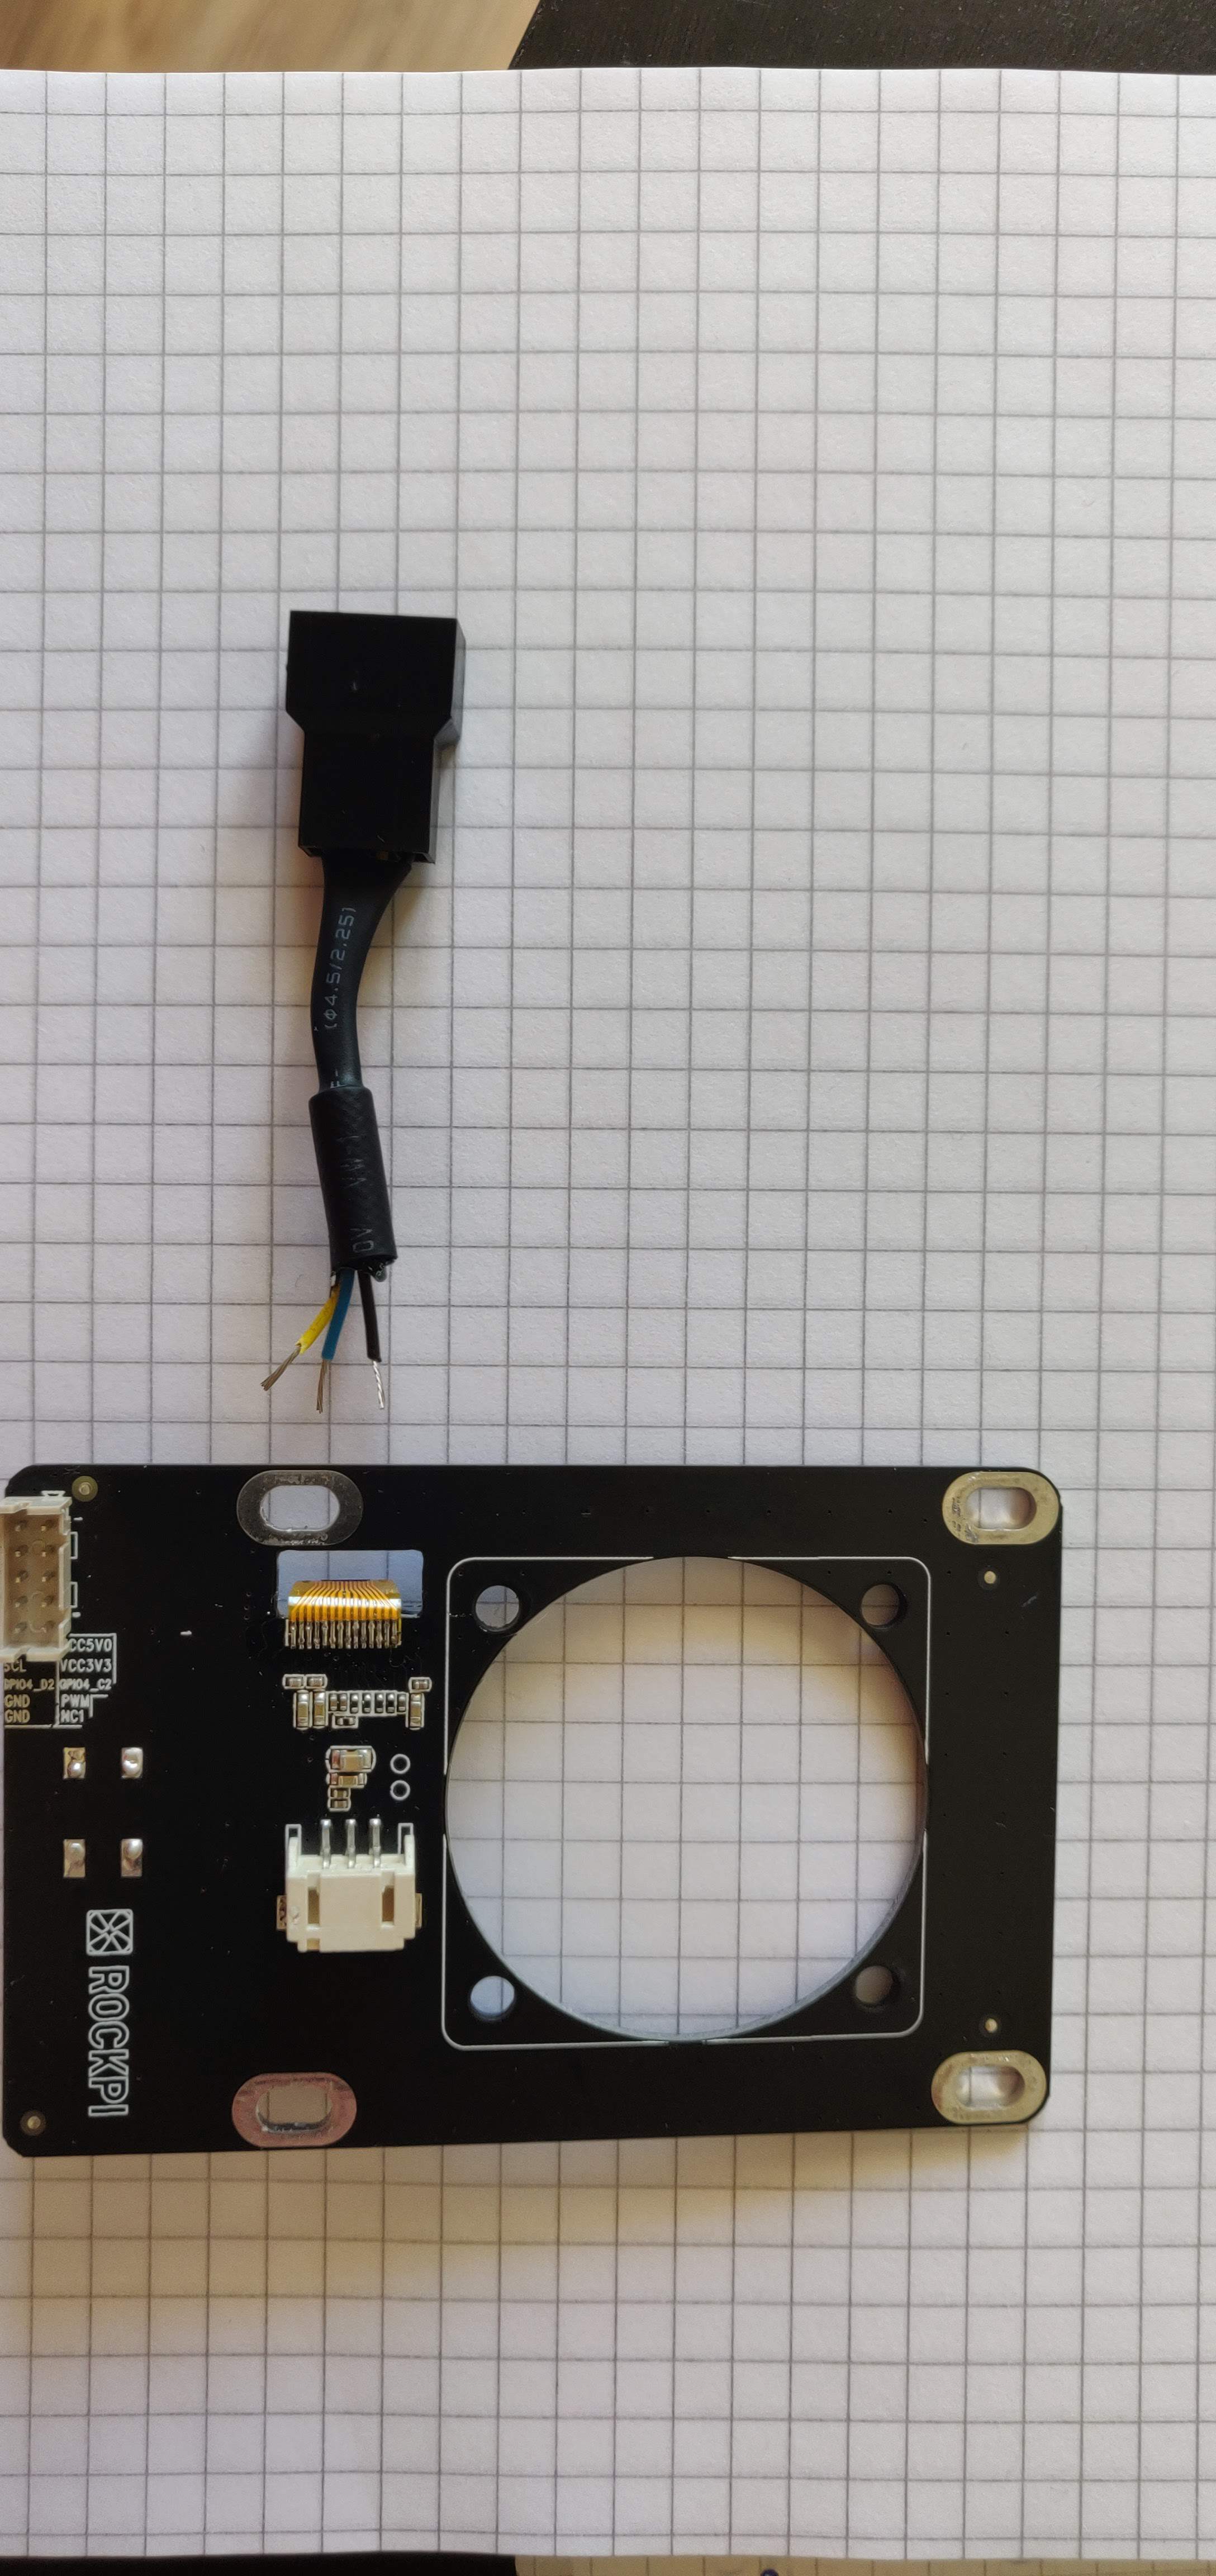
  • Cut the noctua extension cable and solder the wires according to the picture (based on @eskimo’s post). I used a glue gun for proper insulation and to avoid the wires breaking during assembly.
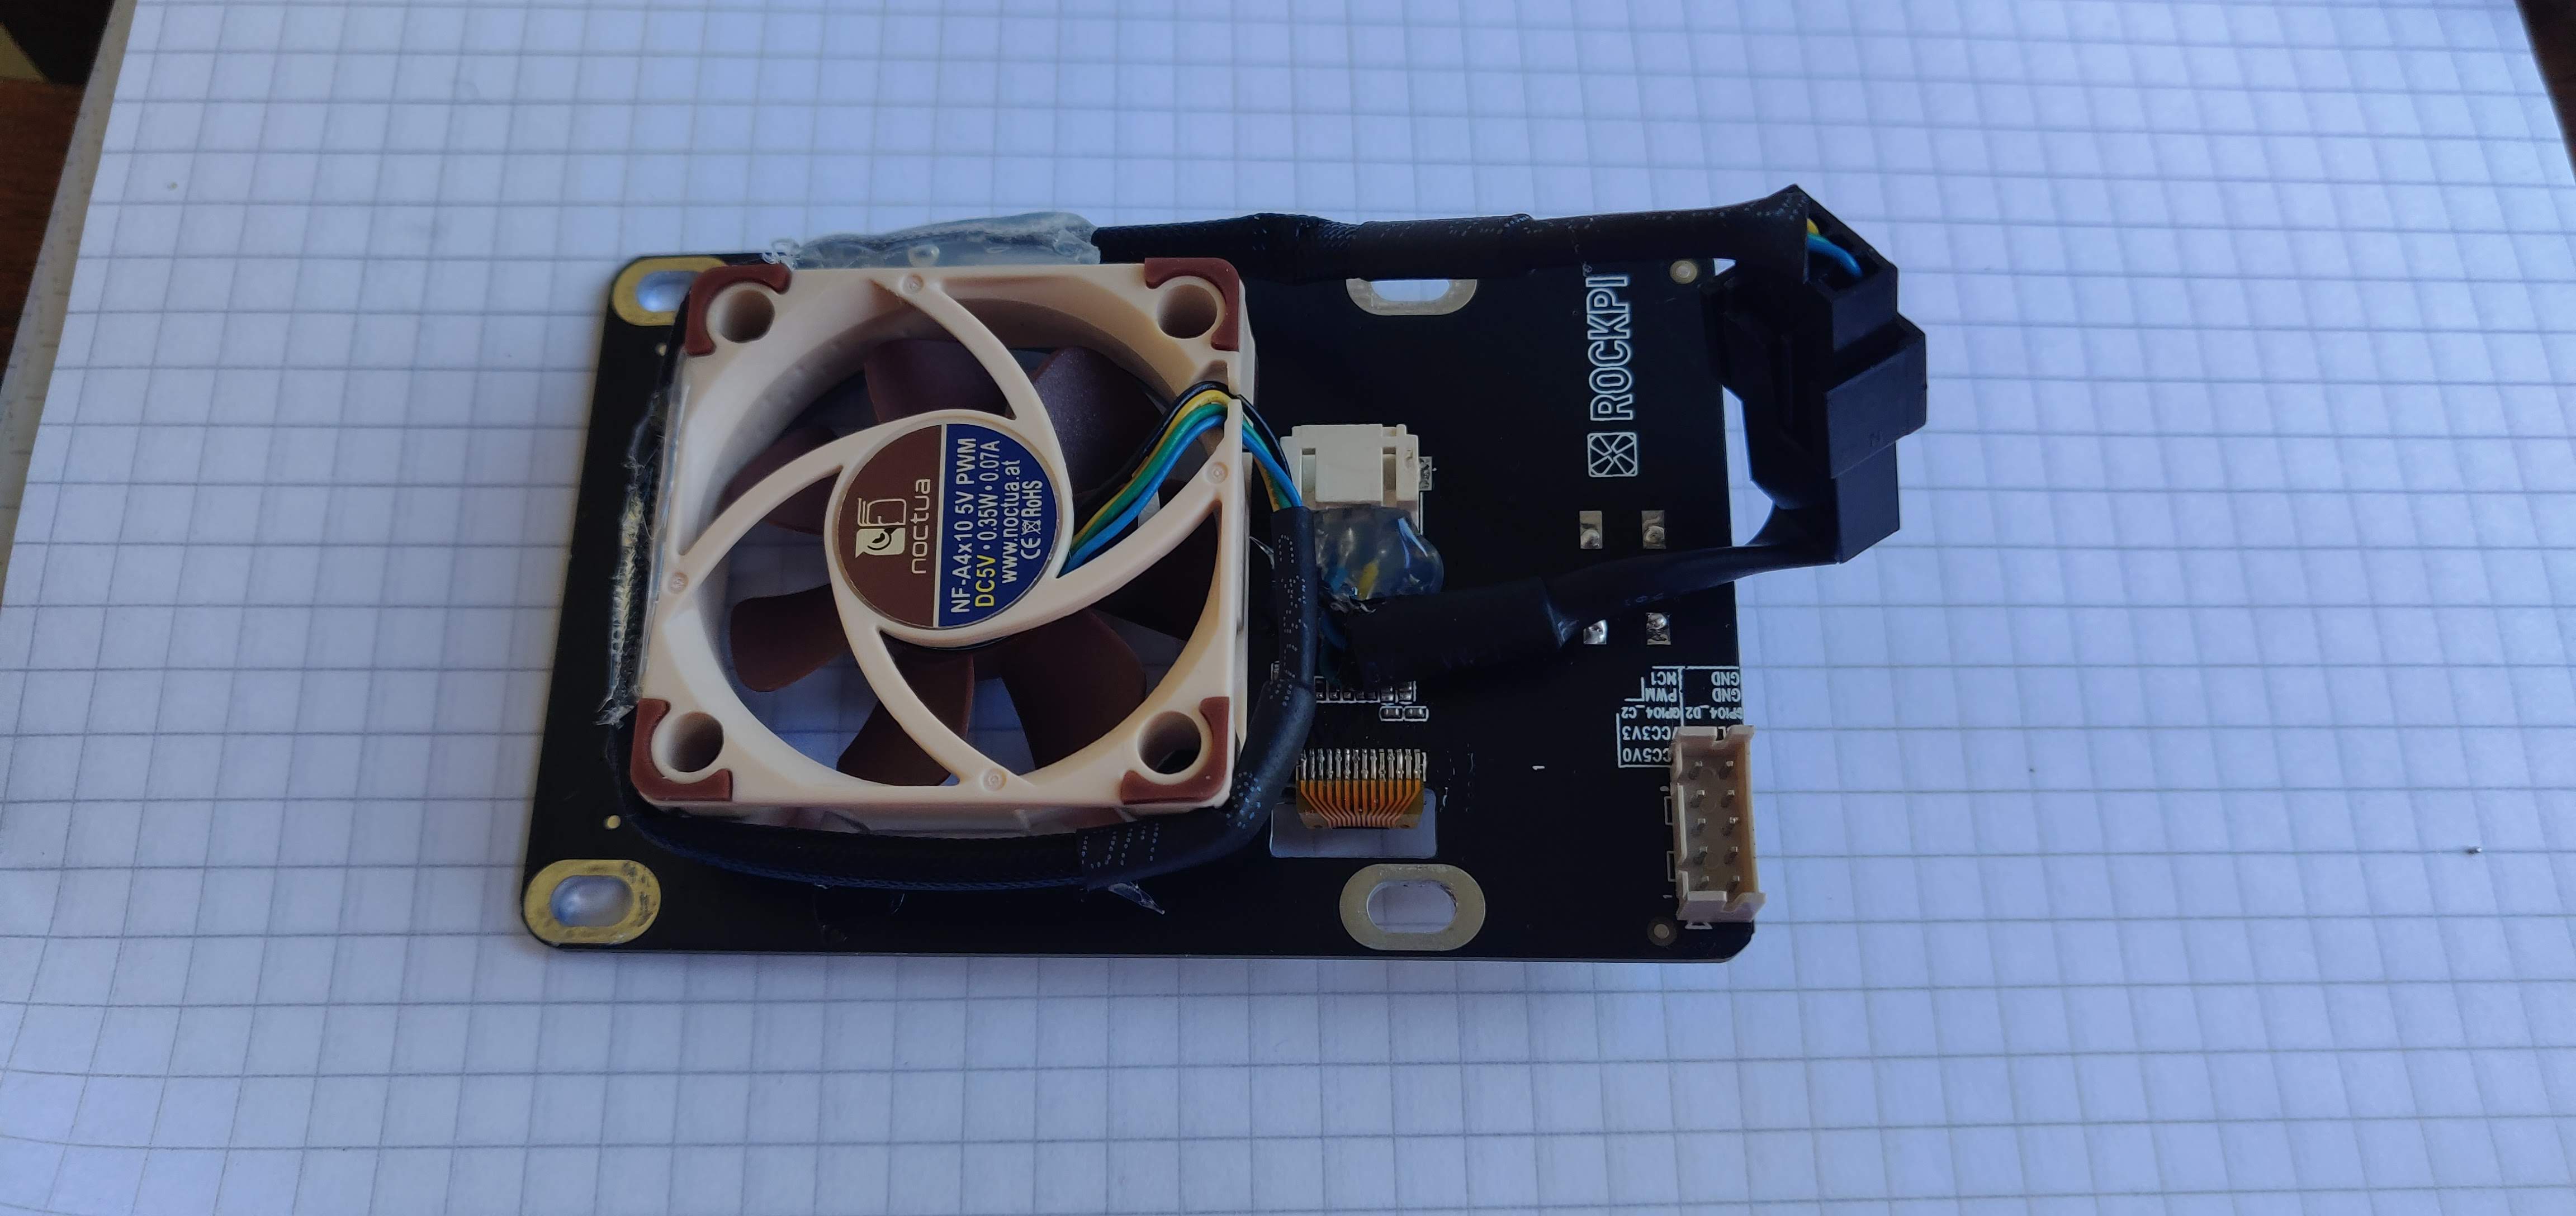
  • Glue the fan to the board (the anti-vibration mounts are too large for the sata-hat board holes). You can also use M3x20mm screws.
  • Mount the sata hat on the aluminum case using M3x10mm screws and nuts. This blocks the noctua fan connector against the case but it also adds a few millimeters rendering the 4 small screws useless.

Performance
With the same settings, I had an average temperature of 39°C with the original fan, and now it’s up to 43°C with the noctua.

1 Like

i would have preferred to directly solder the wires of noctua fan to the PH2.0 connector to avoid the huge bulky MB fan header connector though… but good work!

just surprised the temps are actually higher… i think its something to do with the PWM frequencies? did u you try using setq’s latest code?

I used this configuration to be able to go back to the original setup if necessary. I have just updated the code and I’ll make another post if I see any change in terms of temperature.

I also put a Noctua fan in but have it blowing out of the case rather than in. I saw no real change in reversing either fan so have left them as they were originally. Your milage may vary of course. I also wired it much like yours but with more length from the board to the Noctua connector. This allows the cable to be placed in the space above the USB connectors.

With top fan reversed the problem is the entry air flow : no enought holes to have efficience air flow. I’m really thinking about add some homes on bottom of HAT.
Also searching and option for CPU because air flow in/out is not egal then not efficience.

have you guys considered putting the whole unit on its side? lol… that might help with airflow?

@setq can I check, how many fans can the top hat support? I tried connecting one extra blower fan to the top hat and the original fan was running at a much slower speed…

yes :smiley: SATA HAT box have a true airflow issue. It’s Logical : very thin box.

The PWM frequency of the fan is 25khz, if the frequency is wrong, it may not work.

How many fans can I Daisy chain together? I tried adding a second fan, and the original stock fan was running at 5% power only… it’s like there isn’t enough current to power more than one fan…

Edit: this is how i tried to wire up the additional fans…

Bonus: added a dust filter to the top cover for dust mitigation…

2 Likes

I’m sorry for my misunderstanding. How many fans can be supported probably depends on the amount of power left.

I only have 3 drives in the system, so i should have more than enough power… but it doesnt seem to be the case, because adding even one more fan causes the original 40mm fan to spin slowly… the new blower micro fans are not affected though and spins as intended…

this is the spec sheet for the blower fans that i added…
http://portal.sunon.com.tw/pls/portal/sunonap.sunon_html_d_pkg.open_file?input_file_name=7264646F632F3230313430312F3137373435312F5F443033303138313931462D30305F2D392E706466

I’m a little busy today. I’ll test it for you tomorrow. Connect multiple fans.

Sorry, just a theory… using gpio.hardware_PWM(12, 25000, dc * 10000) means there is the assumption that the fan frequency has to be 25khz right?

what if we used set_PWM_dutycycle(12, dc * 10) instead and define set_PWM_range(12, 1000) where the range will be set to 25-1000… we could avoid the whole fan frequency complication?

just a thought and theory only… waiting for my noctua fans to arrive before doing anything further on the nas…

Hello.
I have the same problem. I noticed that the temperatures have worsened after installing the Noctua fan. Around 5 - 10ºC more than with the original fan.

46

I haven’t been able to install the latest update yet. Have you noticed any improvements after it was installed?

The Noctua fan makes less noise than the original, but I am doubtful that at 100% revolutions it has the same airflow as the original fan, I would say the airflow is less, or that feeling I have.
Has anyone noticed the same thing?
Regards