Hi everyone, I’m trying to use an OV5647 MIPI CSI camera with Rock 3A for my new CV project. I’m using stock Ubuntu Server image. So, I’ve applied an ov5647 overlay, and managed to acquire 10 new devices in /dev/, like this:
The camera also looks powered, and dmesg reports starting and stopping OV5647 device on startup:
However, when I try to take a picture with “v4l2-ctl --device=/dev/video1 --set-fmt-video=width=1920,height=1080,pixelformat=UYVY --stream-mmap --stream-count=1 --stream-to=frame.raw” and then convert it to PNG with “ffmpeg -f rawvideo -pix_fmt uyvy422 -s 1920x1080 -i frame.raw -pix_fmt rgb24 -f rawvideo - | convert -size 1920x1080 -depth 8 rgb:- output.png”, it looks like this:
I tried all the /dev/video* devices, and it didn’t help. Also I tried to use fswebcam, which doesn’t recognize the device as camera. Any help would be appreciated!!
I’ve been trying to use the same camera with 3C and I’ve learned you need to manually setup the pipeline before you can get frames that aren’t all black pixels.
Now I’m using gstreamer to process the raw frames, instead of ffmpeg but it looks like you’re getting the same result before I found out about setting up the pipeline.
Which is kind of strange, I checked the available formats with
v4l2-ctl -d /dev/video0 --list-formats
And the list seems to include GBRG format. So, anyways, even with these settings, I still get the black screen on the photo. Are there any chances the first command is written differently?
Thanks, that worked without any errors! However, the output from camera is still black screen. I suspect it came damaged or non-functional. At this point it’s probably easier to just use a USB camera…
Thanks for the reply! I tried, unfortunately I only have Ubuntu 20.04, not 22.04, which prevents the installation:
dpkg: dependency problems prevent configuration of fswebcam:
fswebcam depends on libc6 (>= 2.34); however:
Version of libc6:arm64 on system is 2.31-0ubuntu9.
have you tried running cheese in a desktop GUI? cheese work right on of the box for me, so at that point I new the camera, wiring, etc was good before I spend a bunch of time trying to figure out the correct commands.
To use camera you need some Rockchip prebuilt packages, which are only available for Debian at the moment.
This is because our old APT key is expired. We are going to release a new Beta image for 3A soon. In the mean time you can try out this test image which I just initiated the build process: Release test-build-1 · radxa-build/rock-3a · GitHub
You can use the Debian desktop image to test your program, as our Debian CLI image does not come with Rockchip packages preinstalled.
Thanks! Unfortunately when I included “rock-3ab-rpi-camera-v1p3-ov5647” and “rk3568-npu-enable” device tree overlays using rsetup, I get kernel panic on startup. Without them, the system starts, but I don’t have the camera in /dev/video* serial.zip (4.6 KB)
I installed the image provided above, enabled the necessary overlay, used the pipeline options provided by @cgorton , and tried taking the picture. These are how they look like, when taken with console commands:
The most progress I’ve been able to notice is the appearance of faint light in the top right corner of black screen.
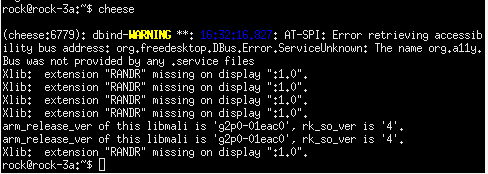
When trying the cheese option through tightvnc instance (as I unfortunately can’t make a full desktop setup for rock 3a) I get this error (which I assume for 99% is related to VNC instance settings)