Of course, here is my part list:
ROCK PI 4C - Heatsink × 1
ROCK PI 4x - M.2 Extension board v1.6 × 1
ACER M.2 NVMe SSD for Rock Pi4 - 128GB × 1
USB C 3.1 GEN2 TO M.2 NVME CASE 10GB/s - silver × 1
ROCK PI 802.3at PoE HAT - ROCK PI 4 × 1
ROCK PI 4 Model C 4GB - Board only (HDMI, DP, 2.4/5GHz WLAN, Bluetooth 5.0) - 4GB × 1
I bought my complete setup from Allnet. As for process used, here are the brief steps:
A.) Flash Debian Desktop image to SD Card using Balena Etcher
B.) Insert SD card and check RockPi4c boots properly
C.) Power down, construct board (at all steps, I pulled things apart multiple times and checked my working):
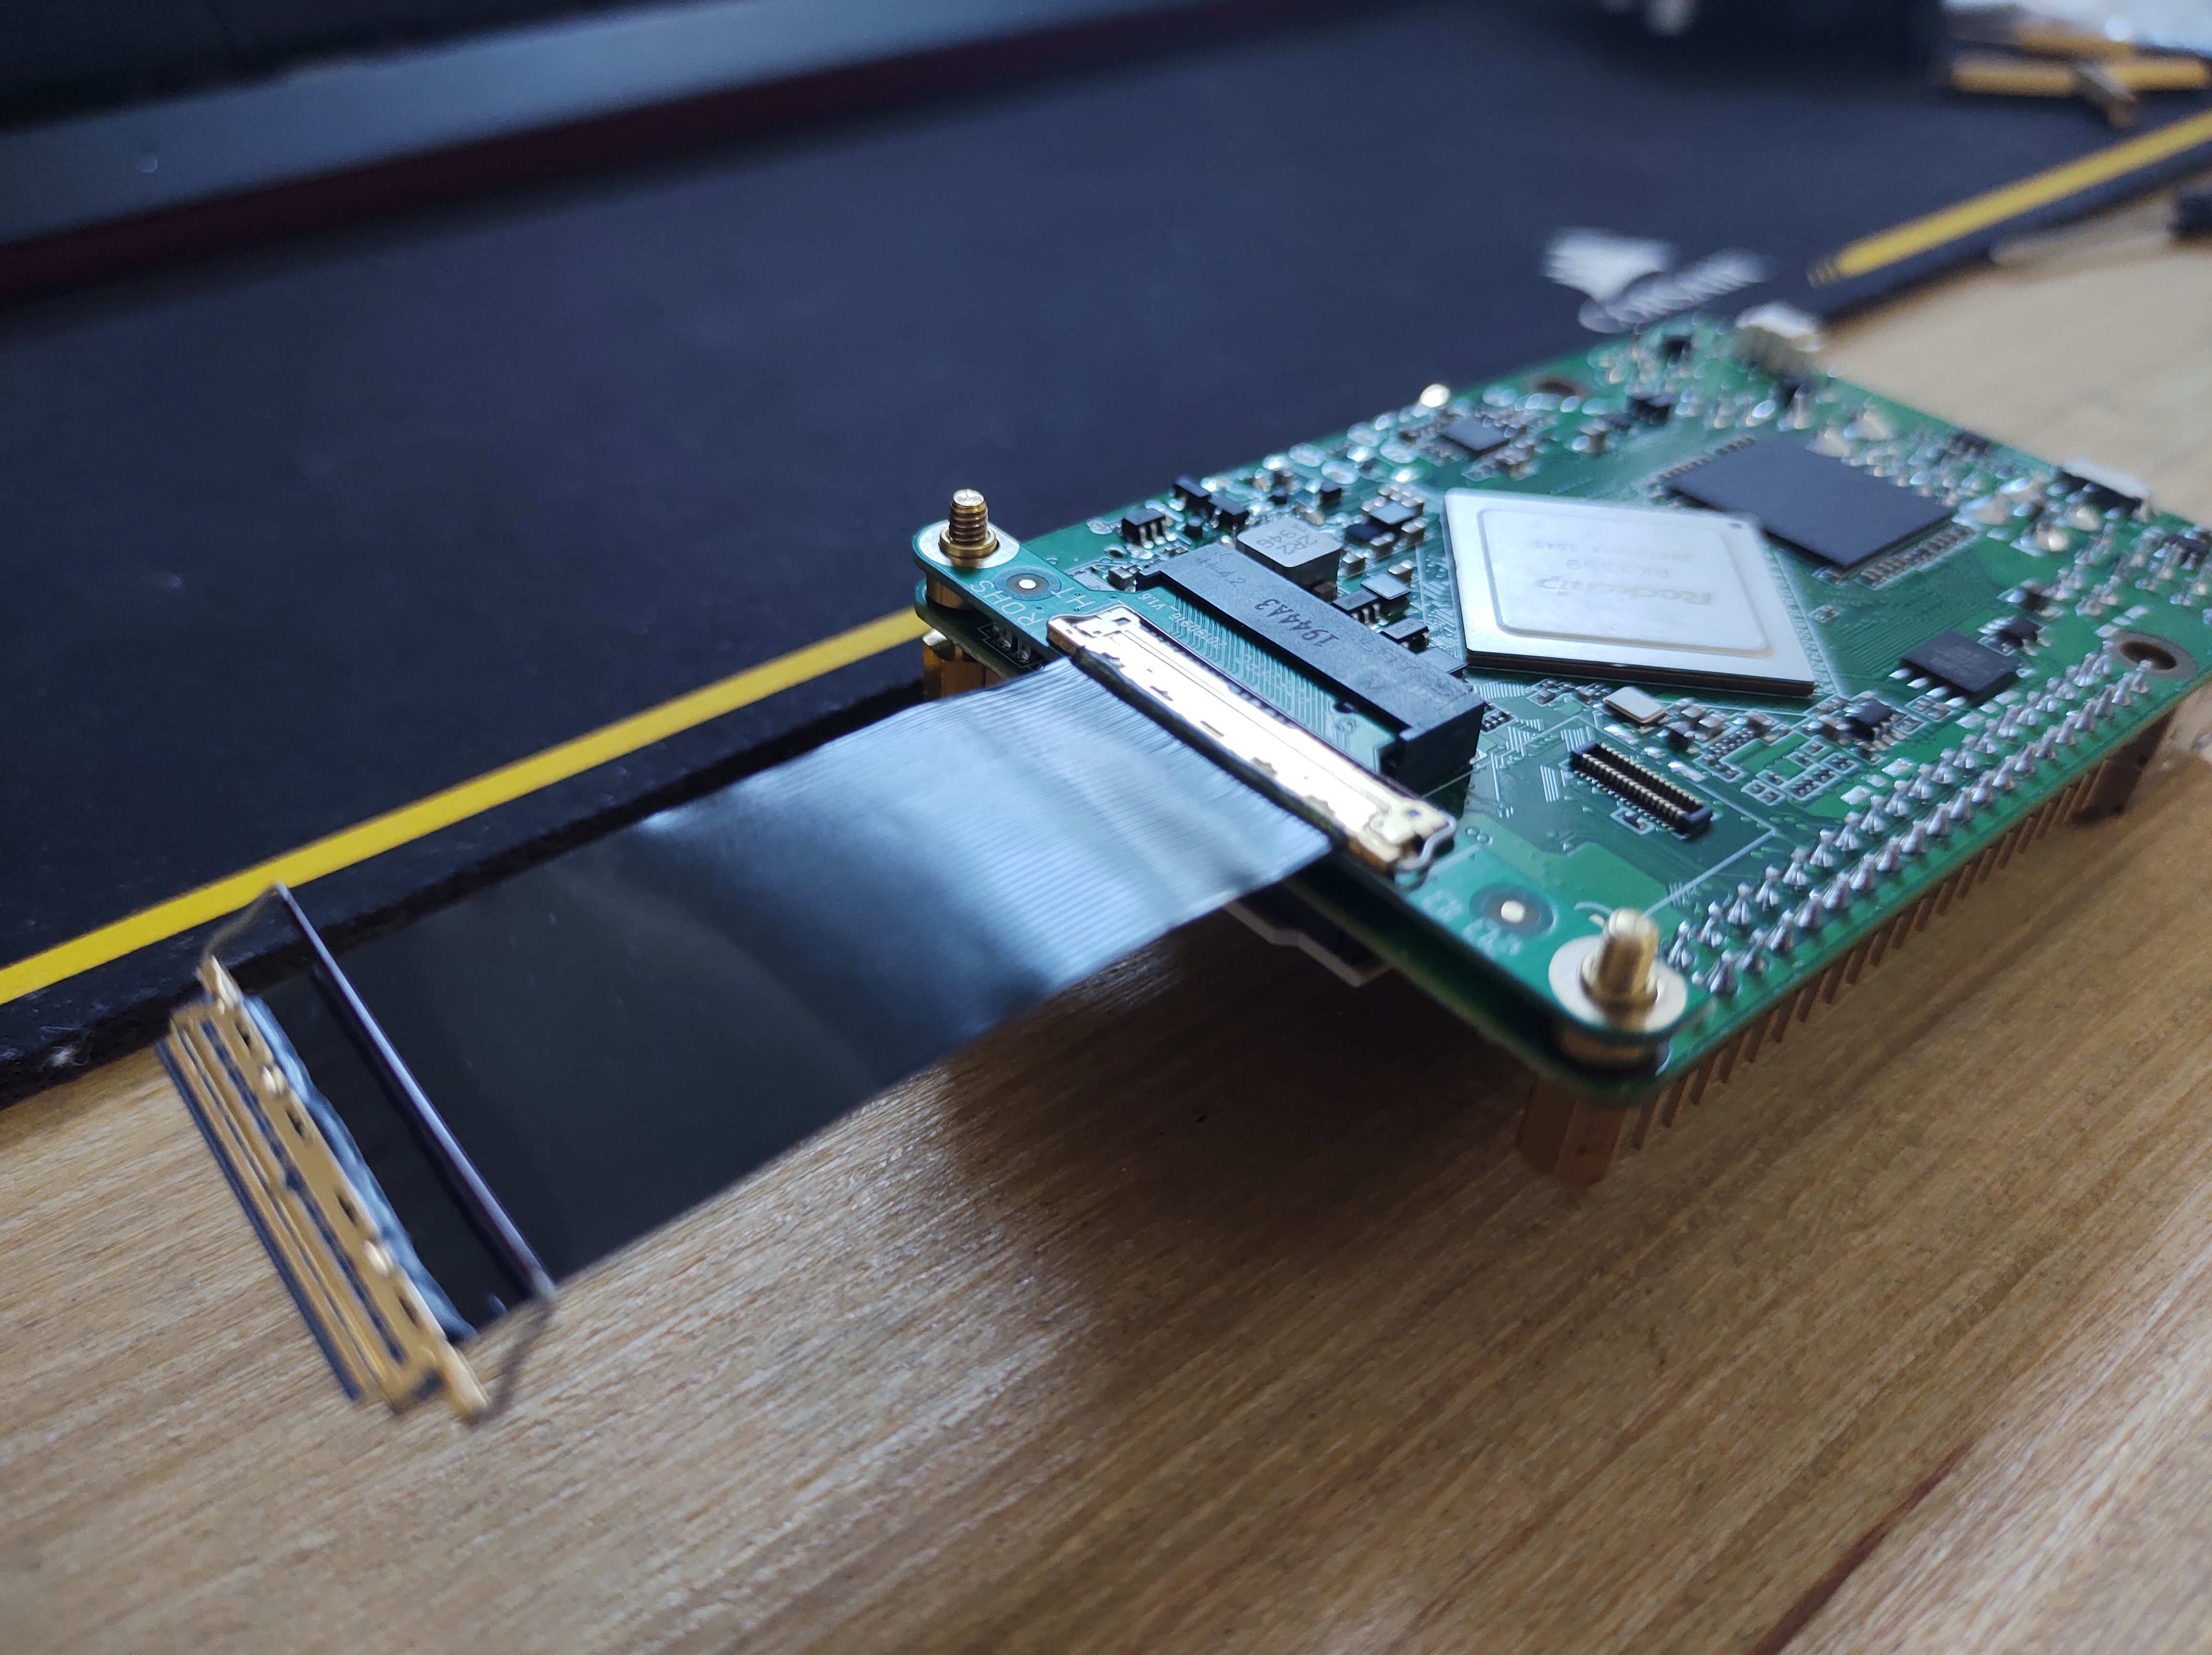
- First, insert M2 extension board to M2 slot underneath the main board. Attach ribbon cable to board (push in without flexing the cable, pull ring over the connection to securely connect) and leave flying loose
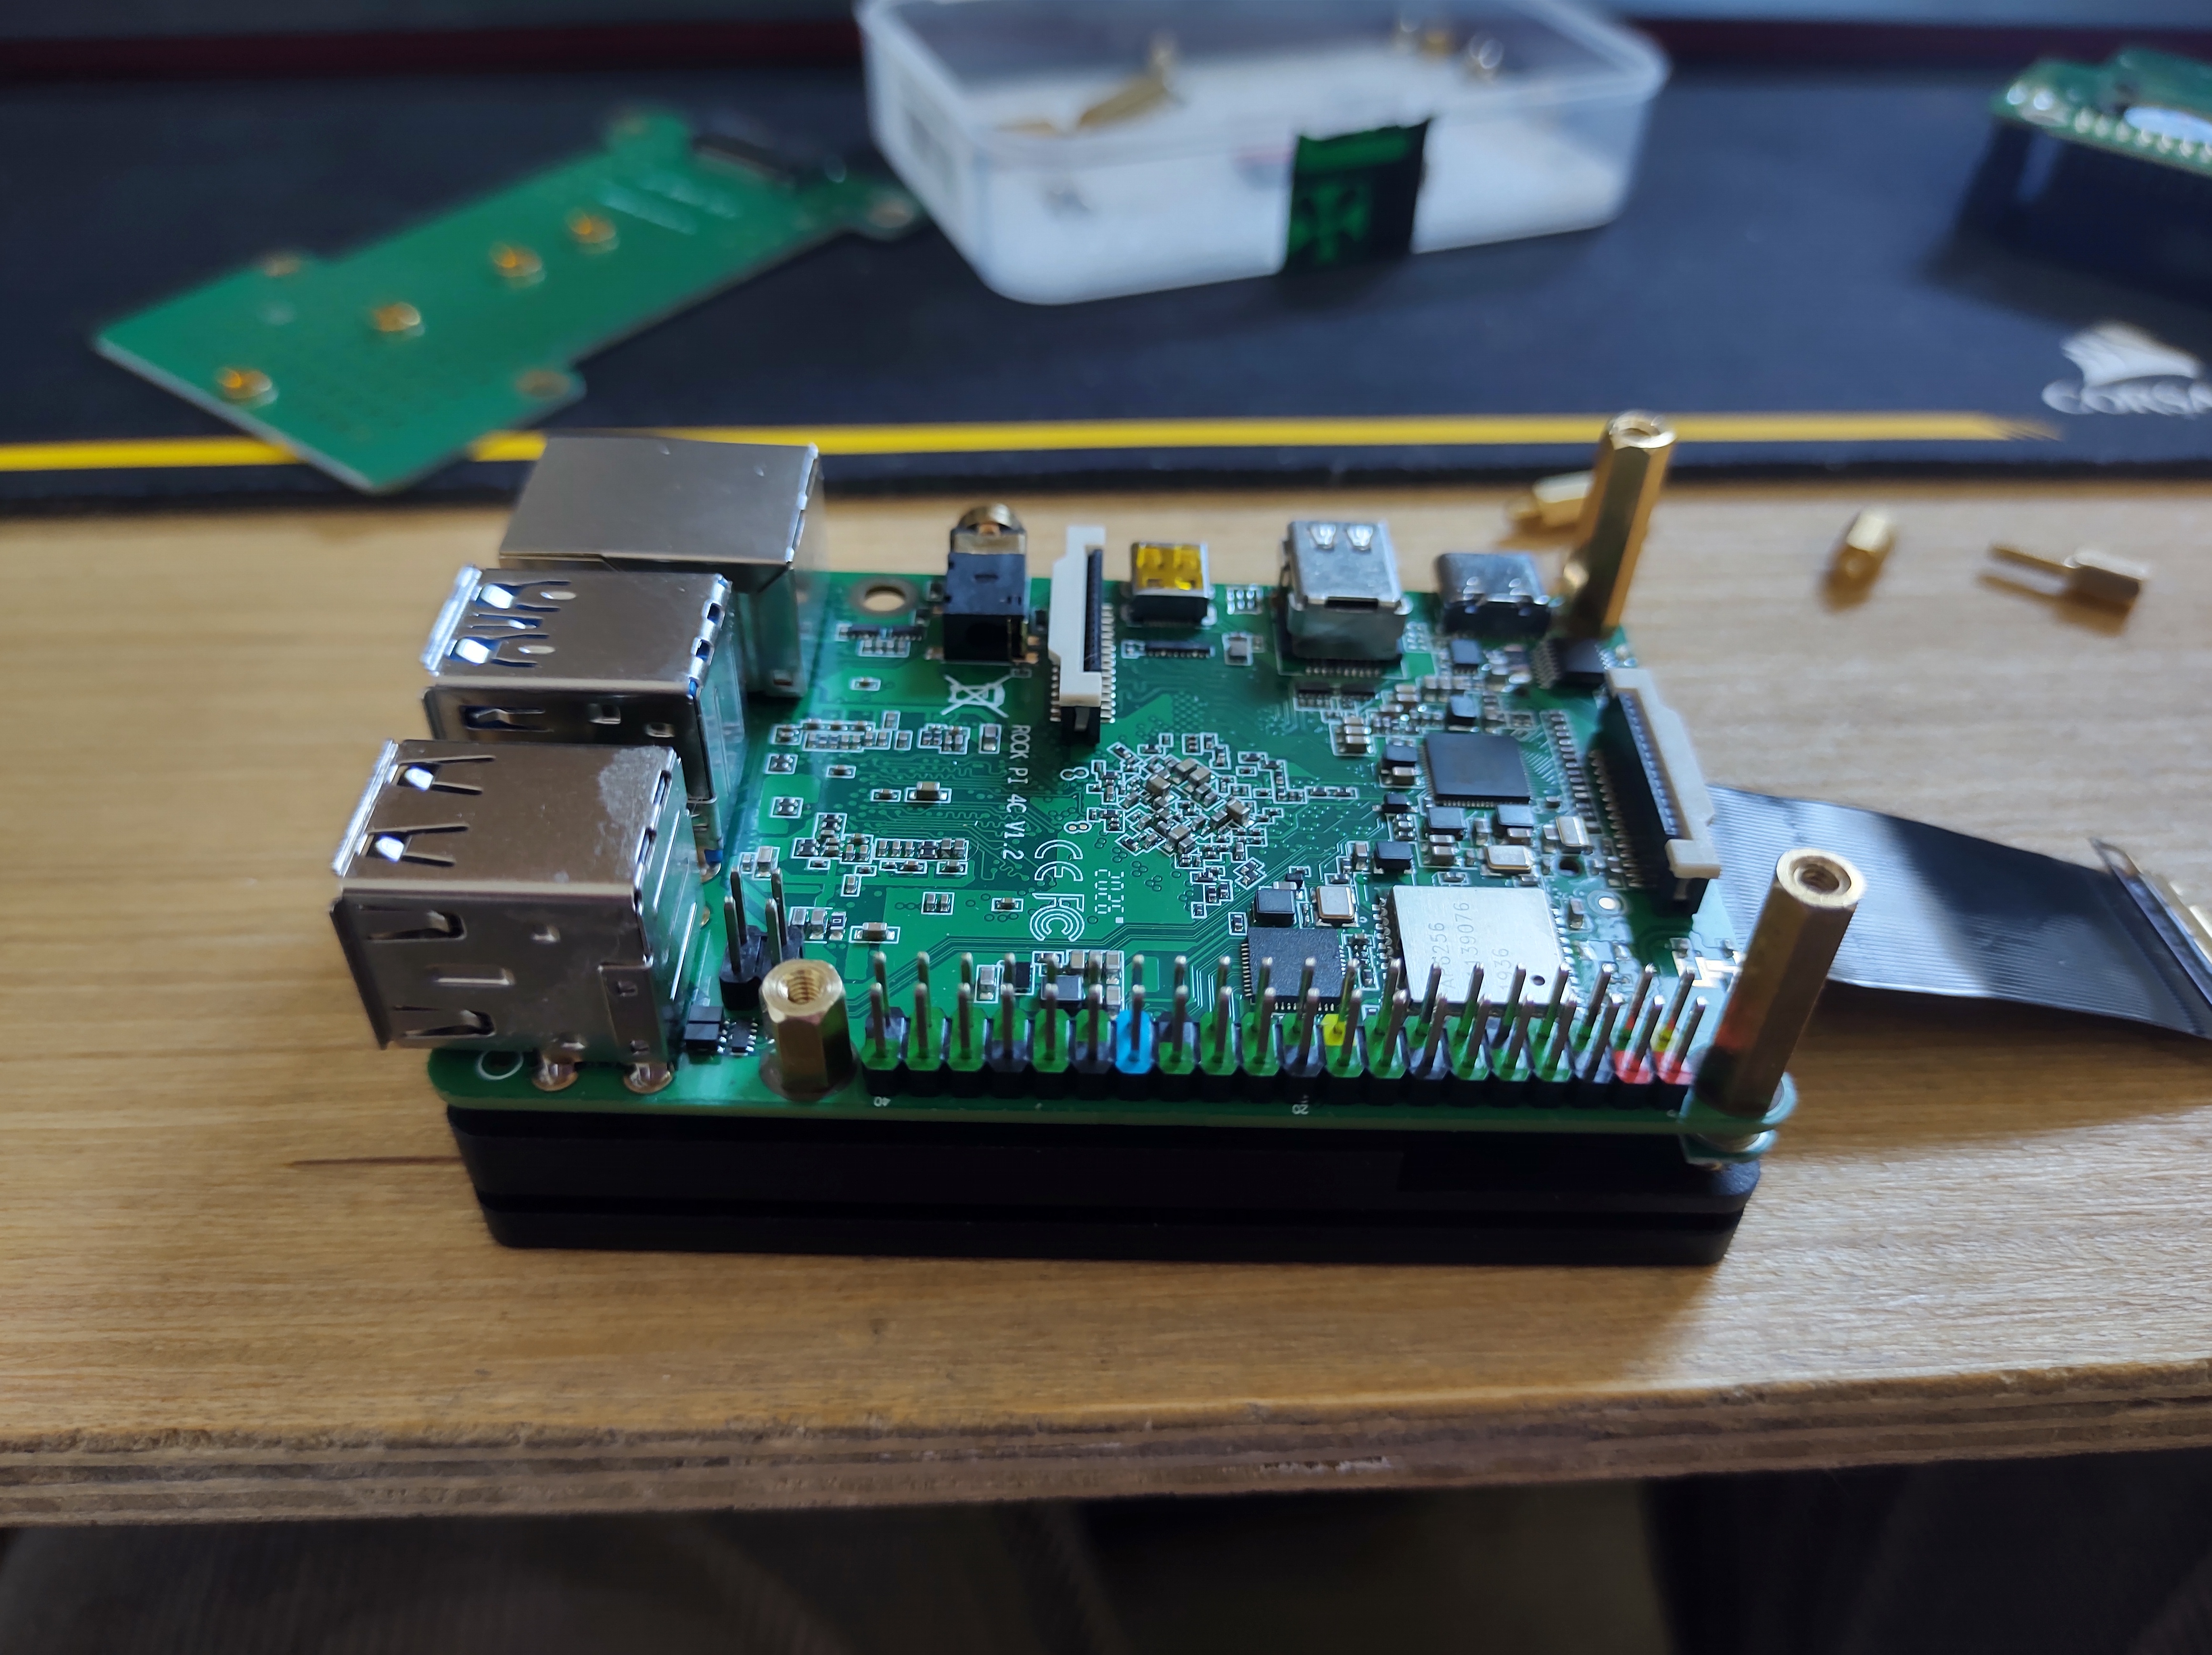
- Attach heatsink, adding a small amount of supplied thermal paste, properly spread out across the CPU plate. Remove standoffs from PoE hat. Screw new, long standoffs down through board, through M2 extension board and into heatsink. Ensure main board is flat against the heatsink! This part is tricky, as you’re screwing through two threads, but just adjust the M2 extension board on the main screw thread, it’ll be obvious after a few tries
- Add PoE hat, pressing firmly into the GPIO pins and ensure that the standoffs match the height of the PoE hat. Removing the hat is tricky - take care you don’t flex the board too much - if you can get something small to lever between the GPIO and the hat, you can gently pry the hat off
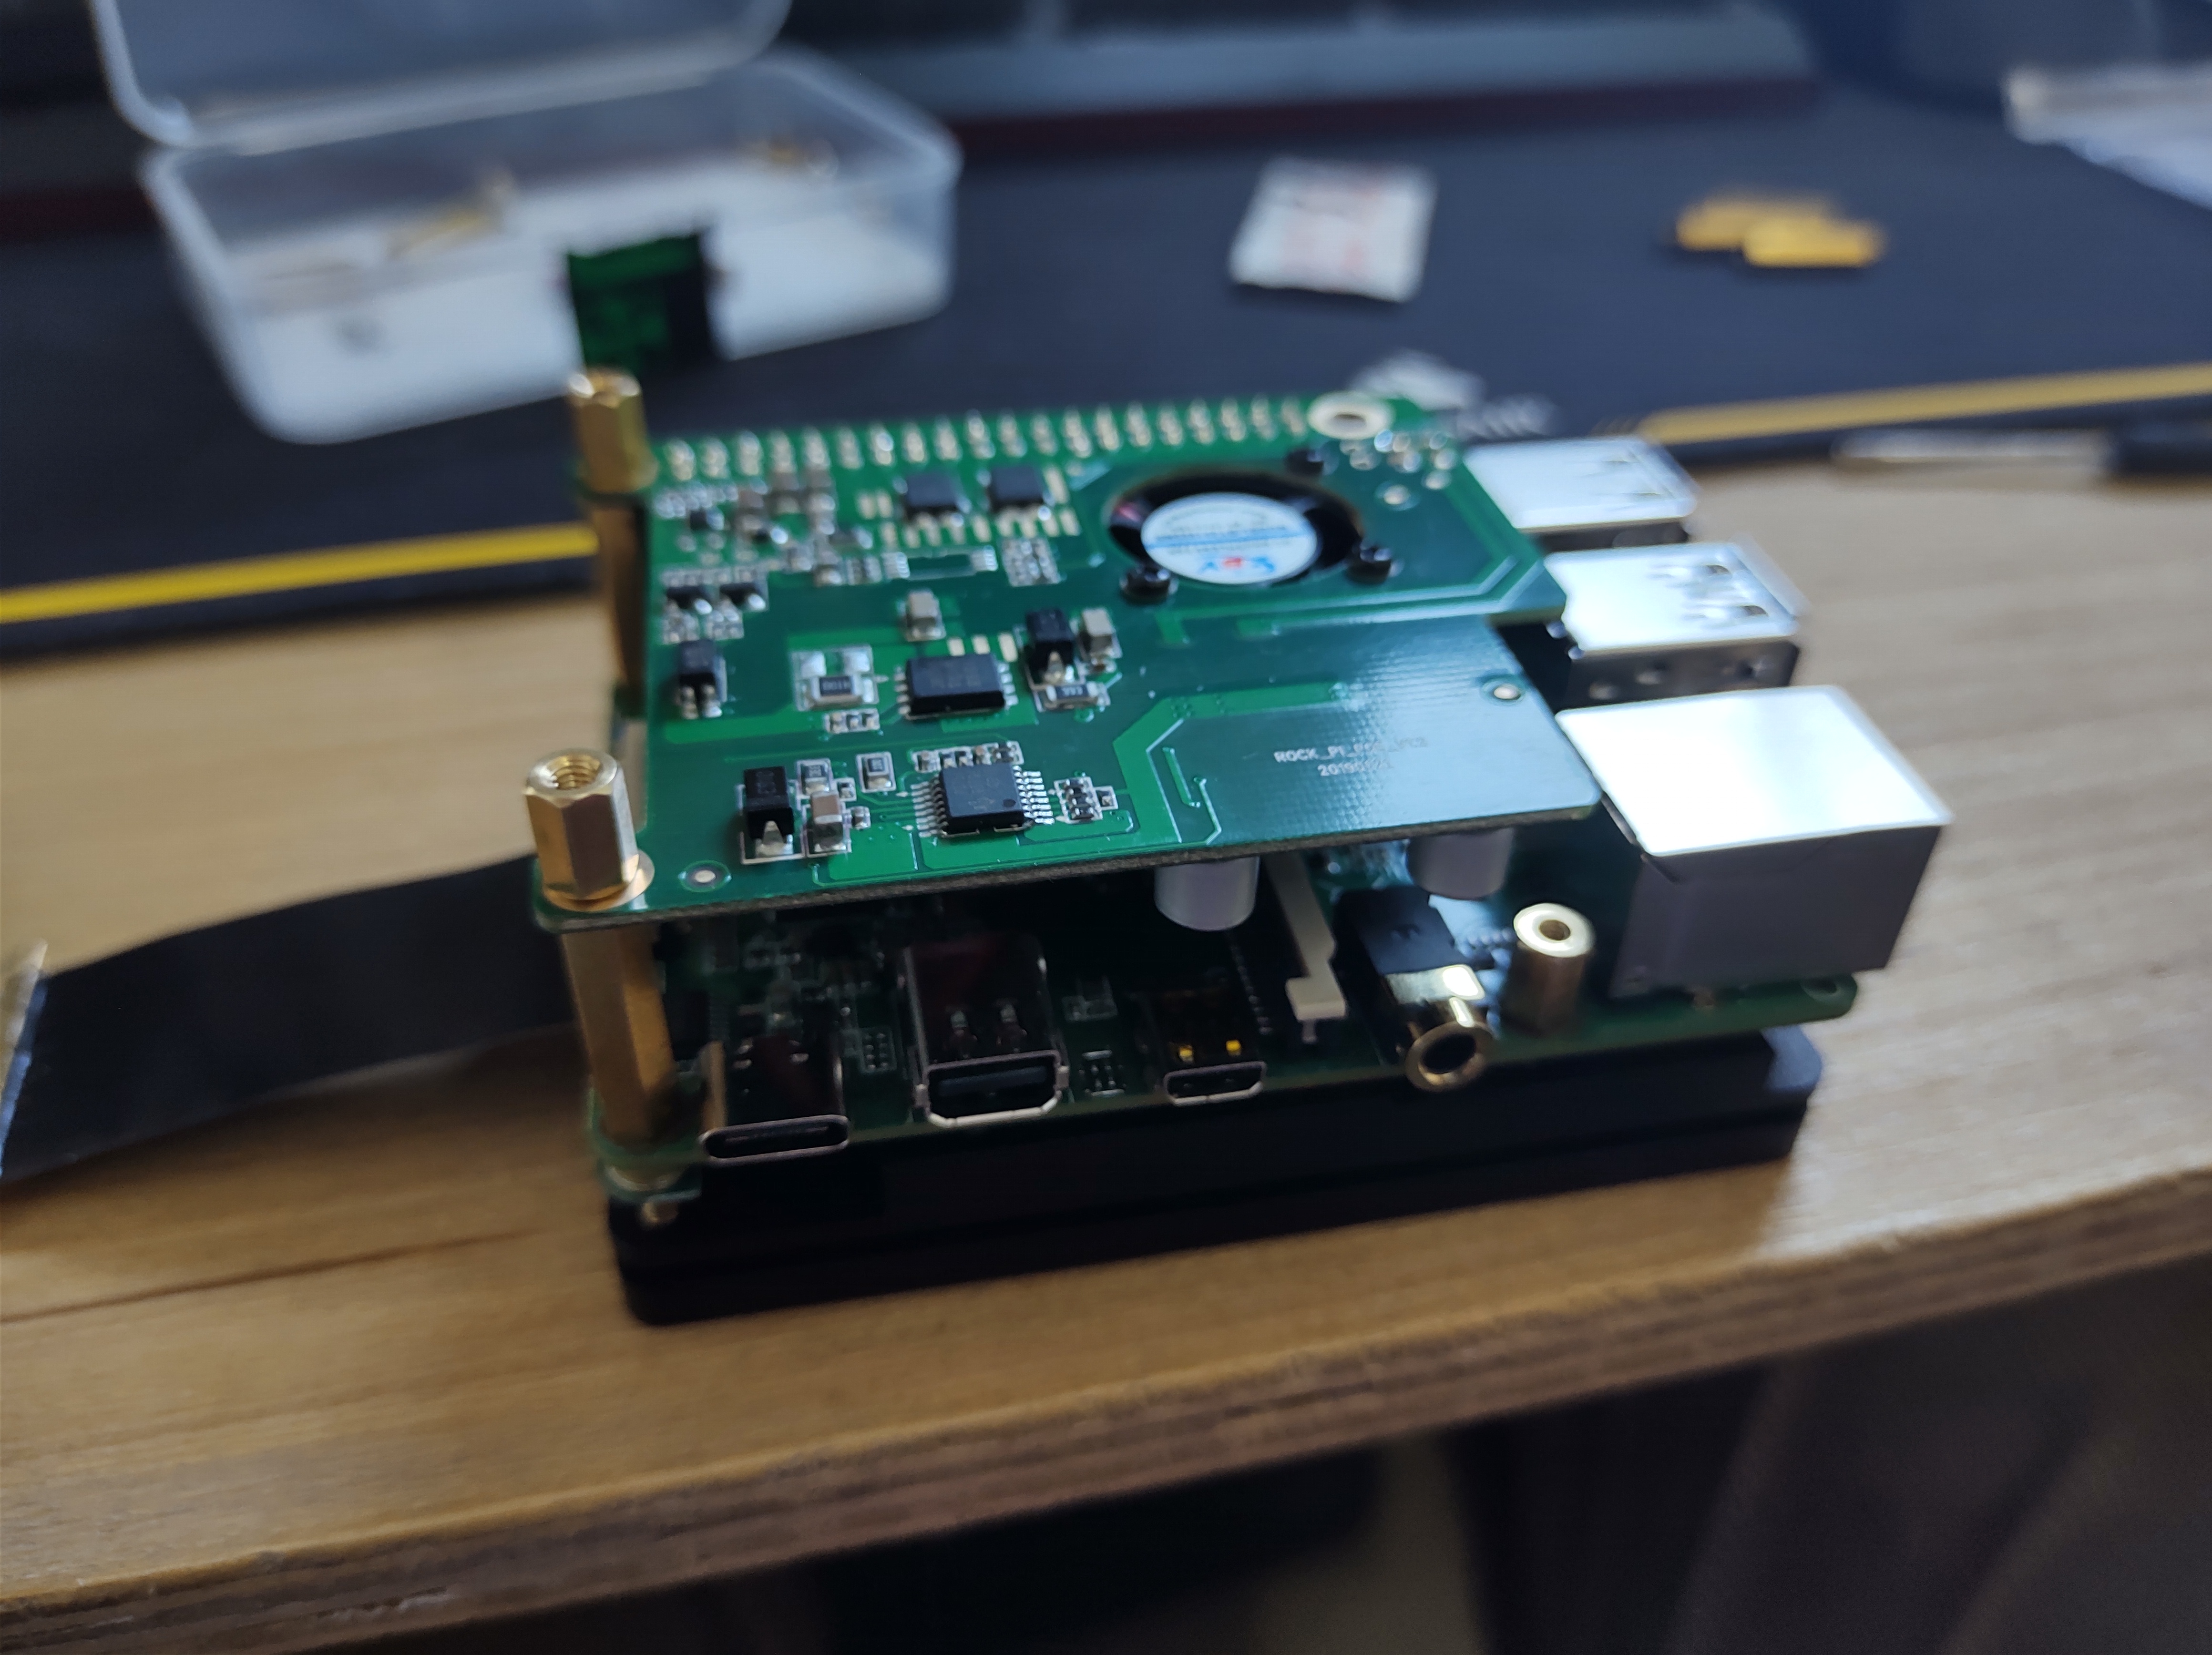
- Add further, small standoffs on top of the PoE hat, to accomodate the NVMe hat situated at the top of the unit
- Attach loose end of NVMe extension ribbon cable into the NVMe hat, then situate the hat on top of the PoE hat, with the NVMe connector facing upwards. Leave the NVMe unattached from the board for now (in the image it’s screwed down - you can see the inserted SD Card distorting the ribbon cable. Leave the board unscrewed so that you can remove the SD card with ease)
Note - I don’t have a wide array of proper standoff heights, so I just did my best. When this gets moved into it’s proper place, I’ll rebuild the unit so that it’s a little more stable!
At this point you have a working board with all the hardware attached, but to get NVMe/PoE working, you need to follow the guides (in this order):
NVMe:
https://wiki.radxa.com/Rockpi4/Linux_system_runs_on_M.2_NVME_SSD
PoE:
https://wiki.radxa.com/ROCKPI_23W_PoE_HAT
So:
D.) Follow guide (Linux_system_runs_on_M.2_NVME_SSD) to write SPI flash. This is the process that updates the bootloader, so that the device can boot directly from SPI, and then load the OS from your NVMe drive. I followed the guide to the letter, but at the end of Step 1, when I ran the command:
sudo /usr/local/sbin/rockpi4c_upgrade_bootloader.sh
I found that the command completed immediately. This is a good sign that something is not being done correctly - flashing the SPI should take 10-15 minutes. In order to write the flash manually, I ran the following two commands:
sudo /usr/local/sbin/rockpi_erase_spi_flash.sh
sudo /usr/local/sbin/rockpi4c_write_spi_flash.sh
The important piece is that you must see the output like the following:
 Writing data to block 0 at offset 0x0
 Writing data to block 1 at offset 0x1000
 Writing data to block 2 at offset 0x2000
 Writing data to block 3 at offset 0x3000
 Writing data to block 4 at offset 0x4000
 ...
Once this part is done, you are ready to go, so just write your image (I have only tested with Debian Desktop) to your NVMe drive. If you’re comfortable doing this with ‘dd’, do so via your RockPI4C by all means, but I used the external enclosure to do this from my other computer. It is important to note that the RK3399 requires 5 partitions to boot, so if you can see 5 partitions on your drive, you are probably doing the right thing (no other chip requires this kind of configuration - I had to the do the same thing with my Pine RockPro64)
E.) Insert NVMe into top hat, screw down to secure. Now you can check that it boots - remove your SD card, power on the board, and after a short delay you should see the blue activity light go on, and your OS should load. Note that at all times there is no boot screen, you’ll see some activity lights, then the desktop if you’re plugging in a screen
If you don’t get any blue light, it is (at least in my case) related to the SPI not being flashed, so ensure you saw the ‘Writing data…’ lines in D.).
F.) Finally, install the PoE drivers with:
curl -sL https://rock.sh/get-rockpi-poe | sudo -E bash -
and shutdown your board again. Finally just plug in an ethernet cable from a decent PoE switch, and you should see everything boot just as before.
G.) Buy more RockPis and run a cluster of noisemakers