ROCK 3 MODEL C: Boot from M.2 or eMMC?

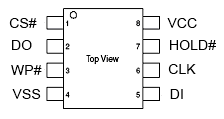
Is this SPI flash already present on the Rock3C or do I need to install an additional 25LQ128EWIG SPI flash? Can you give an example?

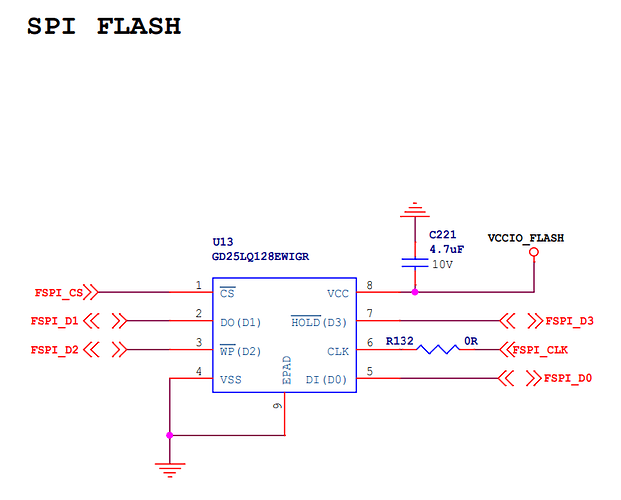
I check this Link:https://dl.radxa.com/rock3/docs/hw/3c/ROCK-3C-V1.332-SCH.pdf
page 17 is GD25LQ128EWIGR
I need a method and tool for burning SPI flash, as well as a bootloader img file.

Need RKDevTool_Release_v2.84.zip for burn SPI Flash.I updata this tool:
Link:https://pan.baidu.com/s/1JYLRJqrIlmOiiMlYxDD1eQ?pwd=5eoz
passwd:5eoz

and I find ROCK 3A not 3C burn SPI by USB-OTG :https://wiki.radxa.com/Rock3/install/spi

Next need bootloader img for burn, for start with M.2 Disk.
please release bootloader, we need try burn into Nor Flash.

Thank you.

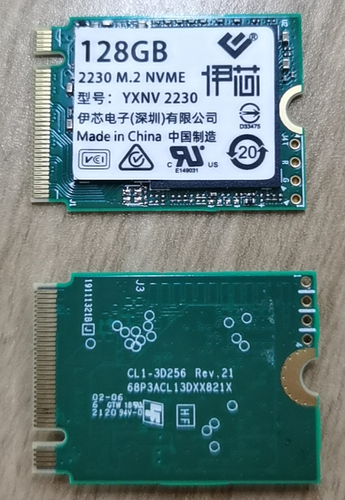
this is my M.2 chip, can’t boot on. Serial Console no any print.

Any updates on this issue?

We are in the process of upgrading ROCK 3C to Rockchip 5.10 kernel, and once it is released, it will include the support to update SPI bootloader to boot from NVMe.

1 Like

Can we expect it to be released anytime soon? Because it would make a major difference. I’ve just received the 3C model (without eMMC storage), and thought it would boot from my NVMe (which i bought for this reason). Now it would be expensive to buy eMMC, and booting from MicroSD is slow.

Hi

is booting from M.2 NVME drive working?

Hi.

I am also curious on the progression of this issue.

Was actually about to buy a couple of ROCK 3C boards, specifically because of the possibility to boot from an M.2 drive. Lucky to have found this discussion thread indicating that this actually does not work, and that radxa is not even trying to resolve the issue.

This was the only reason for considering the ROCK 3C over the Raspberry Pi 4B. Now that the Raspberry Pi supply issue has been resolved (selling locally at MSRP), guess that is the option to go for.

Too bad. Hopefully radxa gets its 5hit together. No point in designing and building a great concept board like the ROCK 3C only to not have its distinguishing features not work.

It still does not work!
Or am I doing something wrong? Here are the steps I tried:

  • Soldered the SPI flash IC onto board (W25Q128JWPIM in my case)
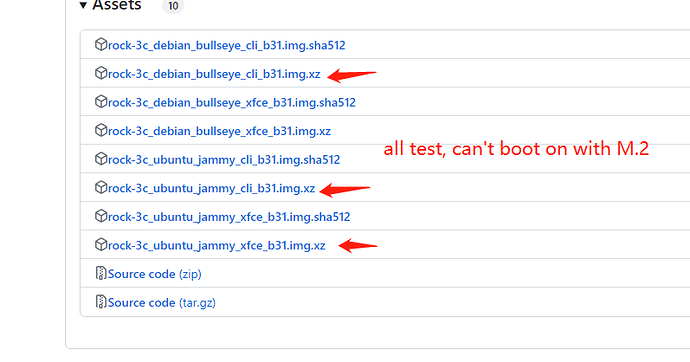
  • Download latest release (b36) from https://github.com/radxa-build/rock-3c/releases
  • Write b36 image onto sd-card and boot from it (‘uname -a’ shows kernel 5.10)
  • run ‘sudo rsetup’ -> System Maintenance -> Update SPI Bootloader
  • writing the bootloader takes about 10min
  • then shutdown, remove sd-card and start again

The output on the UART does not show any sign it wants to boot from nvme. No difference if nvme is installed or not.
image

I also tried to build u-boot myself from https://github.com/radxa/u-boot
No luck.

Can you give a detailed explanation on how to do this, since you said it would work with kernel 5.10? Thanks!

W25Q128JWPIM is not a supported SPI chip for this bootloader. We only tested with flash actually used on ROCK 3C.

Please try the following version:

DELETED as broken

Please try the following version:

image
Thats all showing on the UART. Not booting from sd-card or nvme.
Do you have another idea? Thanks!

The SPI bootloader was bad, which prevented booting. You can use a female to male jumper cable, with female end plugged in the ground on 40-pin. Then with one hand hold the male end touching the CLK pin to temporarily disable SPI boot. Use your other hand to connect the power, and you should be able to boot from microSD. Disconnect the connection when you see U-Boot is launched, so the Linux can later detect the SPI flash.

Here is an image helping you to find the CLK pin:

image

From the back of the PCB it looked like this:

==========================
      40-pin header
==========================
             5      4
short this-> 6      3
             7      2
             8      1
             Flash <- this is printed on the PCB

Once you get into the system you can clear the broken SPI bootloader.

Right now the code needs some work so I’ll not provide any more private build.

Thanks for the explanation!
Fortunately (or unfortunately?) I have experience in clearing the flash. I spent quite a few hours trying to get this to work, flashing and clearing again. I always shorted pin 1 and 4 of the flash chip with pliers when applying power, which then let me boot from sd-card again.

From the back of the PCB it looked like this:

CAREFUL: the pinout you draw is wrong! You might want to correct that. Pin 6 happens to be in the correct place though.

Is this just an issue with the W25Q128JWPIM chip? Or isn’t the GD25LQ128EWIGR chip not working as well? Can you tell how long it will take to work over the code?

Thanks. I was thinking about our 40-pin header when I label the chip pin. I have thus corrected it.

Right now with U-Boot 2023.07.02 I was not able to get NVMe working, so I’m thinking about revert back to 2023.04. GD25LQ128 should work with the bootloader shipped with the system though.

Well here is another private build bootloader. This one should support W25Q128JWPIM.

Archive.zip (697.2 KB)

Fantastic, it’s working!
Thanks so much for your help and support.
Great, you could implement the W25Q128JWPIM IC that fast.
Very much appreciated!

Quick question, I was also building the u-boot myself from https://github.com/radxa-repo/bsp. It spits out 2 files, u-boot-latest_2023.07.02-1_arm64.deb and u-boot-rock-3c_2023.07.02-1_all.deb. What is the difference between these 2 files?

Finnaly you can boot from NVMe thanks to the latest system update (b36). These are the steps that worked for me:

  • Download the latest system image (b36 for now):
    https://github.com/radxa-build/rock-3c/releases

  • Flash the system image on a MicroSD card.

  • Boot from MicroSD card.
    Run:
    "sudo apt update
    sudo apt full-upgrade --allow-downgrades

    The 2nd upgrade is to update pinned packages

    sudo apt full-upgrade --allow-downgrades
    sudo reboot"

  • Run rsetup (in command line or in Applications menu select Settings - rsetup). Select System Maintenance, and Update Bootloader, then Update SPI Bootloader (it will take some time).

  • Now you need to flash the system image again, but on NVMe drive, and this time from Rock 3C. Download and install Etcher for arm64:
    https://github.com/Itai-Nelken/BalenaEtcher-arm/releases/tag/v1.7.9 (balena-etcher-electron_1.7.9+5945ab1f_arm64.deb). Download the system image (b36) and flash it on NVMe drive using Etcher.

  • Turn off Rock 3C. Unplug it. Eject the MicroSD card. Plug the power back and that’s it.

u-boot-latest_2023.07.02-1_arm64.deb is the real package containing the bootloader. u-boot-rock-3c_2023.07.02-1_all.deb is the meta package that link the product (ROCK 3C) to the real package, so the image builder doesn’t have to hardcode which product uses which bootloader.

System upgrade is not necessary if using the latest system image. It is only for user of older image who wish to upgrade.

Can also be done from a computer if you have the hardware to write the drive.

The update and install process seems to go as described without any problem. But when I try turning it on with just the updated NVMe drive, nothing happens. No flashing blue led as when I boot from micro-sd.

I had the same issue, but after i repeated the process, it worked. Can’t explain how.
Also, don’t forget to update both bootloader, and SPI bootloader in rsetup.