Need Help: Failed to install loader/OS to Zero 3W EMMC

This is really frustrating. I read a lot of bad experiences online before I bought the 3W, I thought things would be smoother after a year, unfortunately it doesn’t seem to be the case.

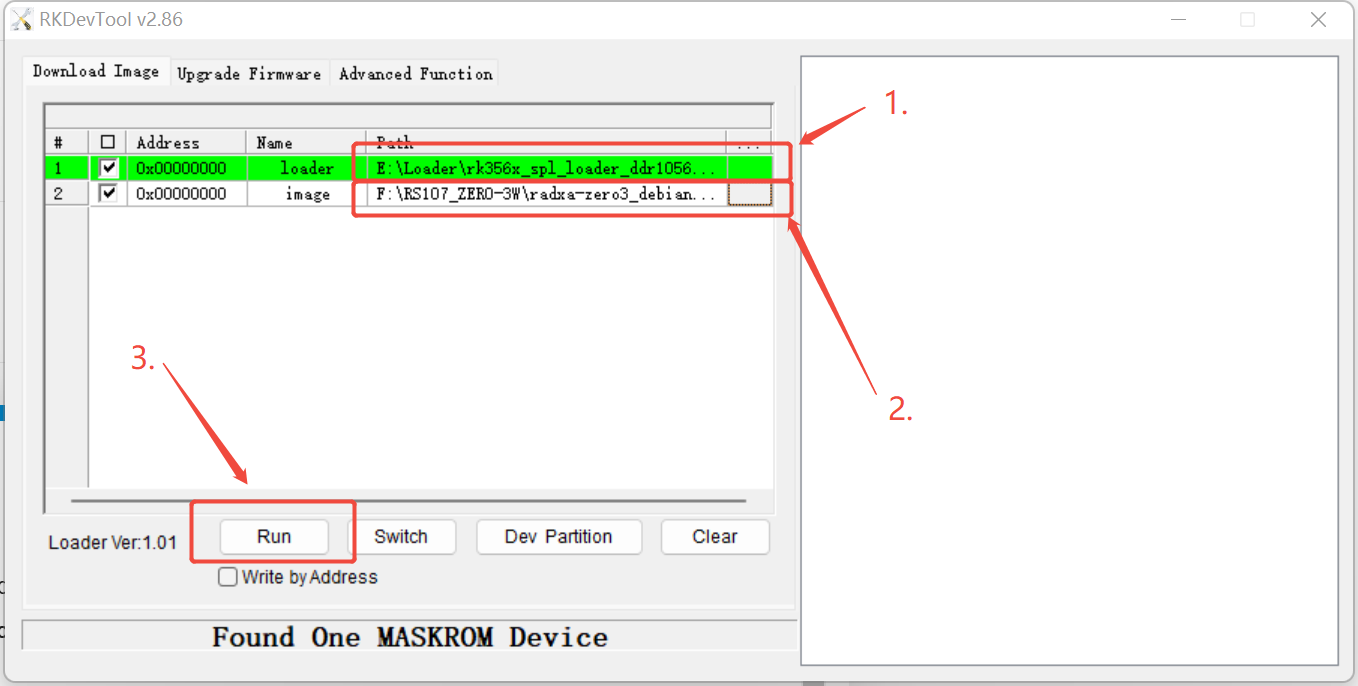
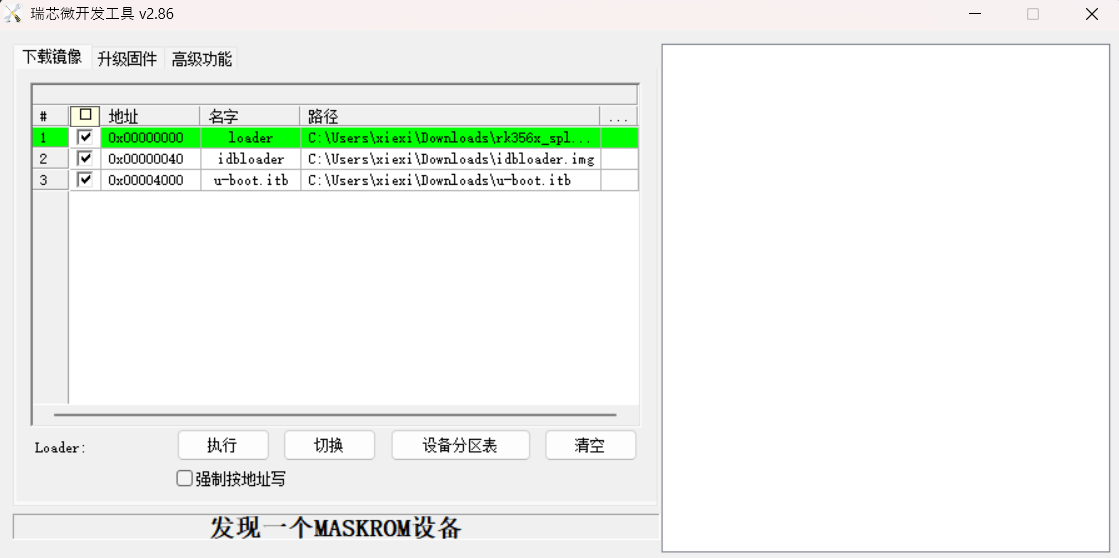
I tried to install the official Debian Bullseye image in Windows, after a few tries because of the confusing instructions, jumped back and forth between RkDevTool 2.86 and 2.96, it started giving me “Test Device Fail” and can’t go any further:

|11:06:10 718|Error:RKU_Write-->WriteFile failed,bRet=0,err=31,size=31,write=0|
|---|---|
|11:06:27 746|ERROR:RKU_ResetPipe-->DeviceIoControl failed,err=31|
|11:06:27 746|<LAYER 1-2> ERROR:TestDevice-->RKU_TestDeviceReady failed,RetCode|

Then I switched to Linux. I tried both rkdeveloptool and upgrade_tool. I can write the loader, but failed to write the image. Both tools gave me “Write LBA failed!” Here is the log of the upgrade tool:

11:57:05        Upgrade Tool v2.1

11:57:05        Current process in ~/repos/radxa/Linux_Upgrade_Tool
11:57:05        Using ~/repos/radxa/Linux_Upgrade_Tool/config.ini
11:57:05        Command Line: ./upgrade_tool wl 0 ../radxa-zero3_debian_bullseye_xfce_b6.img
11:57:05        Current Device Location ID:11
11:57:08        Error:RKU_Write failed,err=-7
11:57:08        Error: RKU_WriteLBA failed, err=-3

Here are the device infos:

Program Log will save in the /root/upgrade_tool/log/
List of rockusb connected(1)
DevNo=1 Vid=0x2207,Pid=0x350a,LocationID=11     Mode=Maskrom

Any suggestions from here?

Hi @O635789

Hope the following information helps you:

  1. It is recommended to use rkdevtools version 2.86.

  2. Connect your 3W board to the PC host using a USB A to C cable.

  3. Once Maskrom mode is detected, please select the loader and image as follows (make sure the image is extracted).

    • loader use : rk356x_spl_loader_ddr1056_v1.12.109_no_check_todly.bin
    • image use : radxa-zero3_debian_bullseye_xfce_b6.img

  1. Then, start the flashing process.

The same. It couldn’t pass “Test Device”:

|09:04:19 289|Error:RKU_Write-->WriteFile failed,bRet=0,err=995,size=31,write=0|
|---|---|
|09:04:21 304|ERROR:RKU_ResetPipe-->DeviceIoControl failed,err=31|
|09:04:21 304|<LAYER 1-8> ERROR:TestDevice-->RKU_TestDeviceReady failed,RetCode(-3),path=\\?\USB#VID_2207&PID_350A#5&38E97A59&0&8#{a5dcbf10-6530-11d2-901f-00c04fb951ed}|
|09:04:22 325|Error:Layer<1-8>:Test Device Fail|
|09:04:22 325|Layer<1-8>: RunProc is ending, ret=0|

I also tried to boot up using microSD card, it failed too. The device drew 1.2A at 5V but no signal to the display.

with the sd card there is no problem use balena etcher to load the os inside the sd card. so if it works with the emmc no, it doesn’t give video. i have tried several ways but i still can’t solve it.

with version 2.86 does not show those options, but these options

Did you burn the system into the SDCard and it didn’t boot properly? If so it could be a hardware problem.

You can contact the after-sales staff to give you a replacement

@Franklin_Murillo The options here are self-configured.

  1. Delete the last option.
  2. set the addresses of all options to 0
  3. change the name of the second option to image

That’s a bummer. I ordered it from Tmall in China and shipped through a 3rd party carrier. One more question, is CM5 a drop-in replacement of Raspberry Pi CM4? There are 3 connectors than 2, I’m wondering if I could use it on a CM4 base board like the Seeed Studio Ochin Tiny.

I just found out Radxa CM5 won’t work on Ochin Tiny (v2). It’s a known issue caused by a capacitor on the board. Seeed Studio said they were going to fix it on v2.01, but I have no idea which version I’m going to receive.

I don’t understand why there wasn’t an accurate screenshot after the product was launched over a year ago. I have to say this is Radxa’s fault.