Hi folks,
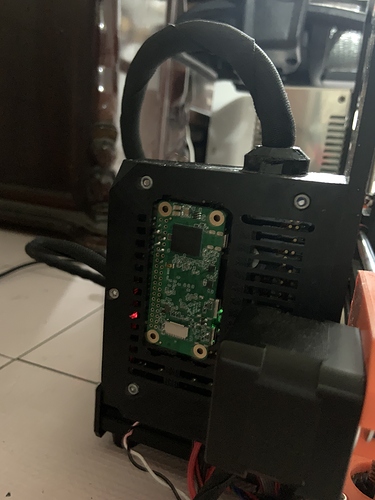
I just make Radxa zero running Octoprint and installed it to my Prusa i3 MK3s, everything works perfect, but this installation is with some hack, and I believe it can be solved by modifying the u-boot, but I am not good about the u-boot, so someone knows how to solve it, please help improve this.
Intro
Prusa i3 MK3s is designed to be able to install raspberry pi zero w onto its Einsy RAMBo, and you can gain more control over it via Octoprint. However, due to the poor computation power of rpi zero w, the CPU is not able to handle the work in time, thus producing prints with bad quality.
As Radxa zero is far more powerful, pin definition compatible with rpi zero, not a power hunger beast (also affordable by the printer board), it could be the perfect candidate to replace rpi zero and accompany with Prusa i3 MK3s nicely.
Overview
The concept is simple,
- Install system on Radxa zero and Octoprint
- Enable UART port to communicate with 3D printer
- Solder Pin, plug onto 3D printer
- Configure serial port settings in Octoprint
- Done
I will cover each step in the following section, but I will first describe the issue that I solved with a hack mentioned at beginning.
Issue
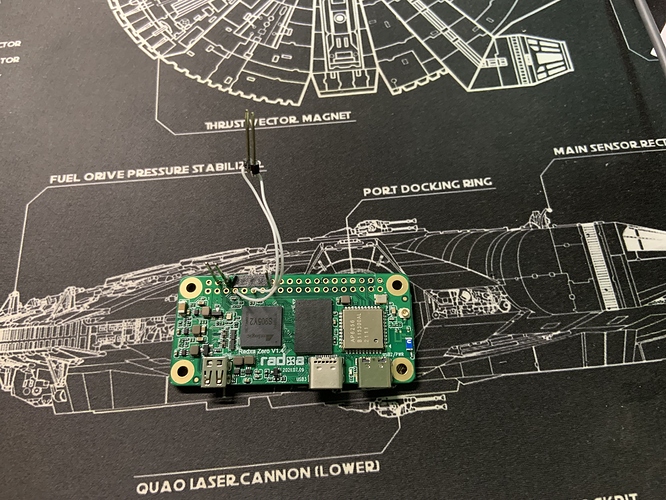
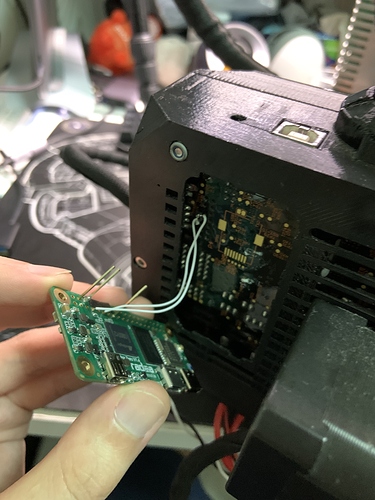
The problem is that u-boot allows interrupts during boot and is also outputting messages during boot, the messages are captured by 3D printer board, and it sends some responses, thus blocking the boot process. I then thus use some jumper wire, connect with UART_AO_B instead to physically solve this issue.
Install System on Radxa zero and Octoprint
There is nothing I could say better than referring to the official documentation. I installed Debian as my system, and install Octoprint. There is a very good post with instructions inside, just refer to it. Also, remember to configure your wifi as well.
Install Octoprint
In short of the post above, you install pip and some packages, install Octoprint via pip, then download the systemd unit, modify the user and executable to your Octoprint, add yourself into the necessary group for interacting with serial port, everything works well.
Enable UART port to communicate with 3D printer
As the issue mentioned above, I used UART_AO_B with setting overlays=meson-g12a-uart-ao-b-on-gpioao-2-gpioao-3 in /boot/uEnv.txt, feel free to use whatever UART port or pin settings you like as we will use jumper wires to connect the printer. Just make sure your console setting is not using this port as well or you will have a hard time.
Solder Pin, plug onto 3D printer
Not much to talk this part, just refer to the prusa tutorial, install these pins in the right position. But as we are not using the UART_AO_A, please leave the TXD and RXD empty, as pictures I showed (sorry that I can not insert more pictures due to the new user policy, please jump to top and view it), and use jumper wires to connect to the UART_AO_B, then install them onto the printer.
Configure serial port settings in Octoprint
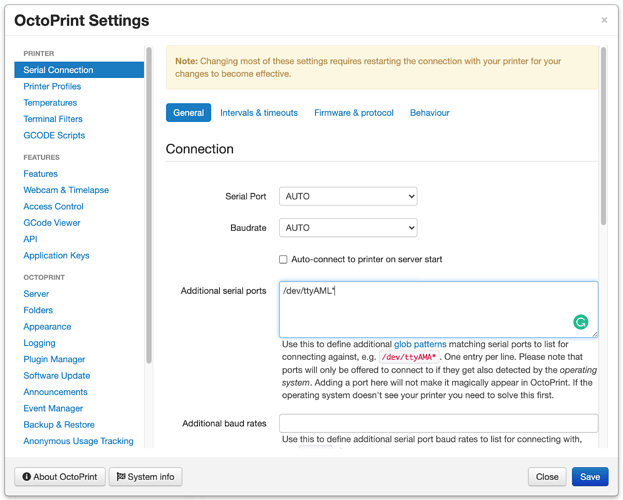
As the implementation of serial port auto-detection does not cover the /dev/ttyAML* on Octoprint, there is a simple trick to do this.
Open the settings > Serial Connection > Additional serial ports
, add the /dev/ttyAML*, and the auto-detection of your onboard serial port is good to go.
Done
Voilà! Now navigate with your browser to http://<Radxa IP>:5000, leave Serial Port and Baudrate AUTO, hit connect, you should be able to enjoy it.
Closing
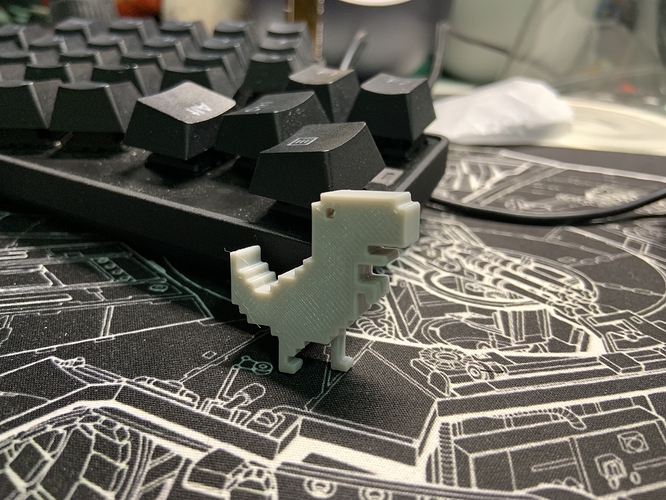
I make a small print (due to the new user policy, I will leave this picture in the comment), the print quality is just as good as printing from SD card, so yes, I think Radxa can be the perfect candidate to accompany with Prusa i3 MK3s.
As I mentioned at the beginning, there is a serial port issue during boot, which can further simplify the setup to use UART_AO_A and also increase the connection when plug onto the printer. If any one knows how to solve it, please share it!
