
![]() Arch Linux Installers for the Radxa Boards
Arch Linux Installers for the Radxa Boards ![]()
Arch Linux ⇄
Mini Arch ⇄
BredOS
Deep Guide for Arch Linux
by @boogiepop
![]() Linux UEFI
Linux UEFI
1usOS (Maybe) by @kwankiu
EndeavourOS ARM (Maybe) by @Pudge
Manjaro (Maybe) by @Spikerguy
- Flash an microSD with Arch Linux Installer
- Go into the Advance Options -> Select to install it on the EMMC
(This way you avoid having to reflash the board emmc or the sd all the dam time and all you need to do is to put the SD CARD and repeat the process).- For BredOS just flash the image you want its more hassle free.
 Arch Linux ARM (ALARM) – Major Issues & Workarounds
-
 ALARM is not officially supported by Arch Linux. Expect inconsistencies.
 -
 Mirror reliability is a common issue. You may frequently need to change mirrors.
Update your mirrors using rate-mirrors :
rate-mirrors arch
# Then manually edit if needed:
# sudo nano /etc/pacman.d/mirrorlist
Server = http://mirror.archlinuxarm.org/$arch/$repo
Server = http://de3.mirror.archlinuxarm.org/$arch/$repo
Server = http://sgp1.mirror.archlinuxarm.org/$arch/$repo
Server = http://us4.mirror.archlinuxarm.org/$arch/$repo
#These are the official mirrors if you add them should work fine.
 WiFi USB Issue on First Reboot After Installation
- During initial setup, the installer may reboot before completing configuration , and:
- Your WiFi USB adapter will not auto-reconnect .
- The process appears stuck or broken.
 Fix :
Fix :
Simply hot unplug and replug the WiFi USB dongle .
The system will detect it and reconnect automatically, allowing the installation to continue.
🖱️Pacman & Arch-Based System Maintenance Tips ▼
 Essential Pacman Commands
Check and edit your Pacman repositories:
sudo nano /etc/pacman.conf
Initialize and refresh keyring:
sudo pacman-key --init
sudo pacman-key --populate
sudo pacman-key --refresh-keys
sudo pacman -S archlinux-keyring
Fix locked database issues:
sudo rm /var/lib/pacman/db.lck
Verify installed Linux firmware packages:
pacman -Q | grep linux-firmware
System Performance & DE Fixes
Set SoC governor to performance mode:
acu soc performance
Fix missing icons in some desktop environments:
sudo pacman -S librsvg
Force reinstall and overwrite all files (last-resort system fix):
sudo pacman -S --overwrite "*" $(pacman -Qqn)
Chromium Browser Tweak
Enable GTK4 support in Chromium:
sudo nano /etc/chromium.d/default-flags
Add this line:
export CHROMIUM_FLAGS="$CHROMIUM_FLAGS --gtk-version=4"
ARM Configuraton Utility aka ACU
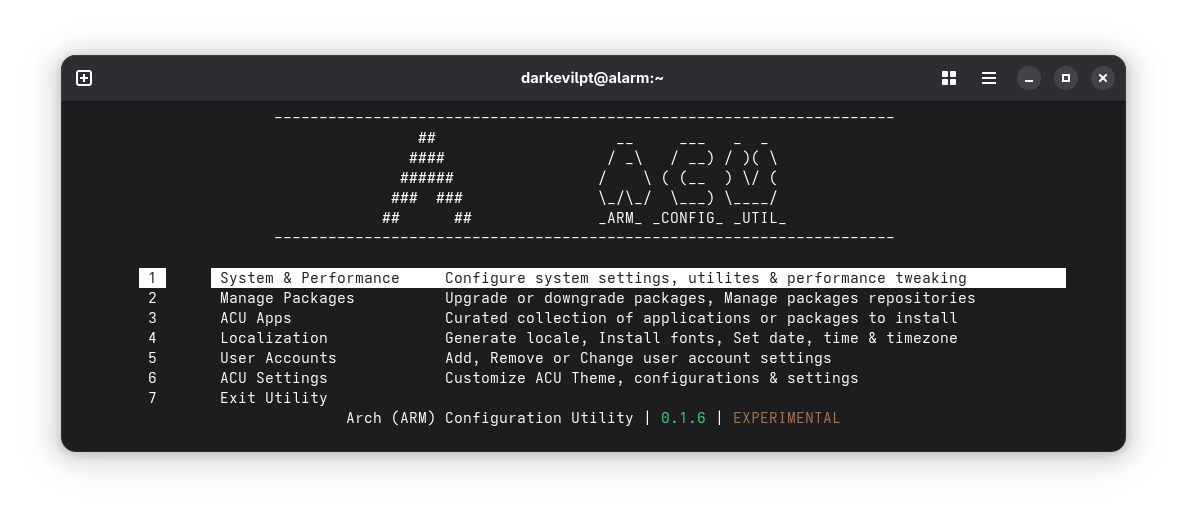
ACU is a community-built tool designed for managing configurations and packages on Arch Linux ARM (still in beta development).
- Type -
'acu'- acu install app -y # -y will work as expected ex:acu -y install chromium - Try
acu --update=devfor the dev branch. Tryacu -uandacu updatefor that updated status. - For everyone:
bash <(curl -fsSL https://raw.githubusercontent.com/kwankiu/acu/main/acu) -u
 Web Browser
This guide shows how to install the Chromium browser with or without Rockchip MPP support, including Flatpak alternatives.
 Chromium with Rockchip MPP Support
Install the version optimized for Rockchip hardware acceleration :
acu install chromium -y
 Arch Linux Official Chromium
Install the latest official Chromium from the Arch Linux repositories:
acu -y install extra/chromium
Chromium via Flatpak (Cross-Distro)
Set up Chromium using Flatpak :
acu install flatpak -y
sudo flatpak remote-add --if-not-exists flathub https://dl.flathub.org/repo/flathub.flatpakrepo
sudo flatpak install flathub org.chromium.Chromium -y
sudo flatpak update -y
Flatpak ensures a sandboxed, up-to-date Chromium experience across most Linux distributions.
🪁 Fan options 
 Non-GPIO Fan Fix for Arch Linux
Note: The current kernel already includes this fix, but I’m leaving the instructions here for future reference.
Clone and Set Up the Fan Control Script
git clone https://github.com/XZhouQD/Rock5B_Naive_Pwm_Fan
cd Rock5B_Naive_Pwm_Fan/
cp fan_pwm /usr/local/bin/
chmod +x /usr/local/bin/fan_pwm
cp fan_pwm.service /etc/systemd/system/
systemctl daemon-reload
systemctl start fan_pwm
systemctl enable fan_pwm
This will install and enable the custom fan controller.
 Manual Fan Management
Prevent the system from automatically controlling the fan:
sudo pacman -S i2c-tools --noconfirm
echo user_space | sudo tee /sys/class/thermal/thermal_zone0/policy
sudo i2cset -y -f 2 0x18 0x8A 0x20
Fan Speed Reference:
0x41= 50%0x64= 100%
 Wifi and BT Tricks
 Wi-Fi & Bluetooth Setup for Intel AX210 (Firmware Installation Example)
Note: An Ethernet connection is required to install the necessary firmware for AX210 Wi-Fi and Bluetooth functionality.
 Wi-Fi Firmware Installation
Download and install the Wi-Fi firmware:
# Download AX210 Wi-Fi firmware
sudo wget -P /lib/firmware https://git.kernel.org/pub/scm/linux/kernel/git/firmware/linux-firmware.git/plain/iwlwifi-ty-a0-gf-a0-59.ucode

# Backup existing PNVM firmware file (if present)
sudo mv /lib/firmware/iwlwifi-ty-a0-gf-a0.pnvm /lib/firmware/iwlwifi-ty-a0-gf-a0.pnvm.bak
 Bluetooth Firmware Installation
Download the Bluetooth firmware files:
# Download Intel Bluetooth firmware files
sudo wget -P /lib/firmware/intel https://git.kernel.org/pub/scm/linux/kernel/git/firmware/linux-firmware.git/plain/intel/ibt-0041-0041.sfi
sudo wget -P /lib/firmware/intel https://git.kernel.org/pub/scm/linux/kernel/git/firmware/linux-firmware.git/plain/intel/ibt-0041-0041.ddc
Bluetooth Module Fix for Intel Wi-Fi/BT
- Open the blacklist configuration file:
sudo nano /etc/modprobe.d/blacklist.conf
- Add the following lines (you can place them at the bottom of the file):
blacklist pgdrv
blacklist btusb
blacklist btrtl
blacklist btbcm
#blacklist btintel
- Save and exit:
- Press
Ctrl + X, thenY, and hitEnter.
Final Bluetooth Setup
bluezorbluetoothis not required on the latest versions of Arch Linux.
# Check Bluetooth service status
systemctl status bluetooth

# Start Bluetooth service
systemctl start bluetooth
 Reboot your system to apply all changes.
📢 Audio options 
 Bluetooth Audio Setup Tutorial (Optional)
The following steps offer useful information for troubleshooting or improving Bluetooth audio support.
 Install Required Audio Packages
acu install pulseaudio pulseaudio-alsa pavucontrol pulseaudio-bluetooth pulseaudio-equalizer paprefs
 Start PulseAudio
pulseaudio --start
Switch from PulseAudio to PipeWire
# Reload user services
systemctl --user daemon-reload

# Disable PulseAudio services
systemctl --user --now disable pulseaudio.service pulseaudio.socket

# Enable PipeWire and PipeWire-Pulse
systemctl --user --now enable pipewire pipewire-pulse
 Verify Audio Server
pactl info
Final Step
Reboot your system:
reboot
💽 Flashing Software 
 Flashing Images via Rockchip Dev Tools (Windows)
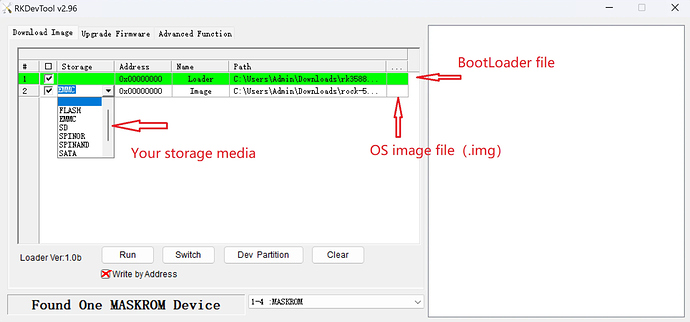
Use the Rockchip Dev Tools ( rkdevtools ) application on Windows to flash firmware images.
 Step 1: Image Preparation
Decompress the image files properly:
- Use WinRAR to extract
.img.xzfiles. - Do NOT use the built-in Windows “Extract All” option — it may fail or corrupt the image.
 Step 2: Image Flashing Settings
In rkdevtools , set the following options:
-
Tick “Write by Address” .
Step 3: Bootloader File
Use the appropriate Rockchip bootloader SPL file for your device:
-
 File Name: rk3588_spl_loader_v1.15.113.bin
-
This applies to RK3588 / RK3588S / RK356x / RK35xx / RK3328 / RK3399 / RK3582 / RK3566 / RK3568 / RK3588S / RK3528 / RK3576 , etc.
Download it from official sources or refer to the Radxa Docs for the latest version and usage guide.
🥛 App Manager Hubs 
 App Management on Linux
FlatHub: Access Hundreds of Linux Apps and Games
Set up Flatpak and add the FlatHub repository:
acu -y install flatpak
sudo flatpak remote-add --if-not-exists flathub https://dl.flathub.org/repo/flathub.flatpakrepo
sudo flatpak update -y
This gives you access to a wide selection of apps and games available on FlatHub.
Bauh: Manage Apps from Multiple Sources
Install Bauh , a graphical package manager that supports Flatpak, AppImage, Snap, AUR, and more:
acu -y install bauh
 Bauh provides a unified interface to manage packages from different ecosystems.
🎢 Package Managers Builders ⌨️
🐧 Universal Package Management (UPT)▼
"One command to manage all the packages on all the distributions."
Install Dependencies
sudo pacman -S gcc make rustup
Install UPT
rustup default stable
cargo install upt
Add Cargo to PATH
Edit your bash profile:
nano ~/.bash_profile
Add this line:
export PATH="$PATH:$HOME/.cargo/bin"
Then reboot your system:
sudo reboot
You can now use commands like sudo upt update , sudo upt upgrade , and more.
🥤YaY - Yet another Yogurt:▼
An AUR helper written in Go.
Unlikepacman, Yay installs packages from both the official repos and the AUR.
Install Yay
sudo pacman -Syu
sudo pacman -S --needed base-devel git
git clone https://aur.archlinux.org/yay.git
cd yay
makepkg -si
yay --version
🏝️ Paru – Minimal AUR Helper ▼
A modern, user-friendly AUR helper with low interaction and many features.
Install Paru
sudo pacman -S --needed base-devel
git clone https://aur.archlinux.org/paru.git
cd paru
makepkg -si
👊🏼 AGR - Arch Git Repositories:▼
🧠 ARB – Package/Repo Builder by 7Ji:▼
ARB is a package builder - repo builder
 Graphics Acceleration / Performance
Panfrost Graphics Tuning (Wayland) with LiuJianFeng & PPA Fork
This section covers performance tuning for CPU, GPU, NPU, and DDR on systems using Panfrost graphics and Wayland , including the OpenCL runtime ( libmali ).
 Manually Set Performance Governors
Edit or manually apply performance settings to optimize system responsiveness:
# Optional: View current DDR governor
sudo nano /sys/class/devfreq/dmc/governor

# Set performance mode for CPU, GPU, DDR, and NPU
echo performance | sudo tee /sys/devices/system/cpu/cpufreq/policy6/scaling_governor
echo performance | sudo tee /sys/class/devfreq/fb000000.gpu/governor
echo performance | sudo tee /sys/class/devfreq/dmc/governor
echo performance | sudo tee /sys/class/devfreq/fdab0000.npu/governor
Apply SoC-Wide Performance Mode
Use the acu tool to enforce performance mode across the system-on-chip:
acu soc set performance
This ensures all subsystems (CPU, GPU, DDR, NPU) operate under the performance governor.
 Android Linux
acu install waydroid -y
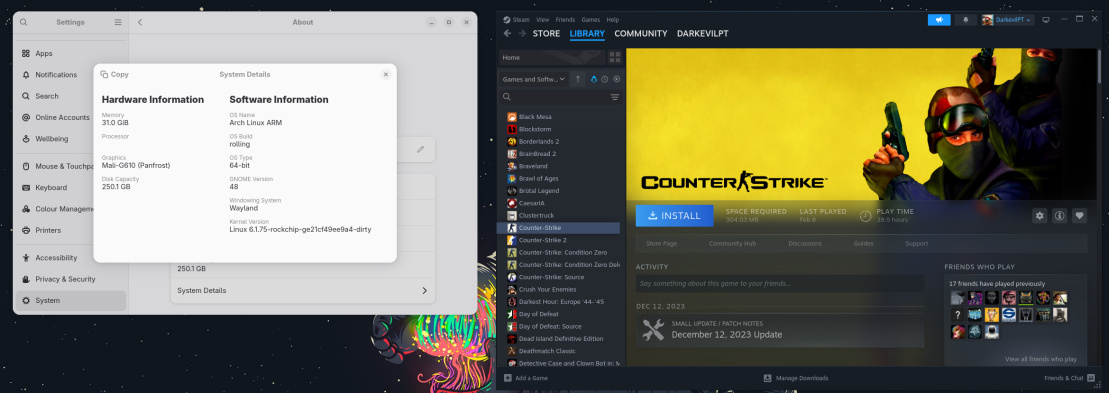
🎮 Steam 
 Steam Setup on BredOS (Multilib Support)
Install Steam and configure it for your specific GPU setup by BredOS using the acu tool.
Step 1: Add BredOS Multilib Repository
echo -e '\n[BredOS-multilib]\nSigLevel = Optional TrustAll\nServer = https://repo.bredos.org/repo/$repo/$arch' | sudo tee -a /etc/pacman.conf && sudo pacman -Sy
# sudo nano /etc/pacman.conf #if you need to check something
Step 2: Install Steam
acu install BredOS-multilib/steam
Step 3: Library Selection (Choose Based on Your GPU)
During installation, you’ll be prompted to select a Vulkan/Steam runtime library:
-
 Option 5:
 lib32-vulkan-swrast
(For general compatibility or fallback software rendering) -
 Option 1:
 steam-libs-any
(Recommended for Panthor users) -
 Option 2:
 steam-libs-rk3588
(Recommended for Panfork or RK3588 devices)
Step 4: Run Games with Improved Compatibility
In Steam Settings → Game Launch Options , use the following flag to improve compatibility:
-force-opengl
Also make sure you’re running games with the latest non-experimental Proton version.
Desktop Ricing #Unixporn
🛠️ Tweaks and Shell Extensions 🔧
Install GNOME Tweaks and Extension Tools
acu install gnome-tweaks gnome-shell-extensions gnome-browser-connector fakeroot git dpkg --noconfirm
Open GNOME Tweaks
Launch Tweaks , and under the “Titlebar” section:

-
Enable Titlebar Buttons (e.g., minimize/maximize)
(Why is this even disabled by default…)
Install and Manage Extensions
Visit extensions.gnome.org to browse and install GNOME Shell extensions.
You can now install popular extensions like:


-
 User Themes – Load custom GTK/Shell themes.
 -
 Dash to Panel or Dash to Dock – Enhance the GNOME panel/dock experience.
 -
 Freon or Vitals – Show temperature, CPU/GPU/RAM usage, and more.
 -
 Compiz-like Wobbly Windows – Add window wobble effects for nostalgia.
 -
Burn My Windows – Add animated window closing effects to spice things up.
 Rice your Desktop
Rice Your Desktop – Themes, Icons, and Shell Style
Customize the look and feel of your Linux desktop using themes, icon packs, and wallpapers.
Step 1: Download Customization Files
 Download your chosen
 Save them to your Downloads directory.
 Step 2: Extract Themes and Icons
cd Downloads

# Extract theme
sudo tar -xf Graphite-teal-nord-rimless.tar.xz -C /usr/share/themes

# Extract icon pack
sudo tar -xf Zafiro-Nord-Black.tar.xz -C /usr/share/icons

# Optional: Use another theme
sudo tar -xf Cold-Metal-No-Logo-GTK.tar.xz -C /usr/share/themes
 Step 3: Create User Theme & Icon Folders (If Needed)
mkdir -p ~/.themes ~/.icons
 You can also change ownership/permissions if needed for easier access:
sudo chown -R $USER:$USER ~/.themes ~/.icons
Step 4: Enable User Themes Extension
Use GNOME Tweaks and GNOME Shell Extensions to enable the User Themes extension.

 Step 5: Apply Themes in GNOME Tweaks
- Open the Tweaks application
- Go to the “Appearance” section
- Select your desired:
- Applications theme
- Shell theme
- Icon pack
- Cursor
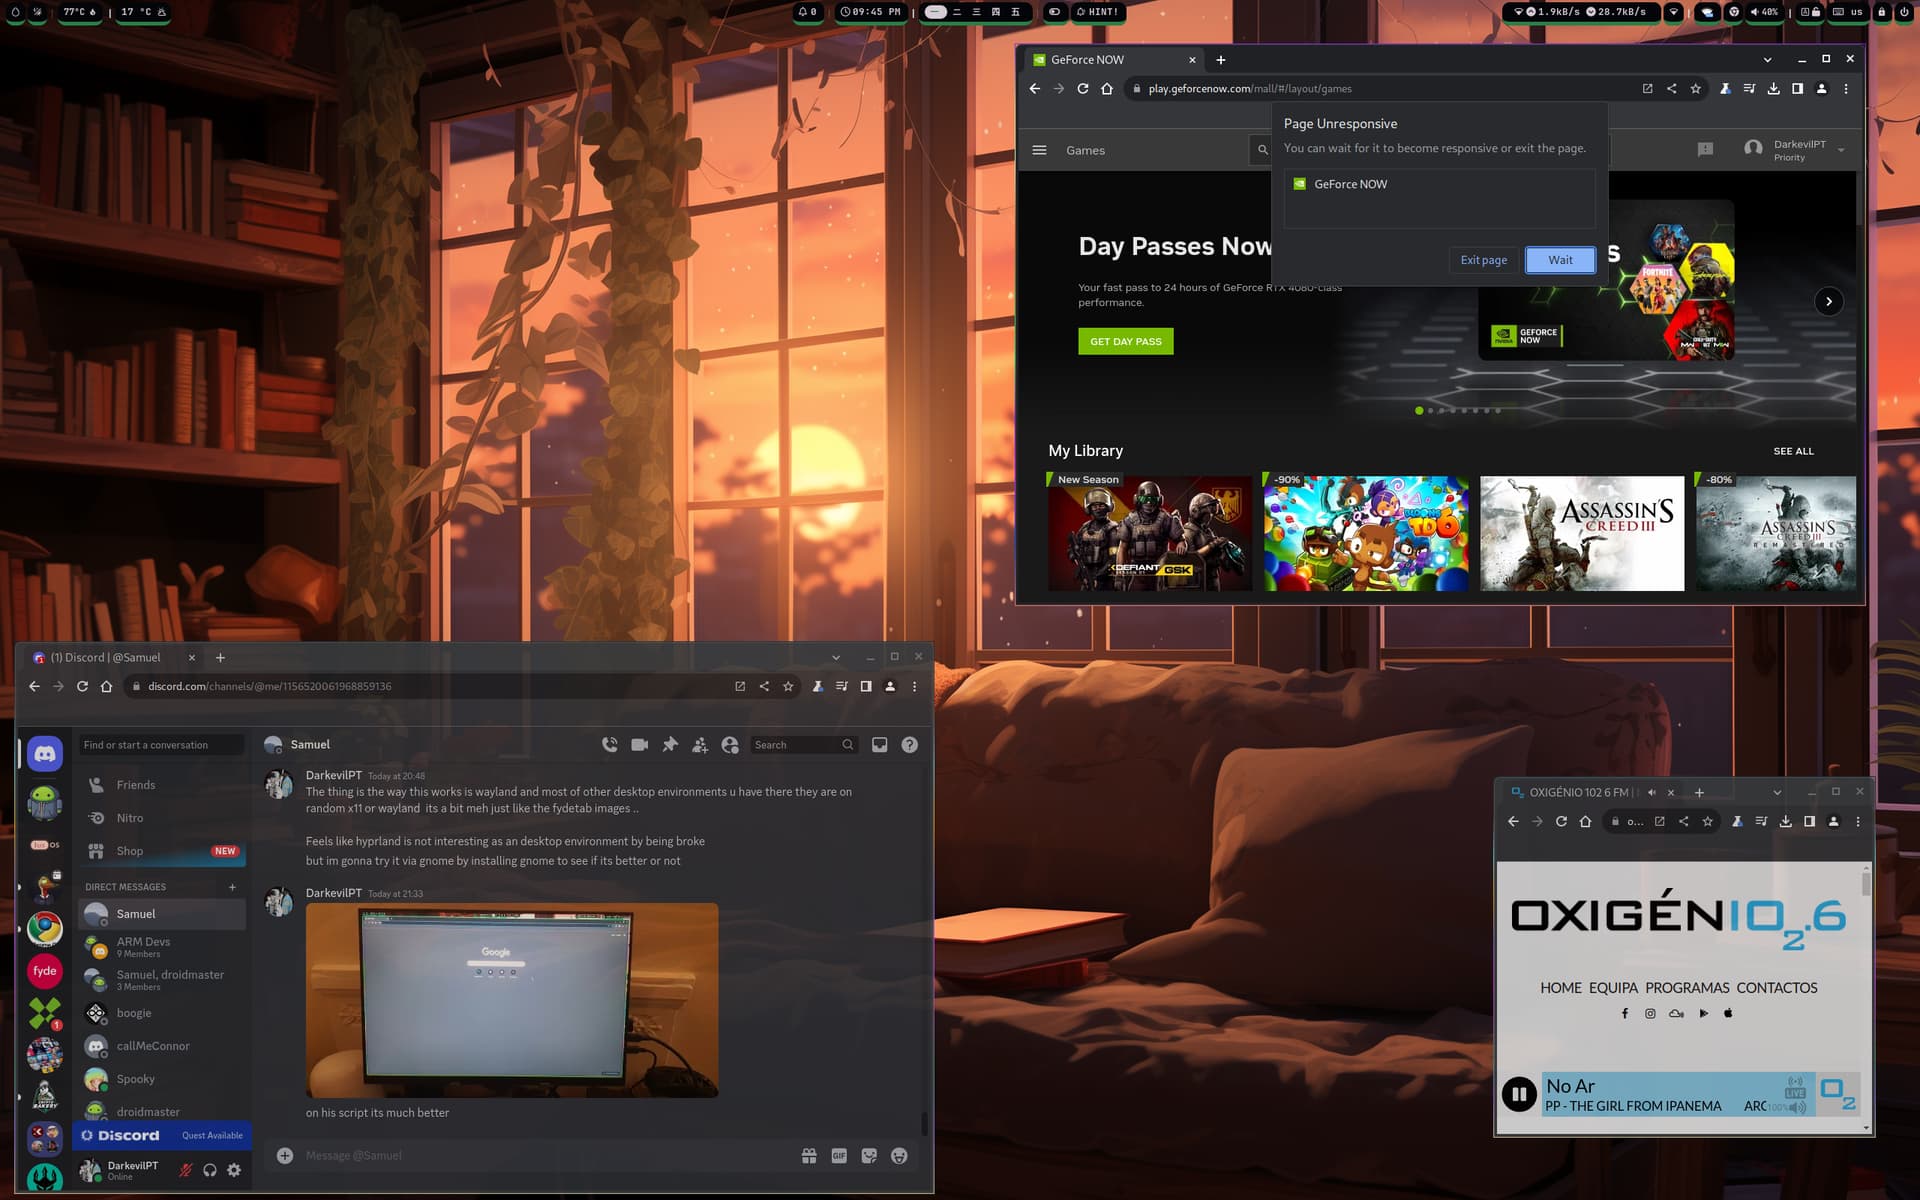
 Your desktop is now riced and stylish!
 Your Login Manager
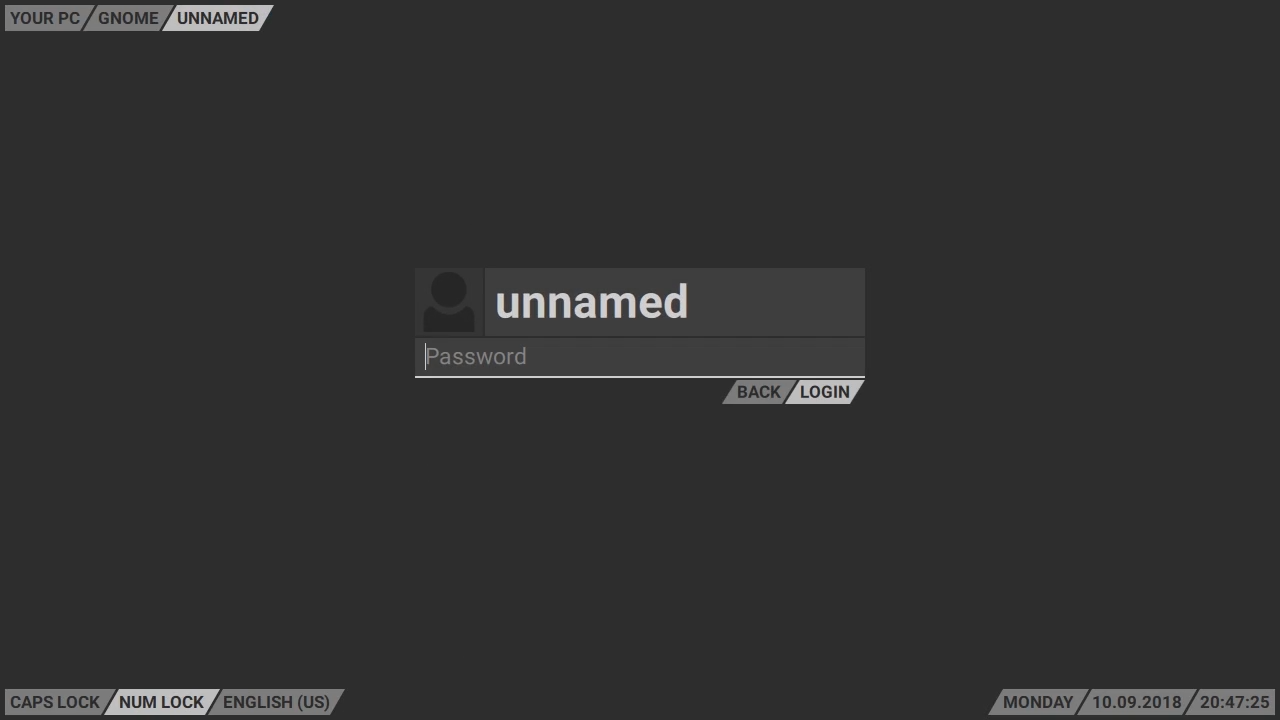
Your Login Manager – SDDM Setup & Theming
Set up and personalize your Linux login experience using SDDM , the Simple Desktop Display Manager.
Install SDDM with Qt6 Features
acu -y install sddm qt6-svg qt6-virtualkeyboard qt6-multimedia-ffmpeg
 Enable SDDM and Disable Other Display Managers
Make sure only SDDM is active to ensure proper functionality:
sudo systemctl disable display-manager.service
sudo systemctl enable sddm
Test Your SDDM Themes (Before Applying)
Preview how themes will look with the greeter:
sddm-greeter --test-mode --theme /usr/share/sddm/themes/maya
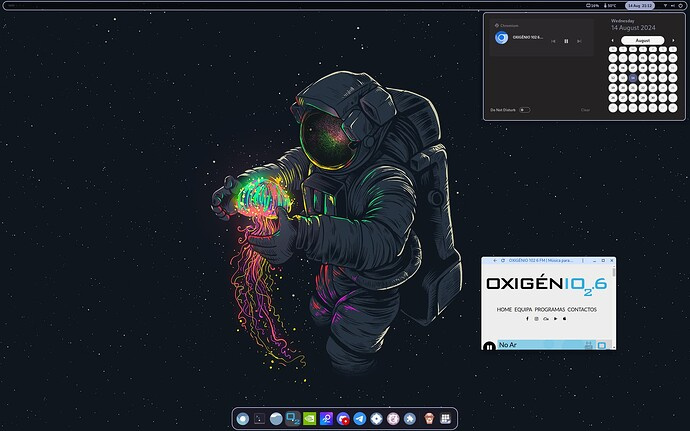
sddm-greeter-qt6 --test-mode --theme /usr/share/sddm/themes/sddm-astronaut-theme
Install the Astronaut Theme by KeyitDev

The Astronaut Theme is one of the best and most polished SDDM themes available.
sh -c "$(curl -fsSL https://raw.githubusercontent.com/keyitdev/sddm-astronaut-theme/master/setup.sh)"
 KeyitDev’s work delivers an elegant, modern login experience.

sudo git clone https://github.com/JaKooLit/simple-sddm-2.git /usr/share/sddm/themes/simple-sddm-2
echo "[Theme]
Current=simple-sddm-2" | sudo tee /etc/sddm.conf
sddm-greeter --test-mode --theme /usr/share/sddm/themes/simple-sddm-2
sudo git clone https://github.com/RadRussianRus/sddm-slice.git /usr/share/sddm/themes/sddm-slice
echo "[Theme]
Current=sddm-slice" | sudo tee /etc/sddm.conf
sddm-greeter --test-mode --theme /usr/share/sddm/themes/sddm-slice
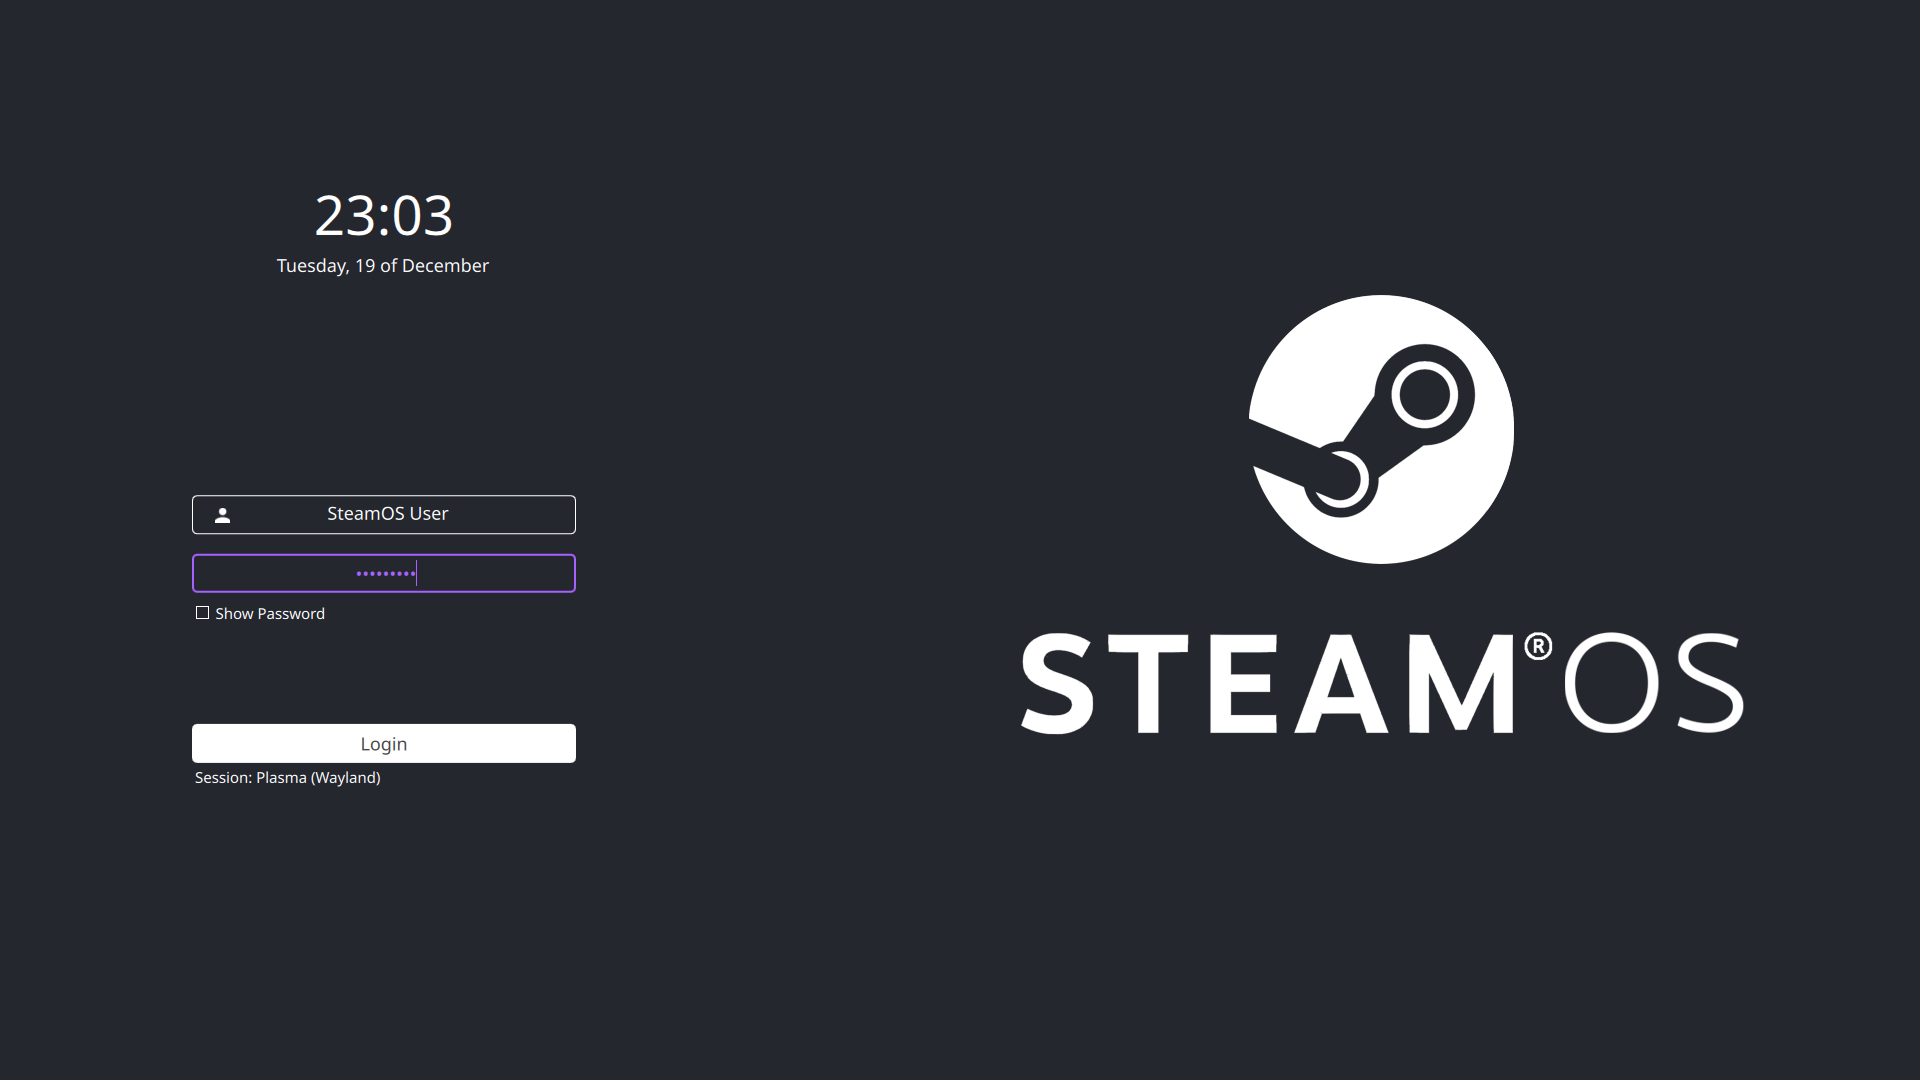
sudo git clone https://github.com/JiayuanWen/sddm-sugar-steamOS.git /usr/share/sddm/themes/sddm-sugar-steamOS
echo "[Theme]
Current=sddm-sugar-steamOS" | sudo tee /etc/sddm.conf
sddm-greeter --test-mode --theme /usr/share/sddm/themes/sddm-sugar-steamOS
sudo git clone https://github.com/AlfredoRamos/urbanlifestyle-sddm-theme.git /usr/share/sddm/themes/urbanlifestyle-sddm-theme
echo "[Theme]
Current=urbanlifestyle-sddm-theme" | sudo tee /etc/sddm.conf
sddm-greeter --test-mode --theme /usr/share/sddm/themes/urbanlifestyle-sddm-theme
 Your Linux Terminal
Installing Zsh and Oh My Zsh
1. Install Zsh and set it as the default shell:
sudo acu install zsh nano -y
chsh -s $(which zsh)
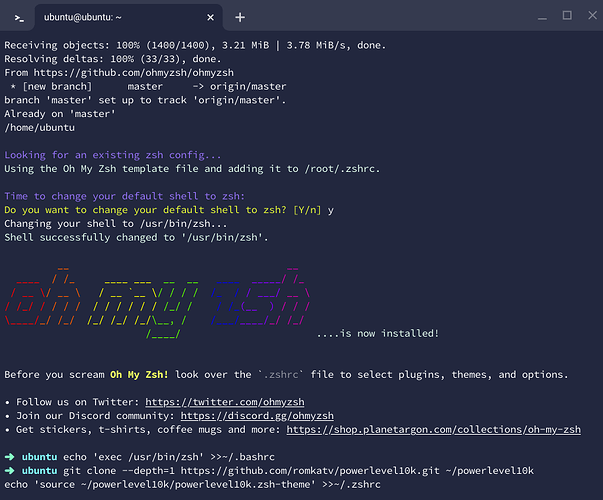
2. Install Oh My Zsh :
Run the following command to install Oh My Zsh :
sh -c "$(curl -fsSL https://raw.github.com/ohmyzsh/ohmyzsh/master/tools/install.sh)"
When prompted, type Y to set Oh My Zsh as your default shell. This will also create a ~/.zshrc file in your home directory. You can edit this file later.
Make Zsh the Default Shell for Bash
If you’re still using Bash, you can set Zsh as the default by running:
echo 'exec /usr/bin/zsh' >>~/.bashrc
 Install Powerlevel10k Theme
- Clone the Powerlevel10k repository :
git clone --depth=1 https://github.com/romkatv/powerlevel10k.git ~/powerlevel10k
- Add the Powerlevel10k theme to your
~/.zshrc
echo 'source ~/powerlevel10k/powerlevel10k.zsh-theme' >>~/.zshrc
-
Change Zsh theme :Open your
~/.zshrcfile:
nano ~/.zshrc
Change the ZSH_THEME line to:
ZSH_THEME="powerlevel10k/powerlevel10k"
Save and exit by pressing Ctrl + X , then Y .
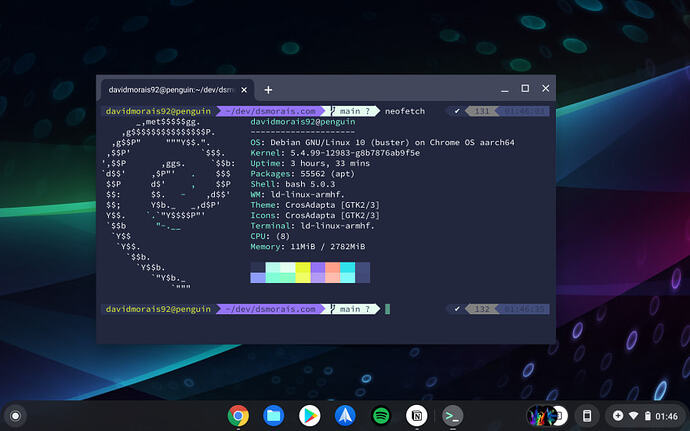
Final Steps
- Open a new terminal window with Ctrl + T and type
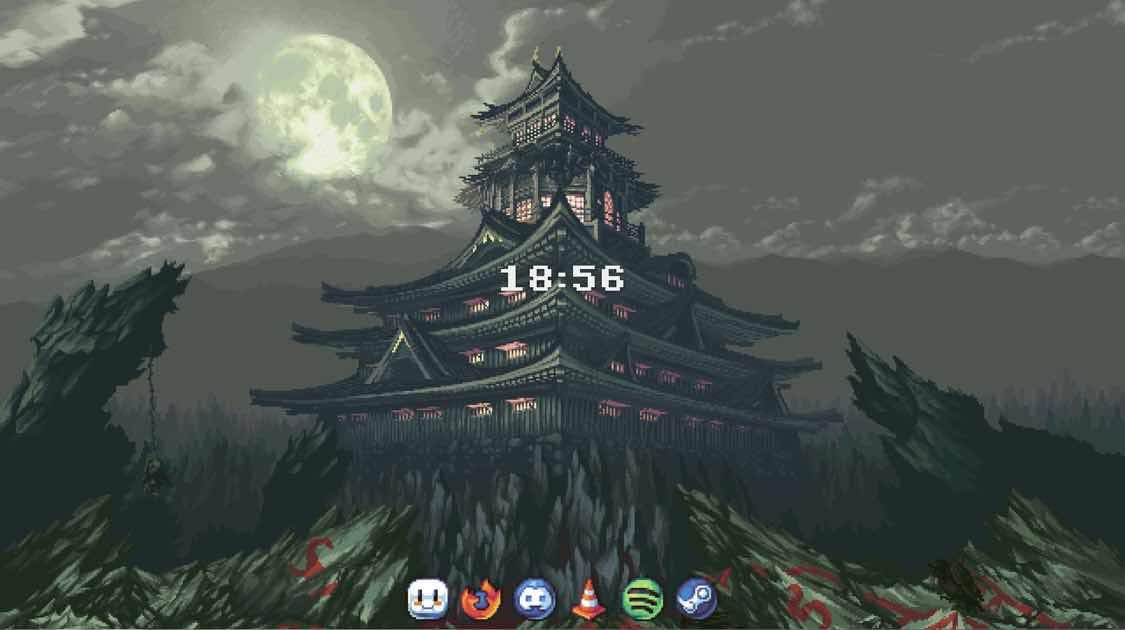
zsh.Your terminal should now look something like this:
Configure Powerlevel10k
To enter the Powerlevel10k configuration wizard, run:
p10k configure
Update Powerlevel10k
To update Powerlevel10k , run:
git -C ~/powerlevel10k pull
 Uninstalling Zsh and Oh My Zsh
If you want to remove Zsh , Oh My Zsh , and Powerlevel10k :
- Remove Installations & Configurations :
sudo rm -f ~/.p10k.zsh
sudo rm -rf -- ${ZSH_CUSTOM:-$HOME/.oh-my-zsh/custom}/themes/powerlevel10k
sudo sh ~/.oh-my-zsh/tools/uninstall.sh -y
- Remove Zsh and related packages :
sudo pacman -Rns zsh
- Delete Zsh Configuration Files :
sudo rm -Rf ~/.zsh*
With this setup, your terminal should now look sleek and modern with the Powerlevel10k theme. Enjoy!
 Desktop Environments
Explore alternative desktop environments tailored for ARM devices. For full documentation, visit:
 Archcraft ARM Wiki
 Archcraft ARM – Minimal & Elegant
acu -y install yay
curl -LO https://github.com/archcraft-os/archcraft-arm/releases/download/1.0/archcraft-arm.tar.gz
tar -xzvf archcraft-arm.tar.gz
cd archcraft-arm

# Optional: customize install script
nano customize.sh

# Default user/pass: archcraft
sudo ./install.sh
Extra Openbox Themes
git clone https://github.com/addy-dclxvi/openbox-theme-collections
sudo cp -r $HOME/openbox-theme-collections/* $HOME/.config/openbox/themes
Fix Polybar Modules in Themes
For example, in the “default” Openbox theme:
- Open the Polybar config file:
nano ~/.config/openbox/themes/default/polybar/config.ini
- Find the line:
modules-right = battery dot ...
- Replace it with:
modules-right = temperature dot volume dot network dot LD sysmenu RD
 Pixarch (Experimental)
A still-in-development desktop environment.
 May contain bugs – use with caution.
acu -y install yay
git clone https://github.com/heisenburgh/pixarch.git
cd pixarch/installation_scripts
./install.sh
 JaKooLit – Arch Hyprland Setup
A Hyprland-based Arch experience with custom styling.
acu -y install yay
git clone --depth=1 https://github.com/JaKooLit/Arch-Hyprland.git ~/Arch-Hyprland
cd ~/Arch-Hyprland
chmod +x install.sh
./install.sh
 Keybinding Note:
Hyprland environments often require changing the modifier key:
# Look for:
nano ~/.config/hypr/hyprland.conf
nano ~/.config/hypr/configs/Keybinds.conf

# Change from:
$mainMod = SUPER

# To:
$mainMod = FN+SUPER

