About multiboot

Hi. I have followed the last instructions, but unfortunately they have not worked. I have decided to start from 0, burning the multiboot image from 0 and activating only the Ubuntu startup input, disabling the Armbian one, and it doesn’t start anything directly. I get a black screen.
So I’m stuck on this about creating a new partition and making it my default / home folder.
I edit:
I am trying and here I have arrived:
I have created an extra partition on my nvme disk, and managed to configure it to mount at startup with the disk utility. As a result my /etc/fstab looks like this:

LABEL=ROOTARMB / ext4 defaults,noatime,nodiratime,commit=600,errors=remount-ro 0 1
LABEL=BOOTARMB /boot ext2 defaults 0 2
tmpfs /tmp tmpfs defaults,nosuid 0 0
/dev/disk/by-uuid/35fbc645-a3ff-4851-9cba-98e3f13e7121 /mnt/35fbc645-a3ff-4851-9cba-98e3f13e7121 auto nosuid,nodev,nofail,x-gvfs-show 0 0

now my doubt on how to mount the / home folder in said partition. I’m following a guide I found on google (https://lavidaestux.wordpress.com/2015/03/28/mover-el-home-a-otra-particion-o-disco/), and I understand the whole procedure, but I get stuck on the etc/fstab edit. I’m afraid to screw up with mounting options. That is, the mount options of the partition where the / home folder is by default have different properties than those of the partition that I managed to mount with the Disks application, and at the moment I have to edit the new mount point, I don’t know how it should look. Sorry for such a long explanation to describe such a simple problem for you I imagine. Thanks in advance.

Edit 2:

I tried and half succeeded, because it seems to me that I was wrong in the address of the / HOME folder, so I did not have an operating desktop, and I had to start from 0 again. Now I have concluded that it is not worth creating the home on another partition. with creating another partition that is mounted at the beginning, with rights to write, and linking the chromium downloads folder to that partition it seems to me that it reaches me for now.

 /dev/disk/by-uuid/35fbc645-a3ff-4851-9cba-98e3f13e7121    /home     ext4    defaults        0       2

Hello, thanks for answering. Finally I have chosen to leave things as they are, and add an additional partition for downloads and files. I left the / home folder as it was.
Now I have a question regarding the average temperature. I don’t know if this is the place to raise it, or if I should open a new post.

There was free time and I designed my previous work in the form of a script.
Now the program can be used not only to create new partitions, but also to modify existing ones
Download, unzip to folder /usr/local/sbin/ and install kpartx

tar -xzvf make_multiboot_dev.sh.tar.gz -C /usr/local/sbin/
sudo apt install kpartx

Example of creating a multi-boot microSD device with three OS. Change /dev/sdz to own and change sizes depending on your needs and drive sizes:

sudo su
#---- Make GPT and flash uboot
make_multiboot_dev.sh --device /dev/sdz  --uboot-file rockpi4b-ubuntu-bionic-minimal-20190104_2101-gpt.img
#---- Flash 3 OS
make_multiboot_dev.sh --device /dev/sdz  --boot-size 128  --image-file rockpi4b-ubuntu-bionic-minimal-20190104_2101-gpt.img
make_multiboot_dev.sh --device /dev/sdz  --image-file Armbian_20.02.0-rc0_Rockpi-4b_bionic_legacy_4.4.210_desktop.img
make_multiboot_dev.sh --device /dev/sdz  --boot-size 512 --root-size 2048 --image-file  LibreELEC-ARM-ALL.arm-9.80-devel-20200331083128-569f834-rk3399.img

An example of how to write a boot partion on microSD, and root on SSD

make_multiboot_dev.sh --boot-dev /dev/mmcblk0  --root-dev  /dev/nvme0n1  --image-file Armbian_20.02.0-rc0_Rockpi-4b_bionic_legacy_4.4.210_desktop.img

Devices must have free space at the end.
You can use existing partions. In this case, free space is not needed, but the data on these partions will be erased. for instance

make_multiboot_dev.sh --boot-device /dev/mmcblk0p7 --root-dev /dev/nvme0n1p5   --image-file  LibreELEC-ARM-ALL.arm-9.80-devel-20200331083128-569f834-rk3399.img

You can create one partion, use the other from the old.
With the --help switch, the program gives a hint.
Can currently be used OS : debian and ubuntu from radxa, Armbian… and LibreELEC…

Actions after the first start of radxa ubuntu

default login: rock password: rock

Don’t install rockchip-fstab !!!

sudo su
apt update && apt upgrade 
apt install rockchip-overlay   rockpi4b-rk-u-boot-latest  rockpi4-dtbo # On the first question of confirmation of installation, press 'y', on the second question of the bootloader, press 'n' !!! 
apt install ssh parted mc nano kpartx gdisk linux-base linux-4.4-latest
return_my_root_to_extlinux.sh 

# check configs
cat /boot/extlinux/extlinux.conf 
cat /etc/fstab 

If ever a new kernel is installed during an apt upgrade, then always use return_my_root_to_extlinux.sh to restore the correct path to rootfs!

2 Likes

interesting. At the moment I am working with armbian multiboot from nvme image that you provided. I have the rockpi as a desktop right now. retire for a while the desktop pc. and i am buying an nvme / usb-A adapter to work with other nvme memory without resorting to the old pc. Until it reaches me from China, I will continue with what I have now. I hope it is not a problem to have only 4 gb free on roofts. I would like to try manjaro, but from the manjaro foro they tellme: https://forum.manjaro.org/t/manjaro-arm-20-04-released/133374/37?u=yuvia

everything that was written before this quote I did not quite understand.
I looked at the link … he means that without SPI you can not load boot from nvme. If your NVME boots through SPI then there should be no problem.

I made a new version of the script. Now you can still install Manjaro and slarm64 images. The -v switch is added. When selected, the program version is displayed.

To install Manjaro on an SSD:

make_multiboot_dev.sh -d /dev/nvme0n1 --root-size 10000 -i Manjaro-ARM-xfce-rockpi4-20.04.img

Change root-size and image file as you need

1 Like

Thank you very much for answering.
What I did was replace my old pc with rockpi4b with the Armbian multiboot image you provide above.

I’ll continue with this multiboot image for now because it works really well. The only thing that worries me is that the Armbiam system partition has 8gb of space of which 3gb is free. I have purchased a usb adapter to hot plug an additional nvme card into the rockpi4b box. But I still don’t have it in my possession.
I will try to test your indications as soon as possible. Thank you

Hi. Excuse me for bothering you. I make a query. Is there a way to implement dtoverlay = pcie-gen2 in armbian from the image you provided above? I tried this by adding the line in /boot/armbianEnv.txt but I saw no difference in read / write speeds.

Env.txt not work here. Try adding dtoverlay=pcie-gen2 to the end of the APPEND line of extlinux.conf, but I don’t know if this will work.

and what about this link ?: https://github.com/radxa/kernel/blob/release-4.4-rockpi4/arch/arm64/boot/dts/rockchip/overlays-rockpi4/pcie-gen2-overlay.dts

On radxa OS, this works if write intfc:dtoverlay=pcie-gen2 in the hw_intfc.conf file. I tested it. I did not test on armbian.

Hello, thanks for the information. Is there a way to restore the modified files without resorting to another machine in case the box doesn’t boot after making those changes?

Thanks for your script and idea @rua1! :slight_smile:

While writing uboot a warning is displayed:

Warning: The resulting partition is not properly aligned for best performance.

Should we fix it?

The u-boot I used is this one: https://dl.radxa.com/rockpi4/images/loader/spi/rockpi4b-uboot-trust-spi_2017.09-2681-geb41d9a6ce_20191104.img

Flashed it to eMMC drive (/dev/mmcblk2).

After writing slarm64 image, the extlinux.conf file looks like the following:

LABEL slarm64
  LINUX /Image
  FDT /dtb//tmp/1/dtb/rk3399-rock-pi-4.dtb
  APPEND root=PARTUUID=bc91ac33-cba2-4a2a-ba9c-42a3b77145de rw rootwait console=ttyS2,1500000  

The FDT part looks incorrect, corrected it to /dtb/rk3399-rock-pi-4.dtb

The resulting image does not boot for me though. Status LED does not blink, screen stays blank. Attached a serial console, but there is no output at all.

Attaching SD card and rebooting works, the system is booted from SD card.

Tested 2 images, Slarm64 and Radxa Debian Stretch, in both cases there is no output on serial console and system does not boot.

Thanks.

1 Like

If you do not have another computer nearby, you need to prepare a separate microsd OS in advance for repair. In case of a loading error, insert the card into the microsd slot for repair, insert the card with the damaged OS into the card reader and then into the USB connector. Boot from microsd to repair and restore files on your usb.
I use a debug cable connected to another computer. In case of failure, I interrupt the boot process and manually load another OS.

You should not pay attention to this message. I’ll try to remove it.

This uboot is designed for SPI. write ubootl from radxa debian or ubuntu.

under what OS you this make?

:+1:

I wrote u-boot from Radxa Debian image to eMMC, but it was incompatible with mbr partitions, and failed to boot Slarm64 or Armbian on SD card.

I have an install of Radxa Debian which is updated, will try to use u-boot from there.

I tried from 2 OS, Slarm64 and Armbian Debian buster. Both gave same result.

Thanks.

hm …

LABEL slarm64
  LINUX /Image
  FDT /dtb/rk3399-rock-pi-4.dtb
uname -a
Linux rockpi-4b 5.4.28-rockchip64 #20.02.7 SMP PREEMPT Sat Mar 28 17:07:03 CET 2020 aarch64 GNU/Linux

Armbian_20.02.7_Rockpi-4b_buster_current_5.4.28_desktop

what version of the script you use?

Script with Version 1.2c

With u-boot from updated Radxa Debian image, the serial console works. However it does not boot. Output:

Load uboot, ReadLba = 4000
Load OK, addr=0x200000, size=0xef1e8
RunBL31 0x10000
NOTICE:  BL31: v1.3(debug):0e7a845
NOTICE:  BL31: Built : 16:13:46, Apr 17 2019
NOTICE:  BL31: Rockchip release version: v1.1
INFO:    GICv3 with legacy support detected. ARM GICV3 driver initialized in EL3
INFO:    Using opteed sec cpu_context!
INFO:    boot cpu mask: 0
INFO:    plat_rockchip_pmu_init(1181): pd status 3e
INFO:    BL31: Initializing runtime services
WARNING: No OPTEE provided by BL2 boot loader, Booting device without OPTEE initialization. SMC`s destined for OPTEE will return SMC_UNK
ERROR:   Error initializing runtime service opteed_fast
INFO:    BL31: Preparing for EL3 exit to normal world
INFO:    Entry point address = 0x200000
INFO:    SPSR = 0x3c9


U-Boot 2017.09-2686-g18c70dba63 (Dec 31 2019 - 12:34:04 +0000), Build: jenkins-linux-build-testing-2-136

Model: Rockchip RK3399 rockpi4b Board
PreSerial: 2
DRAM:  3.9 GiB
Relocation Offset is: f5bdf000
Sysmem: init
I2c speed: 400000Hz
PMIC:  RK808 
vdd-center init 950000 uV
MMC:   dwmmc@fe320000: 1, sdhci@fe330000: 0
Using default environment

Model: Rockchip RK3399 rockpi4b Board
Bootdev(atags): mmc 0
PartType: EFI
get part misc fail -1
boot mode: None
init_resource_list: failed to get boot part, ret=-1
init_resource_list: failed to get resource part, ret=-1
Can't find file:logo.bmp
failed to display uboot logo
CLK: (uboot. arml: enter 816000 KHz, init 816000 KHz, kernel 0N/A)
CLK: (uboot. armb: enter 24000 KHz, init 24000 KHz, kernel 0N/A)
  aplll 816000 KHz
  apllb 24000 KHz
  dpll 800000 KHz
  cpll 24000 KHz
  gpll 800000 KHz
  npll 600000 KHz
  vpll 24000 KHz
  aclk_perihp 133333 KHz
  hclk_perihp 66666 KHz
  pclk_perihp 33333 KHz
  aclk_perilp0 266666 KHz
  hclk_perilp0 88888 KHz
  pclk_perilp0 44444 KHz
  hclk_perilp1 100000 KHz
  pclk_perilp1 50000 KHz
Net:   eth0: ethernet@fe300000
Hit key to stop autoboot('CTRL+C'):  0 

Device 0: unknown device
MMC: no card present
mmc_init: -123, time 0
switch to partitions #0, OK
mmc0(part 0) is current device
Failed to mount ext2 filesystem...
** Unrecognized filesystem type **
starting USB...
USB0:   USB EHCI 1.00
USB1:   USB OHCI 1.0
USB2:   failed to get usb phy
Port not available.
USB3:   failed to get usb phy
Port not available.
USB4:   Can't get the usbphy register address
probe failed, error -6
USB5:   Can't get the usbphy register address
probe failed, error -6
scanning bus 0 for devices... 1 USB Device(s) found
scanning bus 1 for devices... 1 USB Device(s) found
       scanning usb for storage devices... 0 Storage Device(s) found

Device 0: unknown device
ethernet@fe300000 Waiting for PHY auto negotiation to complete......... TIMEOUT !
Could not initialize PHY ethernet@fe300000
missing environment variable: pxeuuid
missing environment variable: bootfile
Retrieving file: pxelinux.cfg/01-ae-1e-19-20-55-6d
ethernet@fe300000 Waiting for PHY auto negotiation to complete......... TIMEOUT !
Could not initialize PHY ethernet@fe300000
missing environment variable: bootfile
Retrieving file: pxelinux.cfg/00000000
ethernet@fe300000 Waiting for PHY auto negotiation to complete......... TIMEOUT !
Could not initialize PHY ethernet@fe300000

My mistake. While trying to update u-boot, looks like I made a typo and deleted the image partitions.

Here is the output while flashing Radxa Debian, one warning:

Size of image BOOT partition is 512 MiB
it flash into partition with size 512 MiB
Size of image ROOT partition is 3051 MiB
it flash into partition with size 8192 MiB

Type Y/y to continue or Ctrl-C to abort.
y
Work with partitions  ...
++++++++++++++++++++++++++++++++++++++++++++++++++++
Attention! If the program does not end with the phrase 'End Of Script' then manually do 'umount /tmp/{1..4}', 'rmdir /tmp/{1..4}'
and remove partions:  /dev/mmcblk2p4 /dev/mmcblk2p5
++++++++++++++++++++++++++++++++++++++++++++++++++++
Files are copied, wait ...
rm: cannot remove '/tmp/2/etc/FIRST_BOOT': No such file or directory

After flashing it worked, and was booted to the Radxa Debian image!

Thank you @rua1! :innocent:

Will try with more images now.

1 Like

Full output while flashing Slarm64:

# ../downloads/make_multiboot_dev.sh --device /dev/mmcblk2 --boot-size 1024 --root-size 10240 --image-file slarm64-current-aarch64-xfce-rootfs-14Dec19-5.4.6-rock_pi_4-build-20191222.img 

Size of image ROOT partition is 5684 MiB
it flash into partition with size 10240 MiB

Type Y/y to continue or Ctrl-C to abort.
y
Work with partitions  ...
++++++++++++++++++++++++++++++++++++++++++++++++++++
Attention! If the program does not end with the phrase 'End Of Script' then manually do 'umount /tmp/{1..4}', 'rmdir /tmp/{1..4}'
and remove partions:  /dev/mmcblk2p6 /dev/mmcblk2p7
++++++++++++++++++++++++++++++++++++++++++++++++++++
Files are copied, wait ...
---------/boot/*Env.txt :
verbosity=4
console=both
fdtfile=rk3399-rock-pi-4.dtb
rootdev=/dev/mmcblk1p1
---------found RockPi4 fdt files :
/dtb/rk3399-rock-pi-4.dtb
--------- extlinux.conf :
LABEL slarm64
  LINUX /Image
  FDT /dtb//tmp/1/dtb/rk3399-rock-pi-4.dtb
  APPEND root=PARTUUID=75eed00b-3ffd-4562-9f40-e7e0d5f1557c rw rootwait console=ttyS2,1500000  
---------- /etc/fstab :
#
# /etc/fstab: static file system information
#
# <file system>        <mount point>   <type>  <options>                        <dump> <pass>
shm                    /dev/shm        tmpfs   defaults                         0      0
devpts                 /dev/pts        devpts  noexec,nosuid,gid=tty,mode=0620  0      0
sysfs                  /sys            sysfs   defaults                         0      0
proc                   /proc           proc    defaults                         0      0
#
#/dev/#EXT4FS_BOOT#    /boot           ext4    errors=remount-ro                0      1
#/dev/#SWAP#           swap            swap    defaults                         0      0
#/dev/#EXT4FS_ROOT#    /               ext4    errors=remount-ro                0      1
#/dev/#EXT4FS_HOME#    /home           ext4    defaults                         0      2

UUID=9f4441e4-07f0-4ee9-91ae-640ca1429c22  / ext4     noatime,nodiratime,data=writeback,errors=remount-ro       0       1
UUID=0629b095-d61d-4ba3-8676-adc896d2efd1 /boot ext2 defaults 0 0

loop deleted : /dev/loop0
  -= All OK =-
-= End Of Script =-

This one also booted.

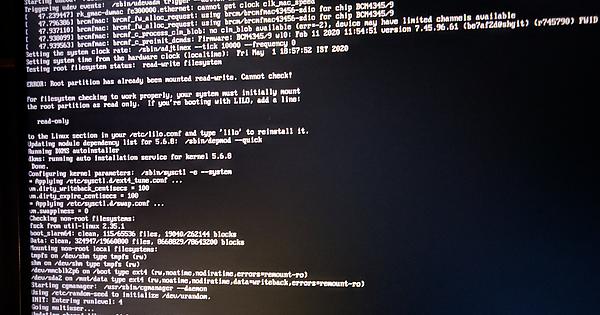
However there was no console output on tty1, so I made some changes to extlinux.conf based on studying boot.scr.bak:

#  APPEND root=PARTUUID=75eed00b-3ffd-4562-9f40-e7e0d5f1557c rw rootwait console=ttyS2,1500000  
  APPEND root=PARTUUID=c1f2eb7f-064b-40e4-9826-c174658e065e ro rootwait console=ttyS2,1500000 consoleblank=0 earlyprintk console=tty1 loglevel=4

Comment part is before, uncommented part is after.
Also changed rw to ro since Slarm64 uses it for checking the partition and then remounts it after check.

@rua1, maybe you could upload your script to gitlab? Can send you pull request there!

Thanks again for your work. :innocent:

1 Like