Hello,
is there any case (not transparent) to fit that Rock Pi 4 WITH heat sink AND M.2 board???
I really need that…
Hello,
is there any case (not transparent) to fit that Rock Pi 4 WITH heat sink AND M.2 board???
I really need that…
I don’t get it, could you please explain in more detail why you modified the heatsink?
Didn’t you read the last three posts before that? That’s what it actually results from.
On heatsink you have “borders” to fit heatsink to chip, since chip on RockPi4 is not monolith (there actually difference in height in the middle and on the edges). But this borders too high, so if you use thermal compound and not glue - there is no connection between chip and heatsink. That why i modified it
@Dante4 Thank you very much, now I understand!
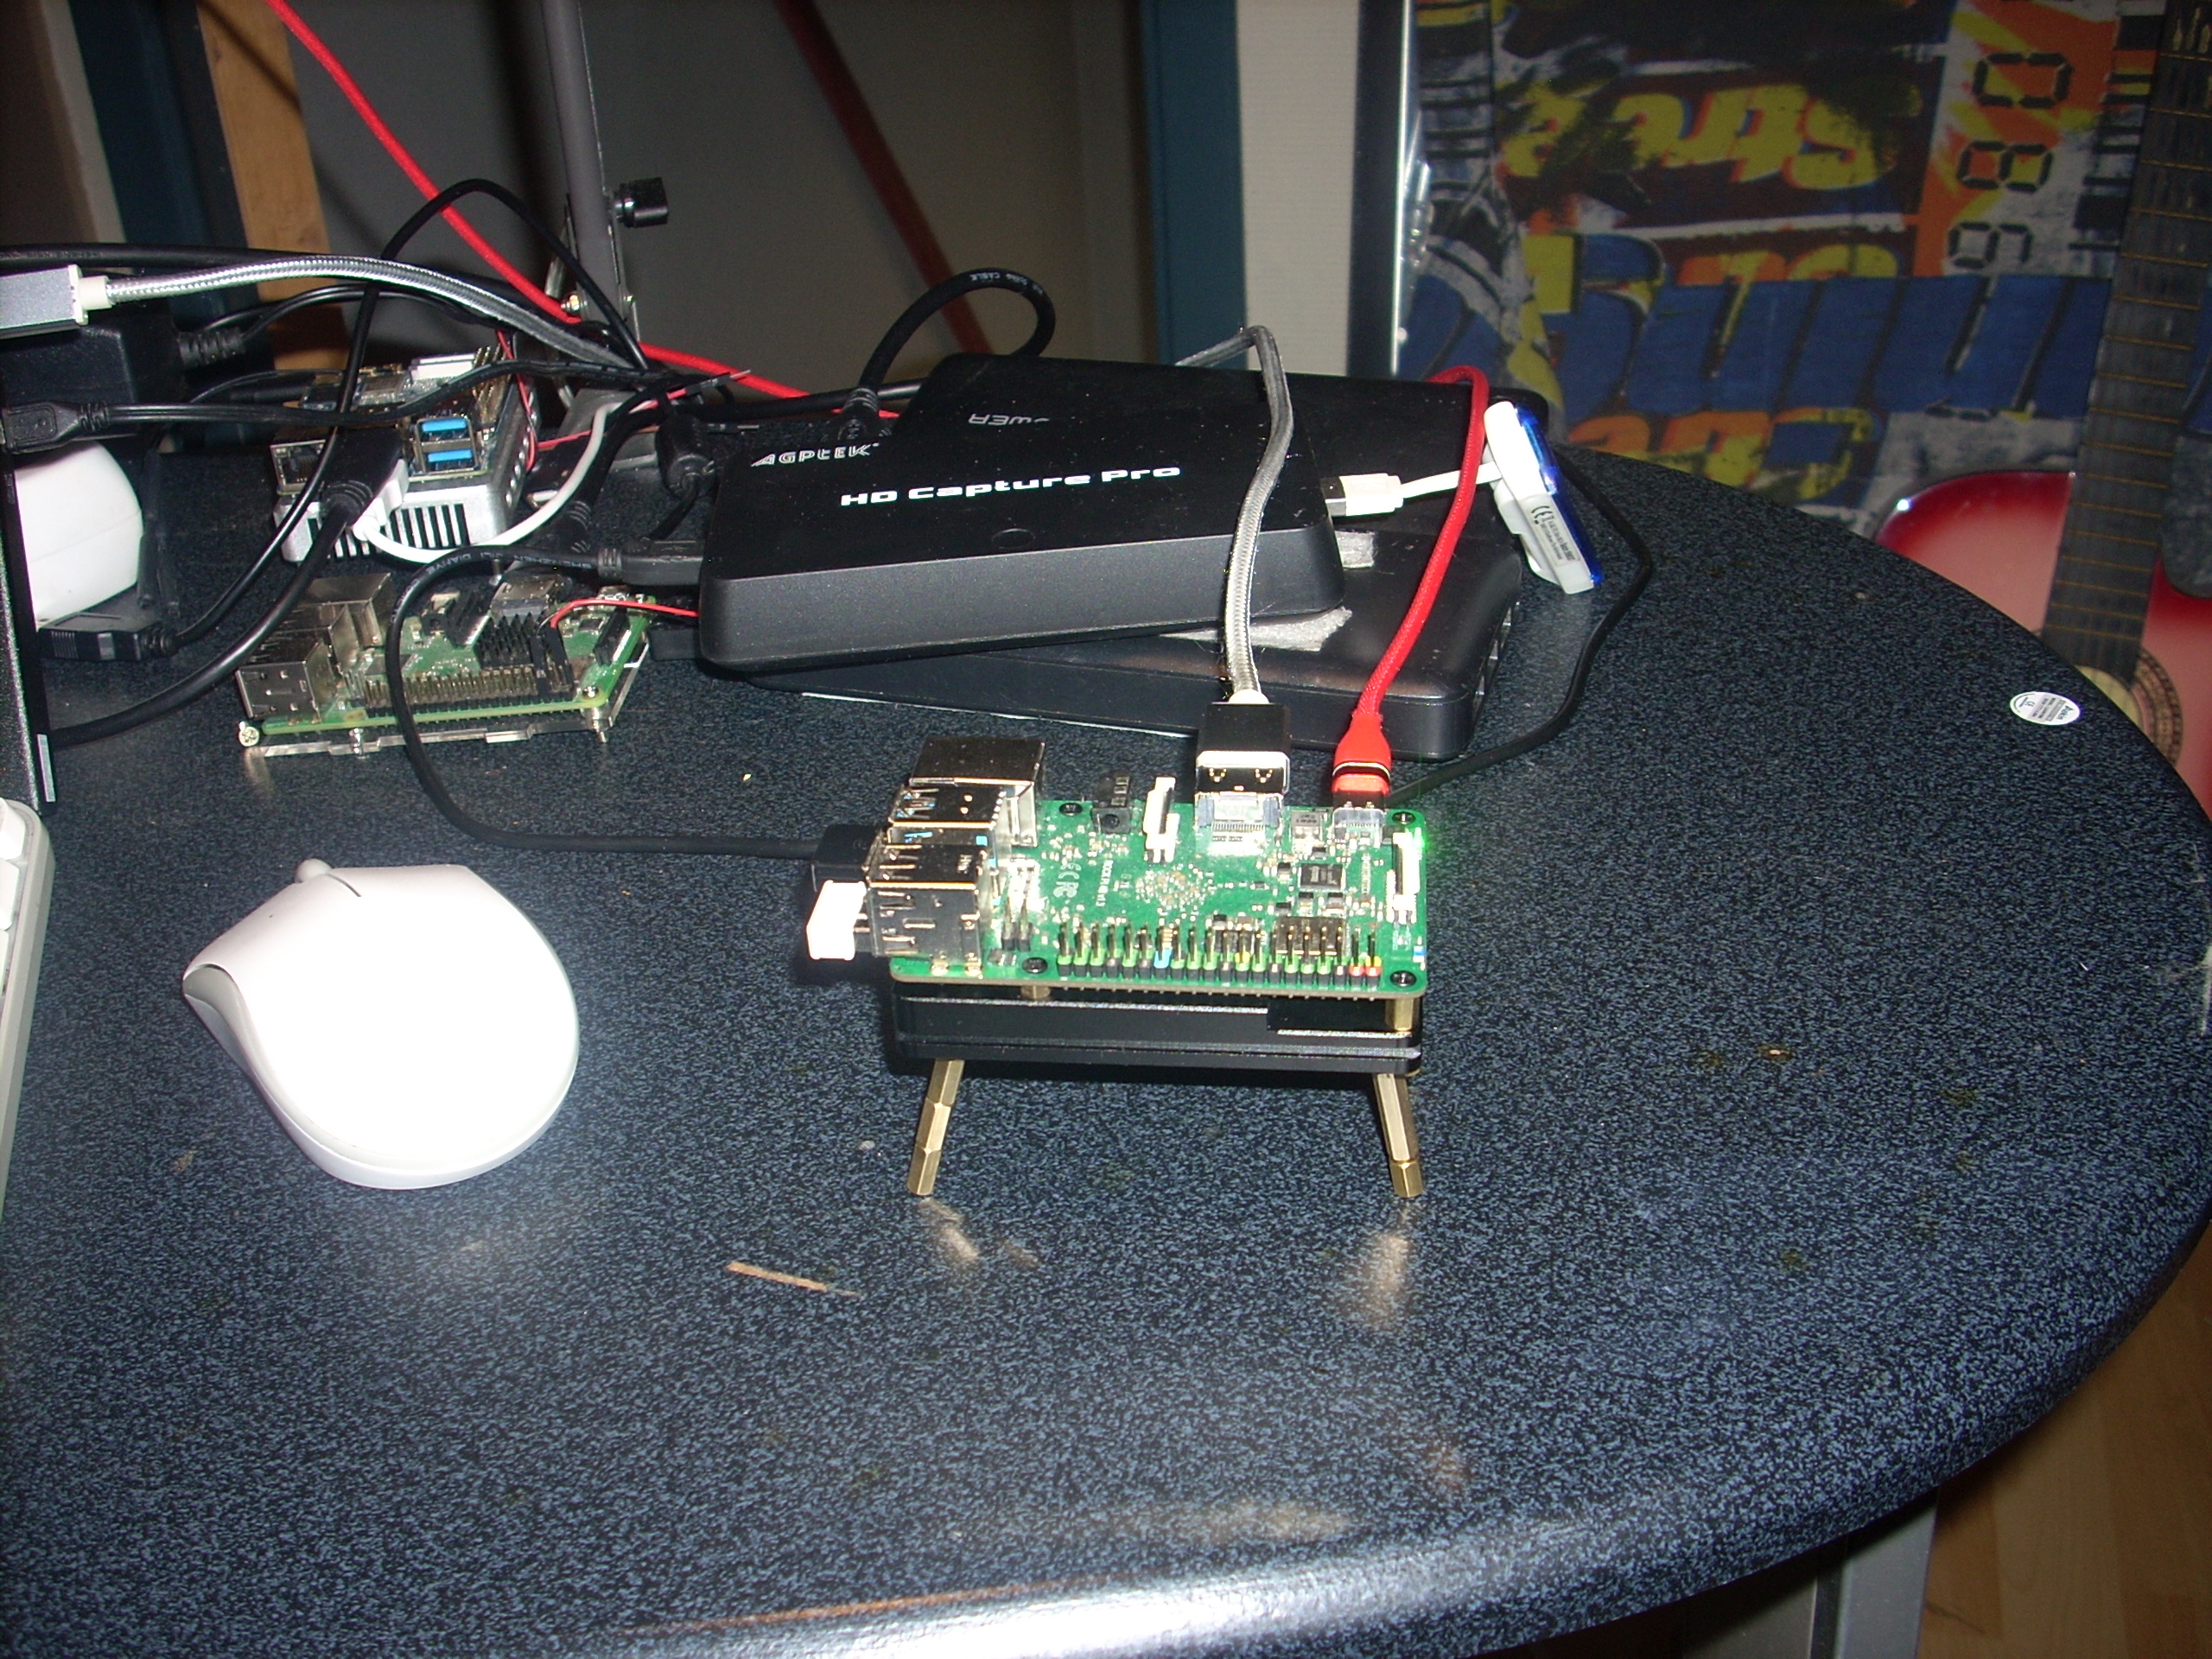
I finally got my heatsink for the RockPi. I’m happy with it. I’ve installed it without a problem.
I did try to screw it down with razers on-top. But noticed this didn’t push the board down onto the heatsink well. With the small screws this isn’t a problem. But then you can’t fit the m.2 hat.
The contact of the cpu seemed ok, I spread a not too thick layer of thermal paste to the heatsink. And then fitted the Rock Pi onto it. And then took it off again. The whole part of the cpu that goes into the heatsink was covered with paste.
The screw size of the spacers is different to those we use in Europe. So my replacement parts don’t fit onto it.
I’ll now use the RockPi for Blender rendering. I used the NanoPi M4 until now since it had a better heatsink, but only 2GB RAM. My RockPi has 4GBddr4. So a big step-up.
@radxa
The neck of some raisers seem a bit too long what makes it not fit fully into the screwhole underneath that. Maybe you could see to replace those if you make an new batch of heatsinks.
Also a cut-out for the eMMC/M.2 would have been awesome. The heatsink is big enough even without that part.
I couldn’t fit my screws into the holes on the underside to raise the heatsink. So I had to put my screws into the fins to raise it. Maybe you could add bigger screwholes for this like the NanoPi M4’s heatsink has.
On the M.2 hat I’m not going to say anything. I’ve got it, but I’m not going to use it for now. I’ll order a box of raisers with the same diameter as the ones that are used by Radxa for when I need the M.2 Hat.
Temperatures.
Small heatsink no fan 85°C throttle, keeps rising to 95°C
Big heatsink no fan 77°C after 1 hour maxed out
Big heatsink + small fan at 3.3V 45°C
VS
Small heatsink + small fan at 5V 83°C
So a small fan at 3.3V is very effective on the big heatsink. I’ve screwed it onto the fins.
I can barely hear the fan. This is only needed when you use the sbc continiuous maxed out. For normal use the big heatsink is more than sufficient. It took +20 minutes to reach 70°C. +40 minutes to reach 77°C.
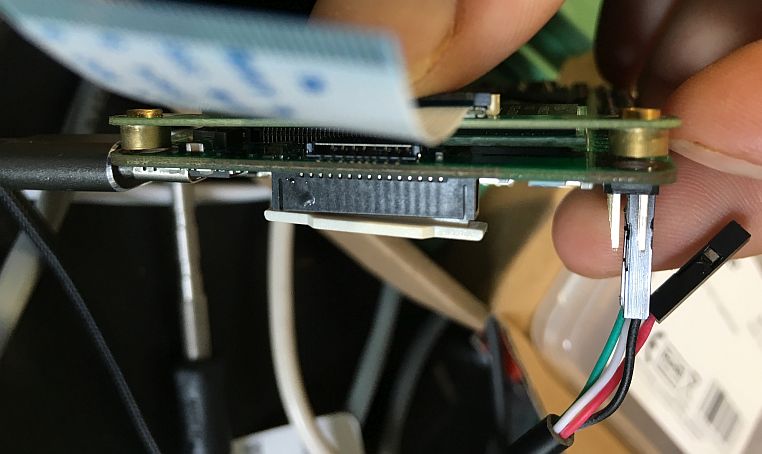
So, I recently took delivery of a Rock Pi 4B - 4G, Heatsink, eMMC, M2 Extension board, thinking that they would all work nicely together. I fitted the heatsink with the supplied spacers and booted up with no problems. Then I installed the M.2 shim board with the supplied hardware as best I could guess with a complete lack of instructions and it would appear that the main board is now damaged and unresponsive. I have disassembled everything and the board is definitely dead, so it was either almost DOA or there is a serious design flaw with the heatsink that has caused a short. So what now, I have spent $140 USD on hardware that I cannot use? I really wanted this to work as I buy a lot of high end SBC’s and this one appeared to tick all the boxes for me. Also, there is no mention anywhere that you cannot fit the M2 and eMMc at the same time.
eMMC and M.2 can be used at the same time.
M.2 installation tutorial we did not update to the wiki in time, is our error.
We will add this item right away.
Only power the board, and do not need to install the SD card or eMMC module, please confirm whether the green light on the board is lit or not.
When powering the board without SD card or eMMC the green light is lit.
I have checked the serial console using the cable bought from you and the instructions found here (https://wiki.radxa.com/Rockpi4/dev/serial-console) and there is nothing on the serial console.
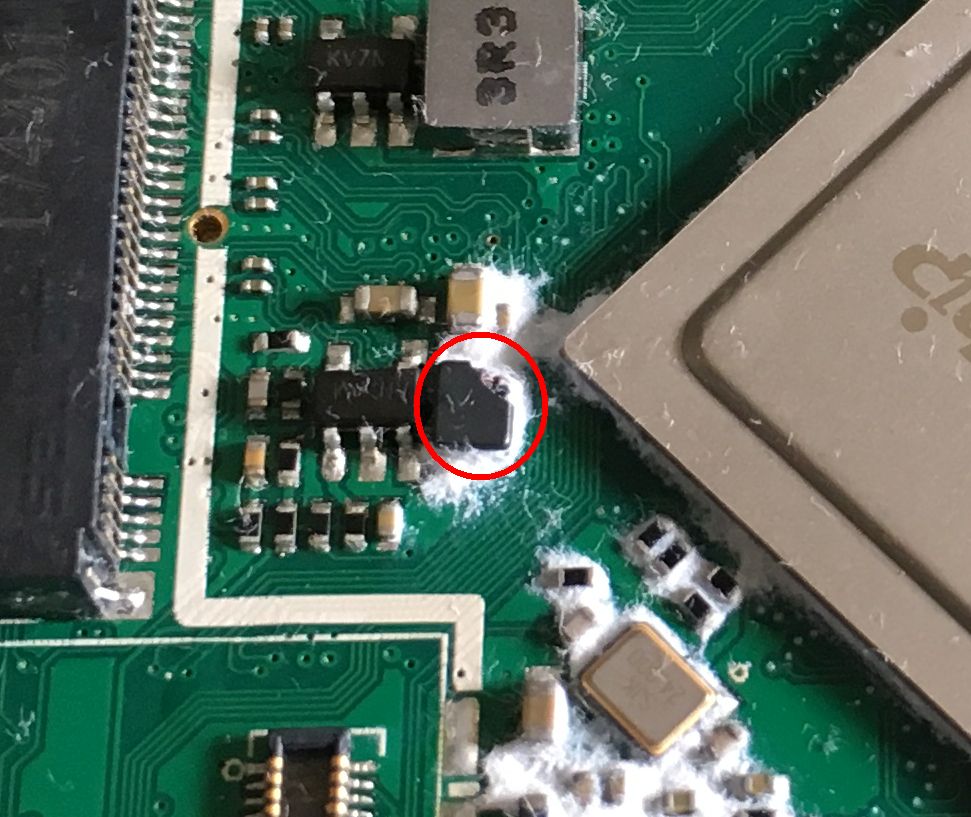
When I examine the board it looks like this component may be damaged?
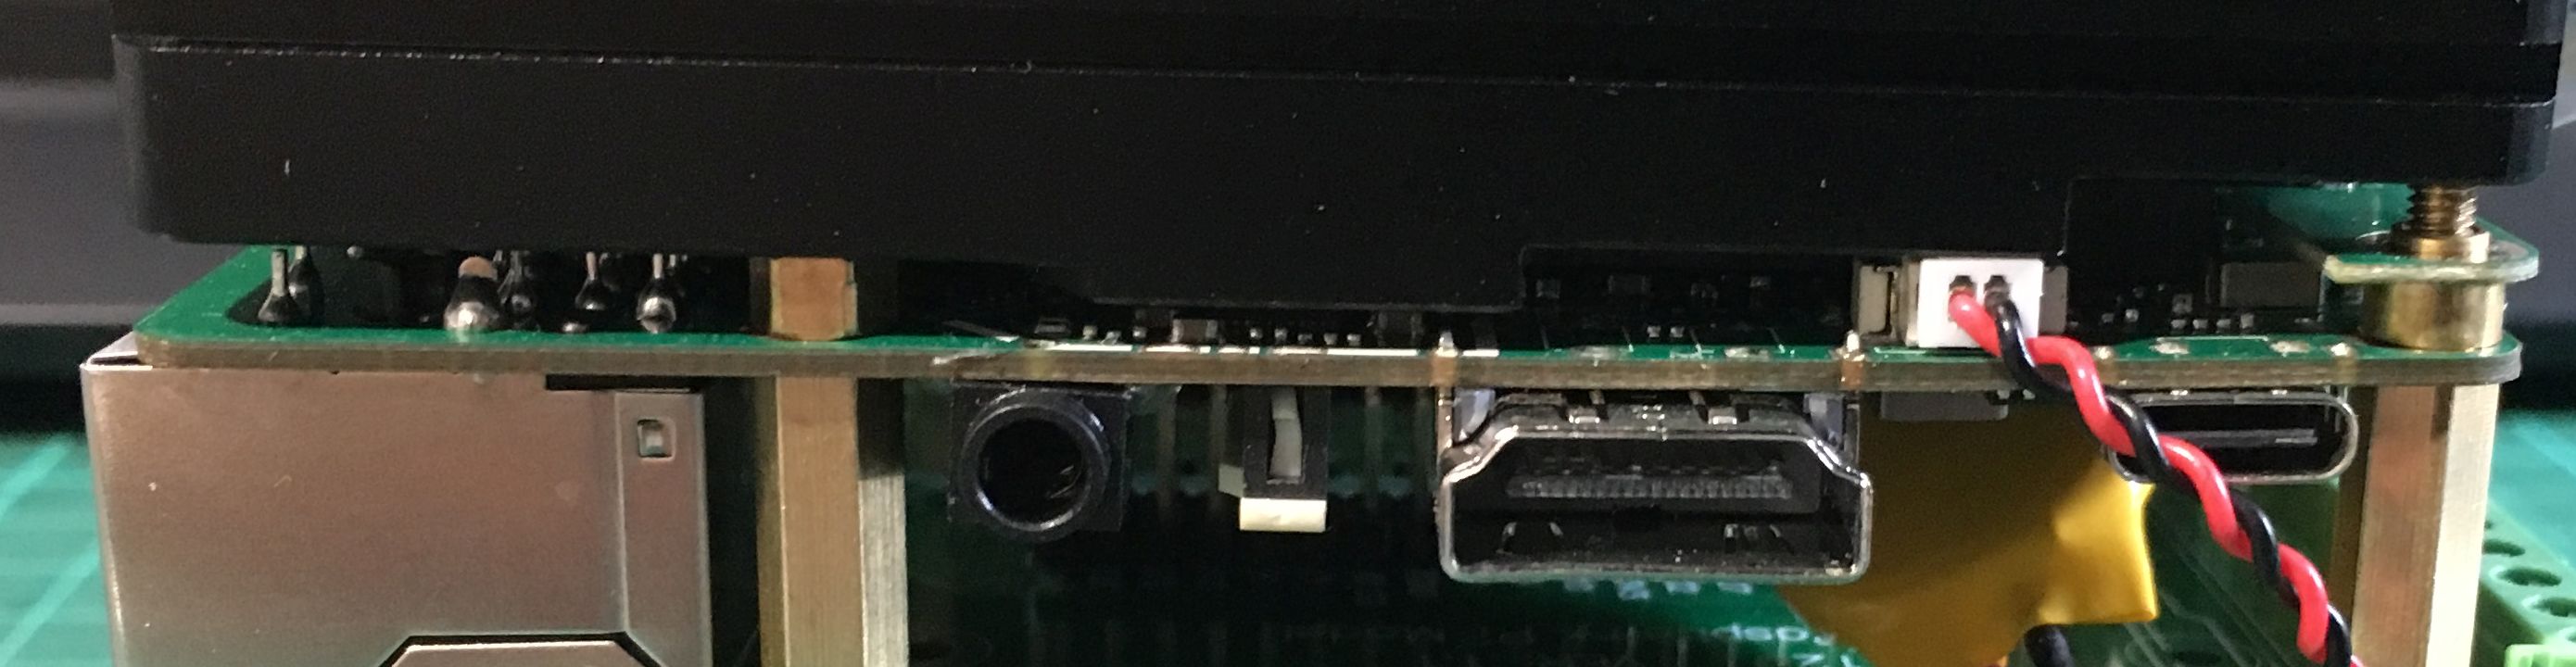
It is not possible to correctly fit the M.2 shim with the eMMC module fitted. It does not go all the way down like it does without the eMMC fitted and of course will affect the way the heatsink then fits with all parts as supplied from you an ordered at the same time.
Could I suggest that if you receive an order with various options that you provide the parts and instructions to allow these parts to work together as intended without people having to guess or DIY.
Please contact the corresponding seller directly to arrange a direct refund and please also sending back to us.
The board has been damaged!
Although it is man-made damage, we still say sorry to you!
We accept the advice humbly! Add more installation documentation
Thanks Luffy, I have contacted Allnet China. Will post an update when this is resolved.
Regards,
Paddy
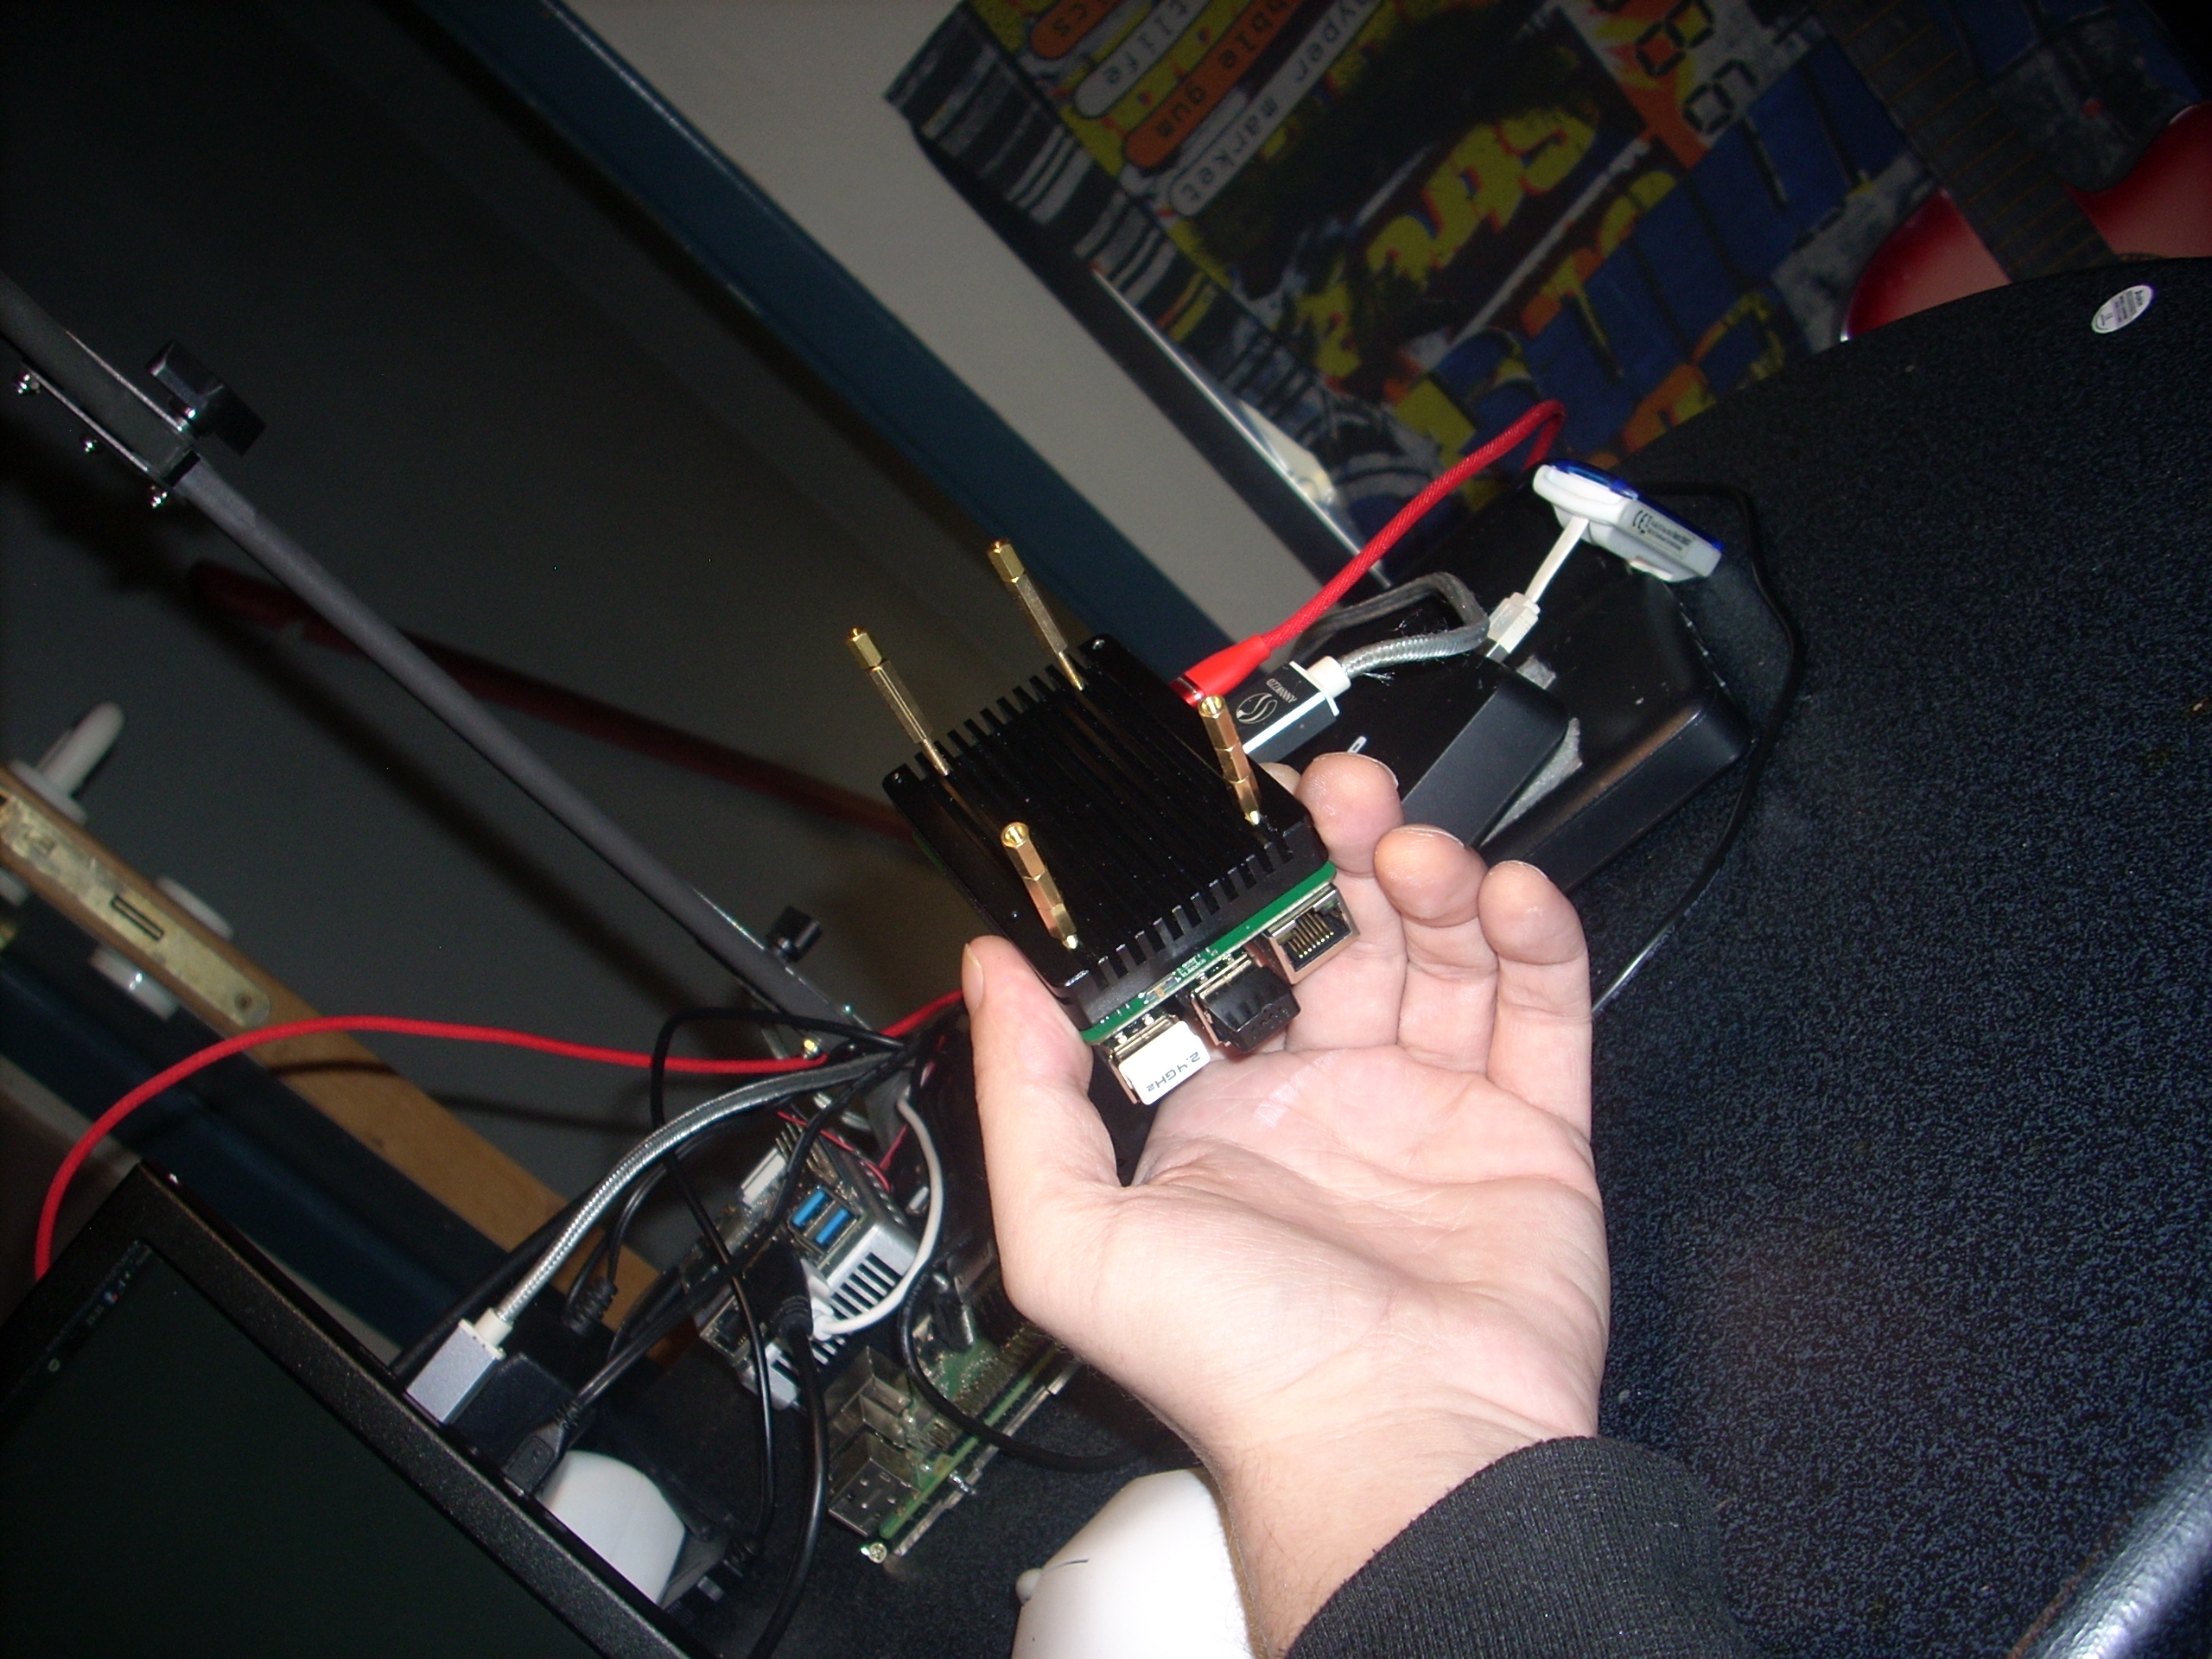
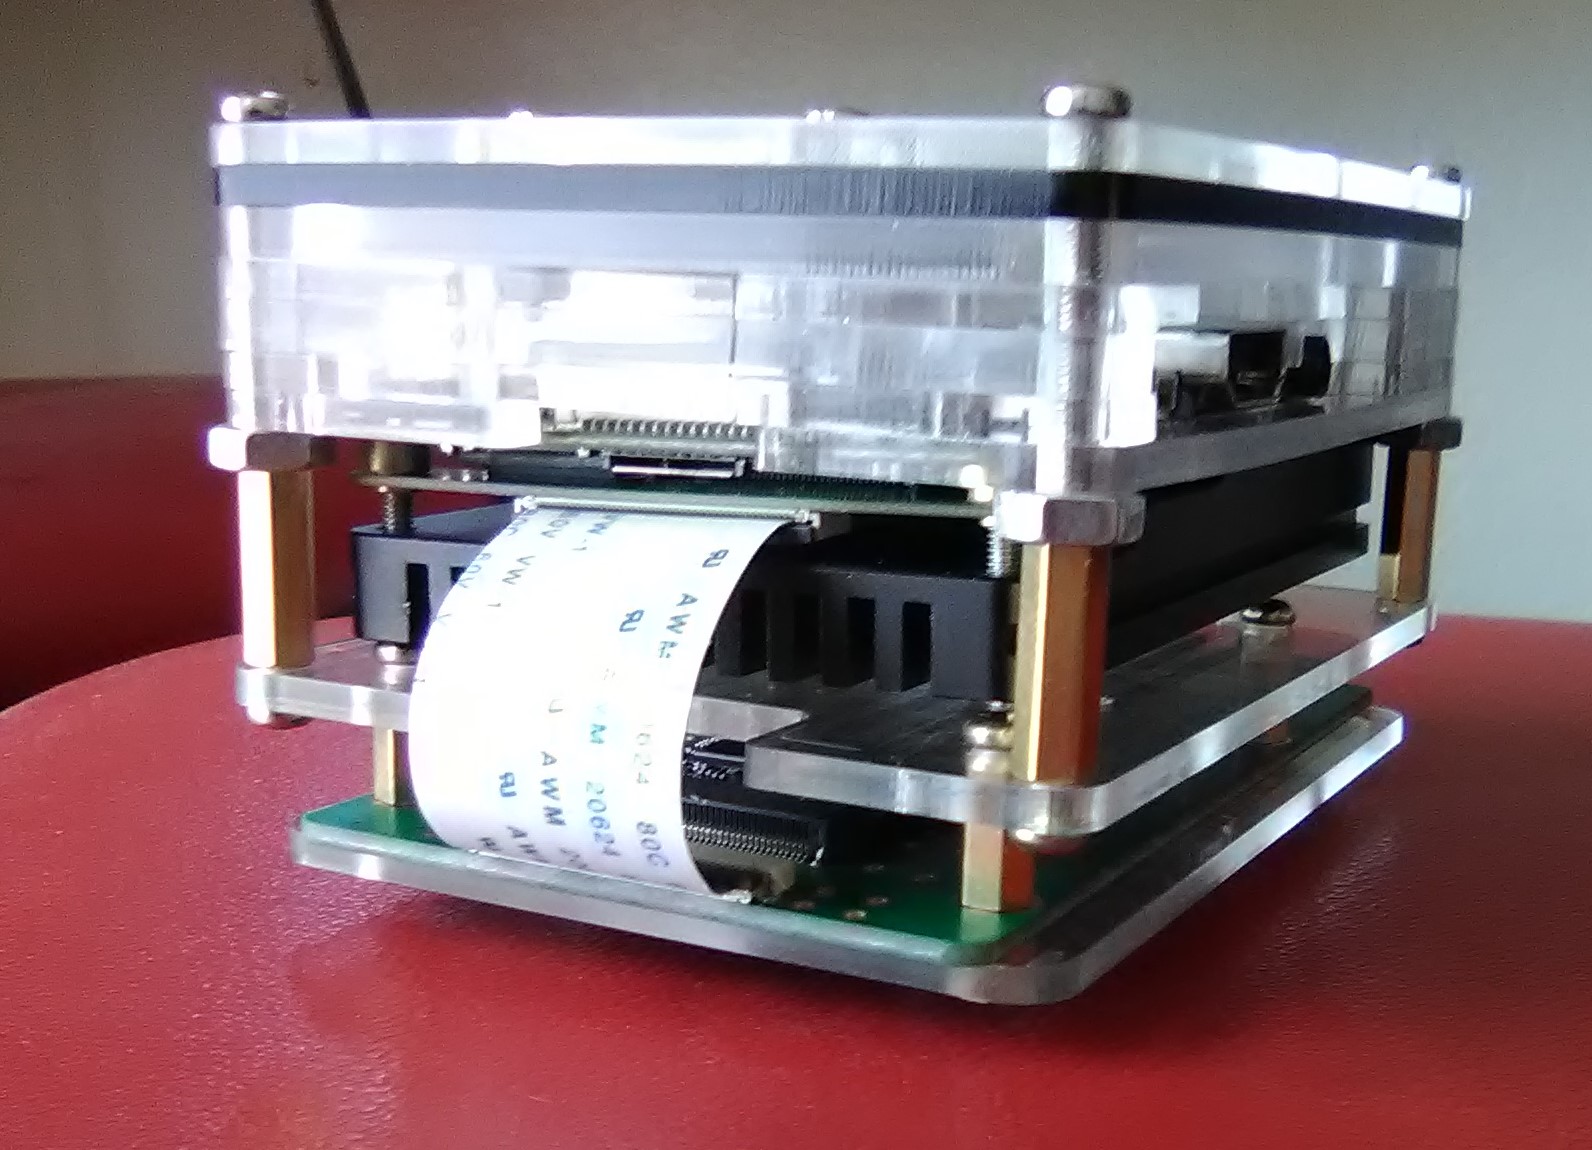
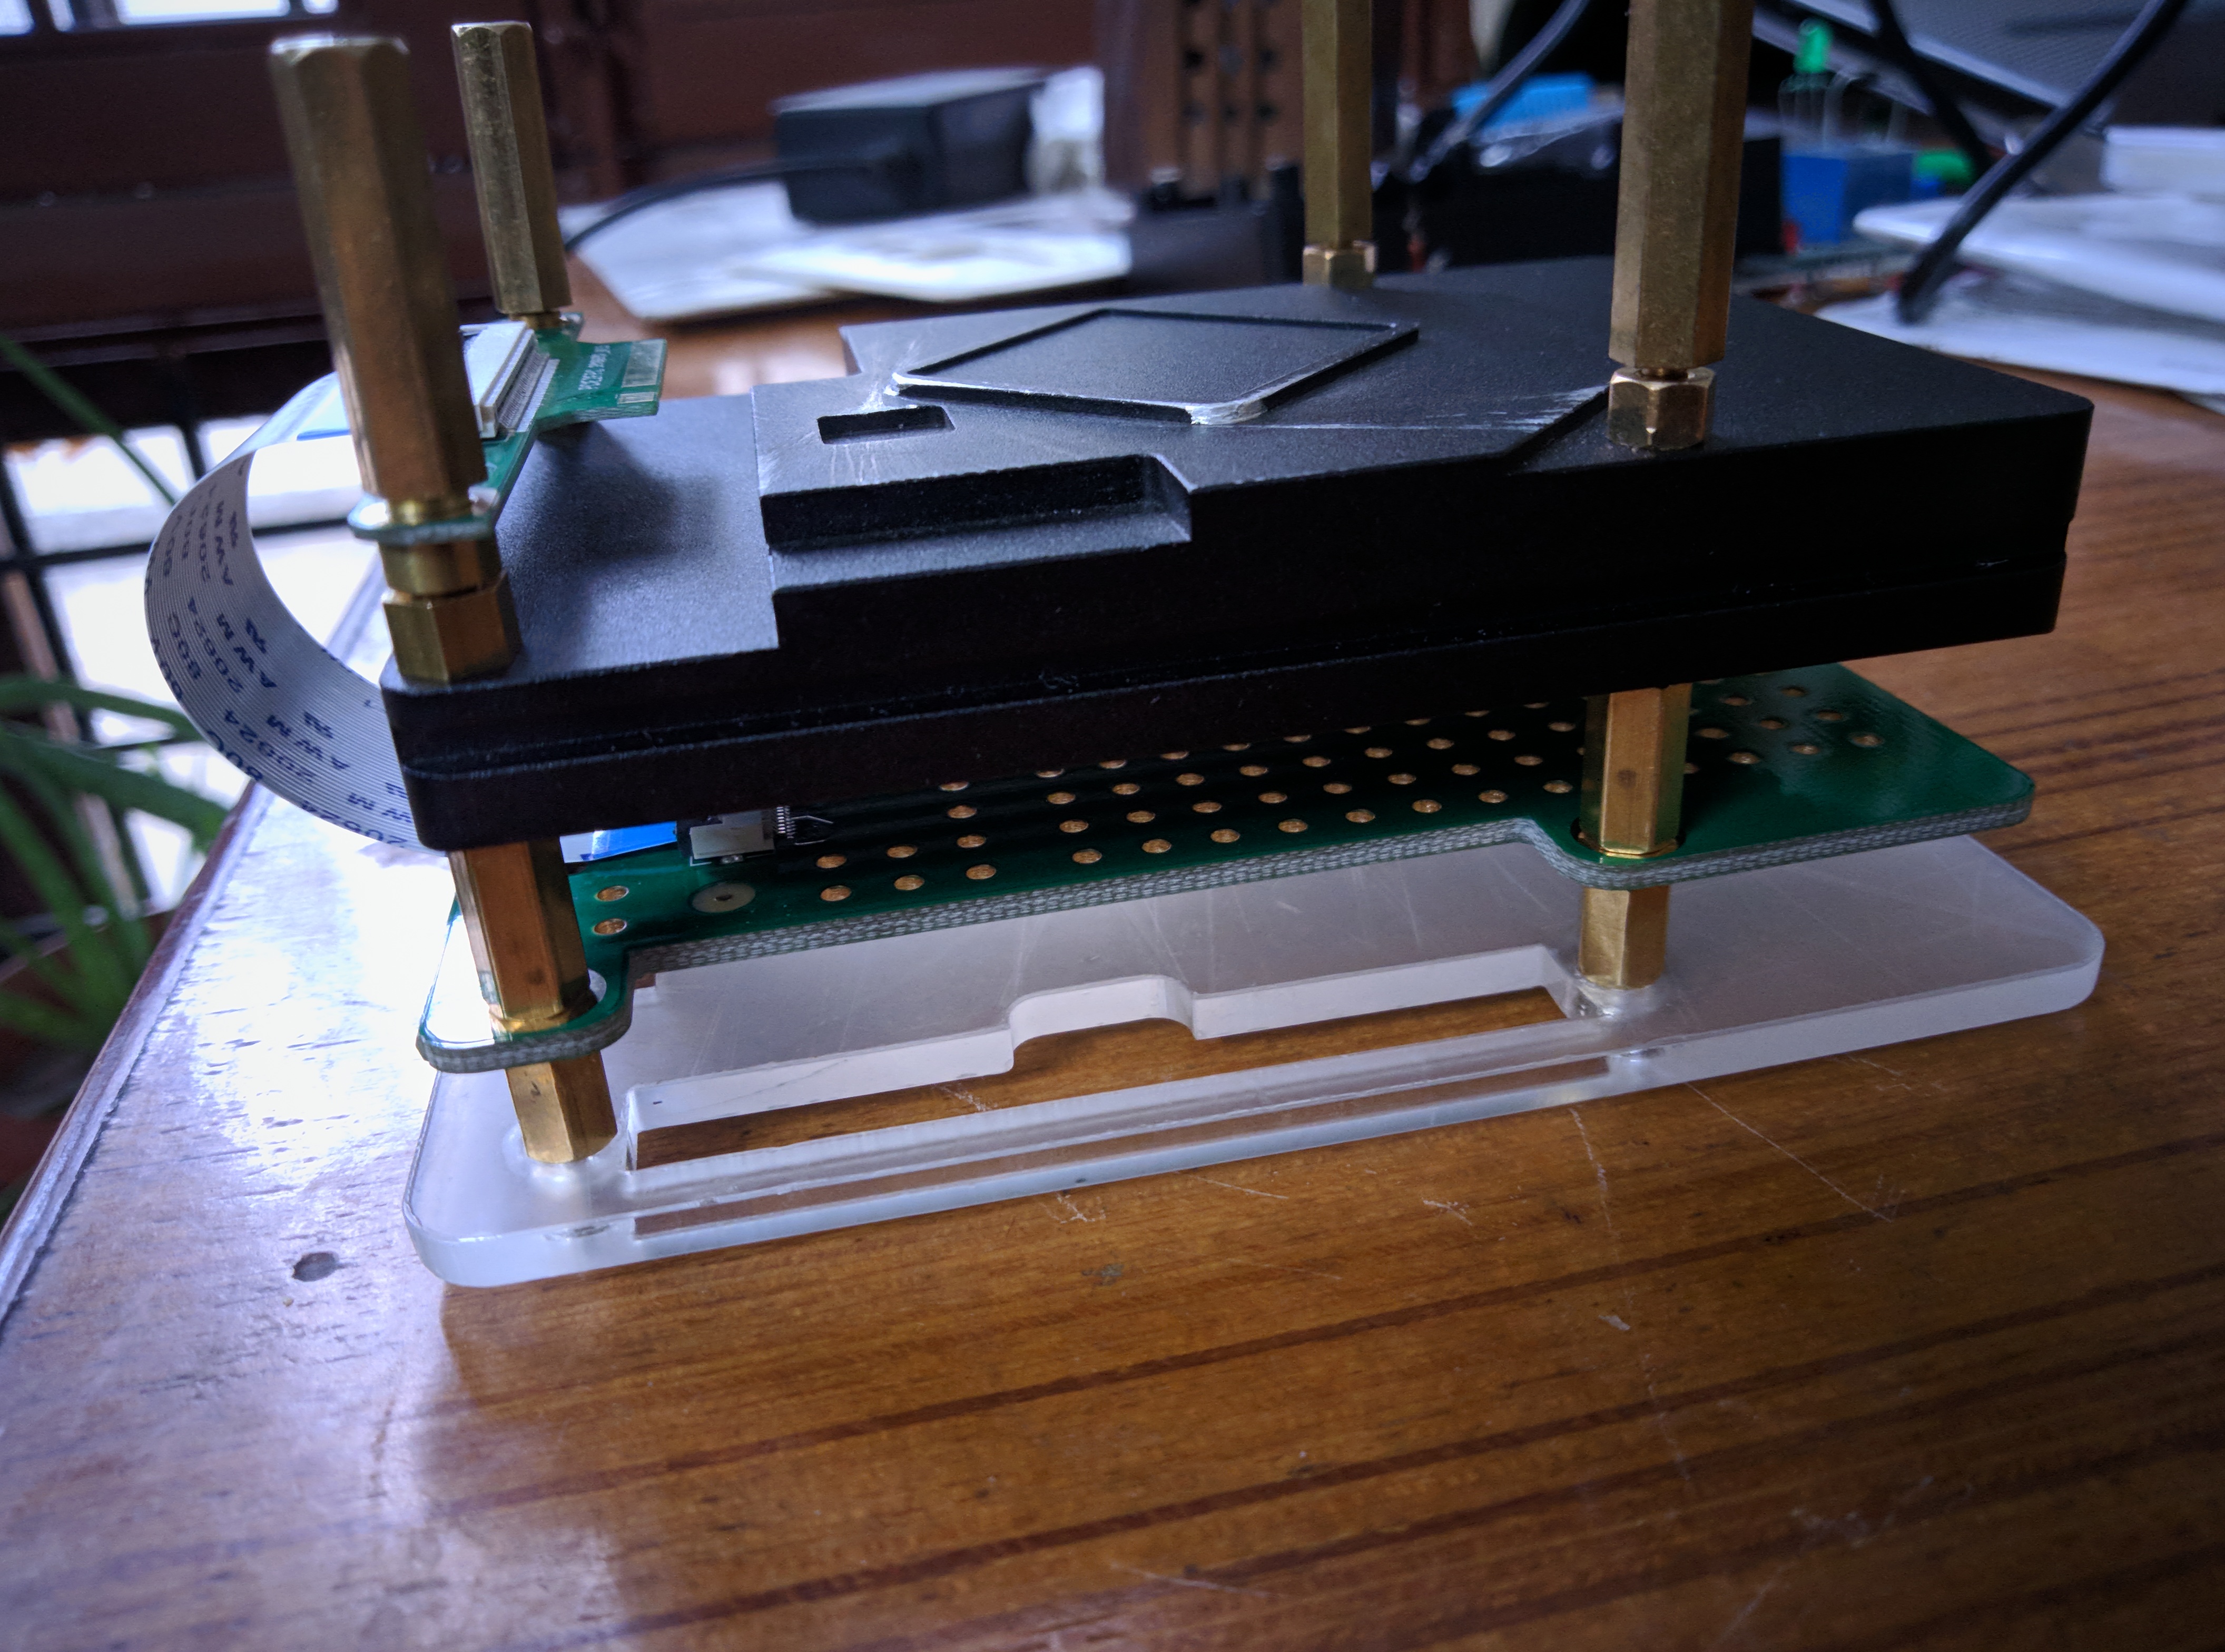
I mounted the SSD with standoffs on the opposite side of the heatsink. That exposes the uSD slot, GPIO header and allows the board to be protected by a modified $10 RPi 3 case w/cooling fan.
Some filing was necessary to provide clearances for OTG switch, RTC header, & USB-c connector. The bottom of the RPi 3 case separates the SSD card from the heatsink and adapts RPI mounting holes to SSD standoffs.
The provided pillars will interfere with the RPi case, so I needed to purchase 2 x 2.5mm X 12mm long flathead screws from the local Ace Hardware ($.74) to pass through the board, thread into the M.2 adapter, and thread into the heatsink (last image, final mod).
After taking the photo, I found that a few nylon washers in between the mainboard and M.2 shim provides the necessary clearance needed for the eMMC module. Otherwise, allow a few threads to show on the mounting screws (standoffs), by not completely tightening the shim down, prior to installing the heatsink. Consider the mounting screw as a means to adjust the distance.
Hope this helps.
Note: Photos show the original ver 1.2 M.2 extender board. The new ver 1.4 extender board has the M.2 connector underneath the extender board.
Very nice setup! Which RPi 3 case w/cooling fan did you use?
Thanks.
Pictured is a $10.99 Miuzei case, which includes 3 heatsinks, fan, & feet from Amazon.
To replace the above case that was stripped from my RPi 3B+ by the Rock Pi 4B bully, I’ve since purchased a $10.99 OoOEgg_X case, which includes 3 heatsinks, fan, and 5V/3A power adapter w/on-off switch, also from Amazon.
I think the OoOEgg_X looks nicer, with alternating black layers and black screws. The power adapter is a free bonus.
Hi, anyone had any luck finding which size of screws is required to mount the other side of the heatsink to something else? M2 is too small, M2,5 is too big.