I wanted to extend my approach to the possibility of attaching the NVME carrier.
Since I don’t own this extension I wanted to ask, if anyone can provide the dimensions of the carrier pcb and the other parts (including ribbon cable). A 3d model would be even better 
thanks a lot
The M.2 extender board is 87 mm long X 55 mm wide.
BTW, ALLNET says they have started production of an aluminum case, but I haven’t seen it yet.
The following is what I came up with after much thought, searching the web for suitable project boxes, and metalwork. Unfortunately, I am unable to upload the document as an attachment, so formatting is lost, but I hope the information is helpful for others.
Aluminum Rock Pi 4B Case
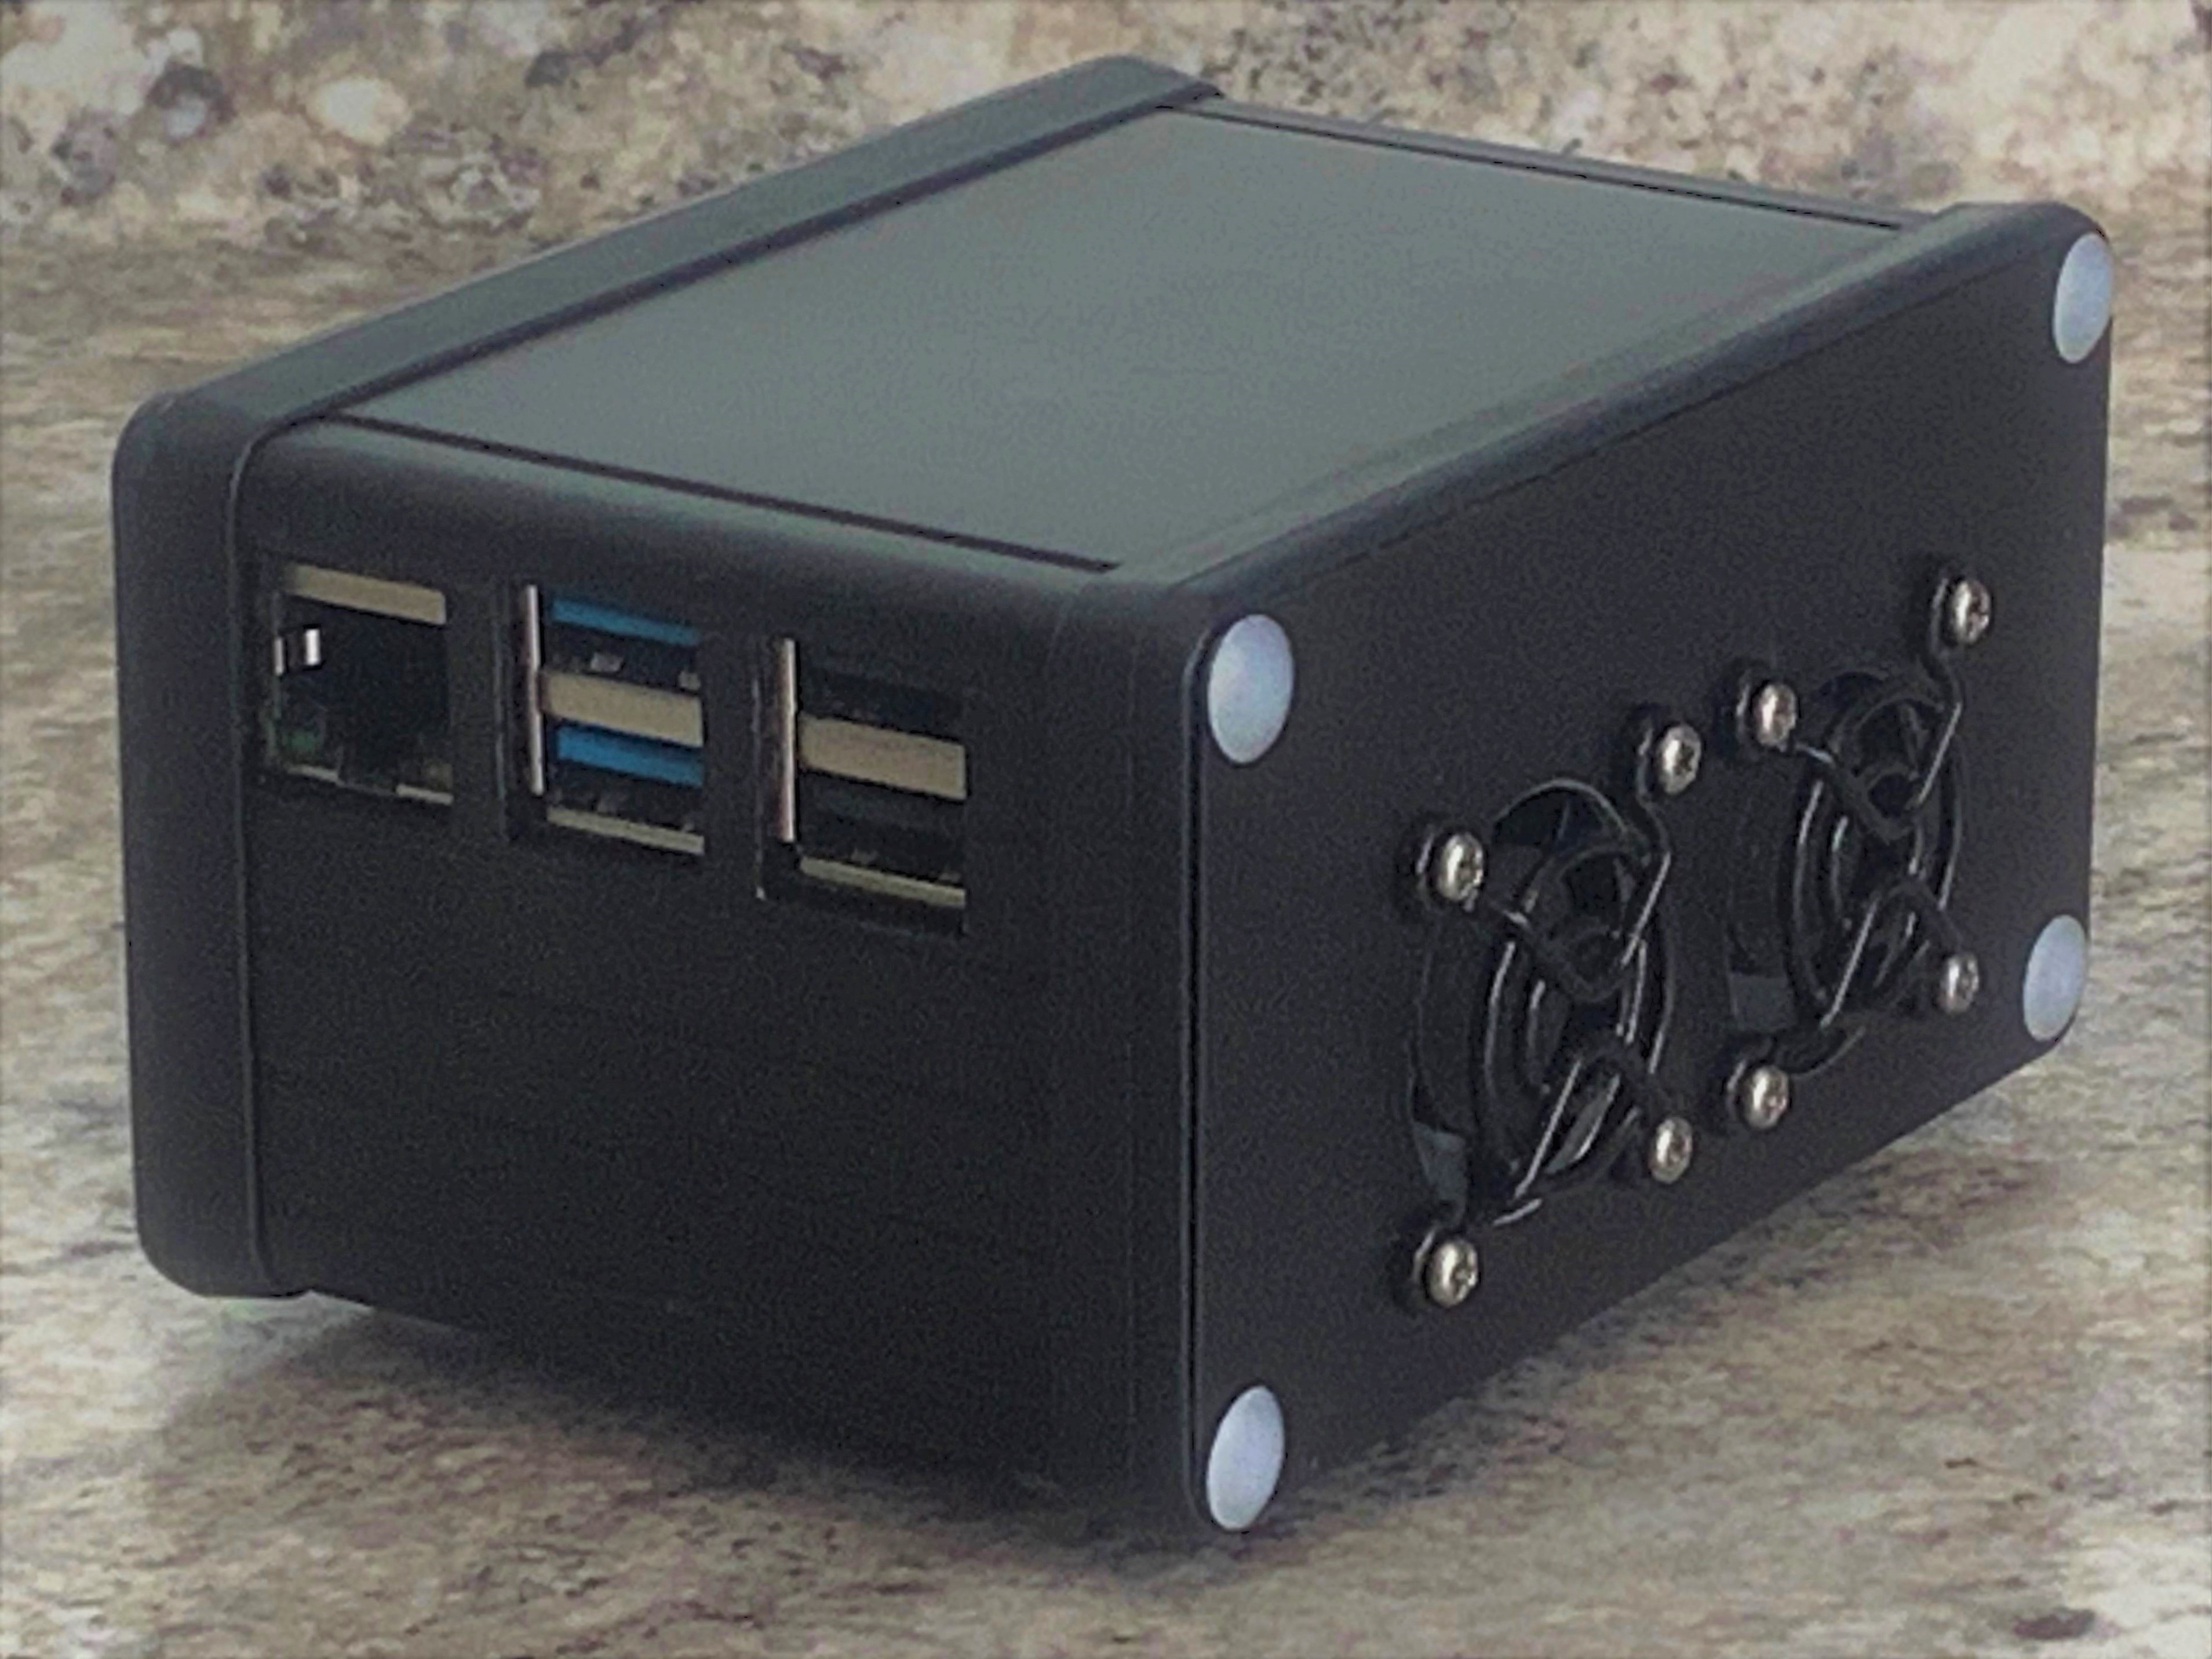
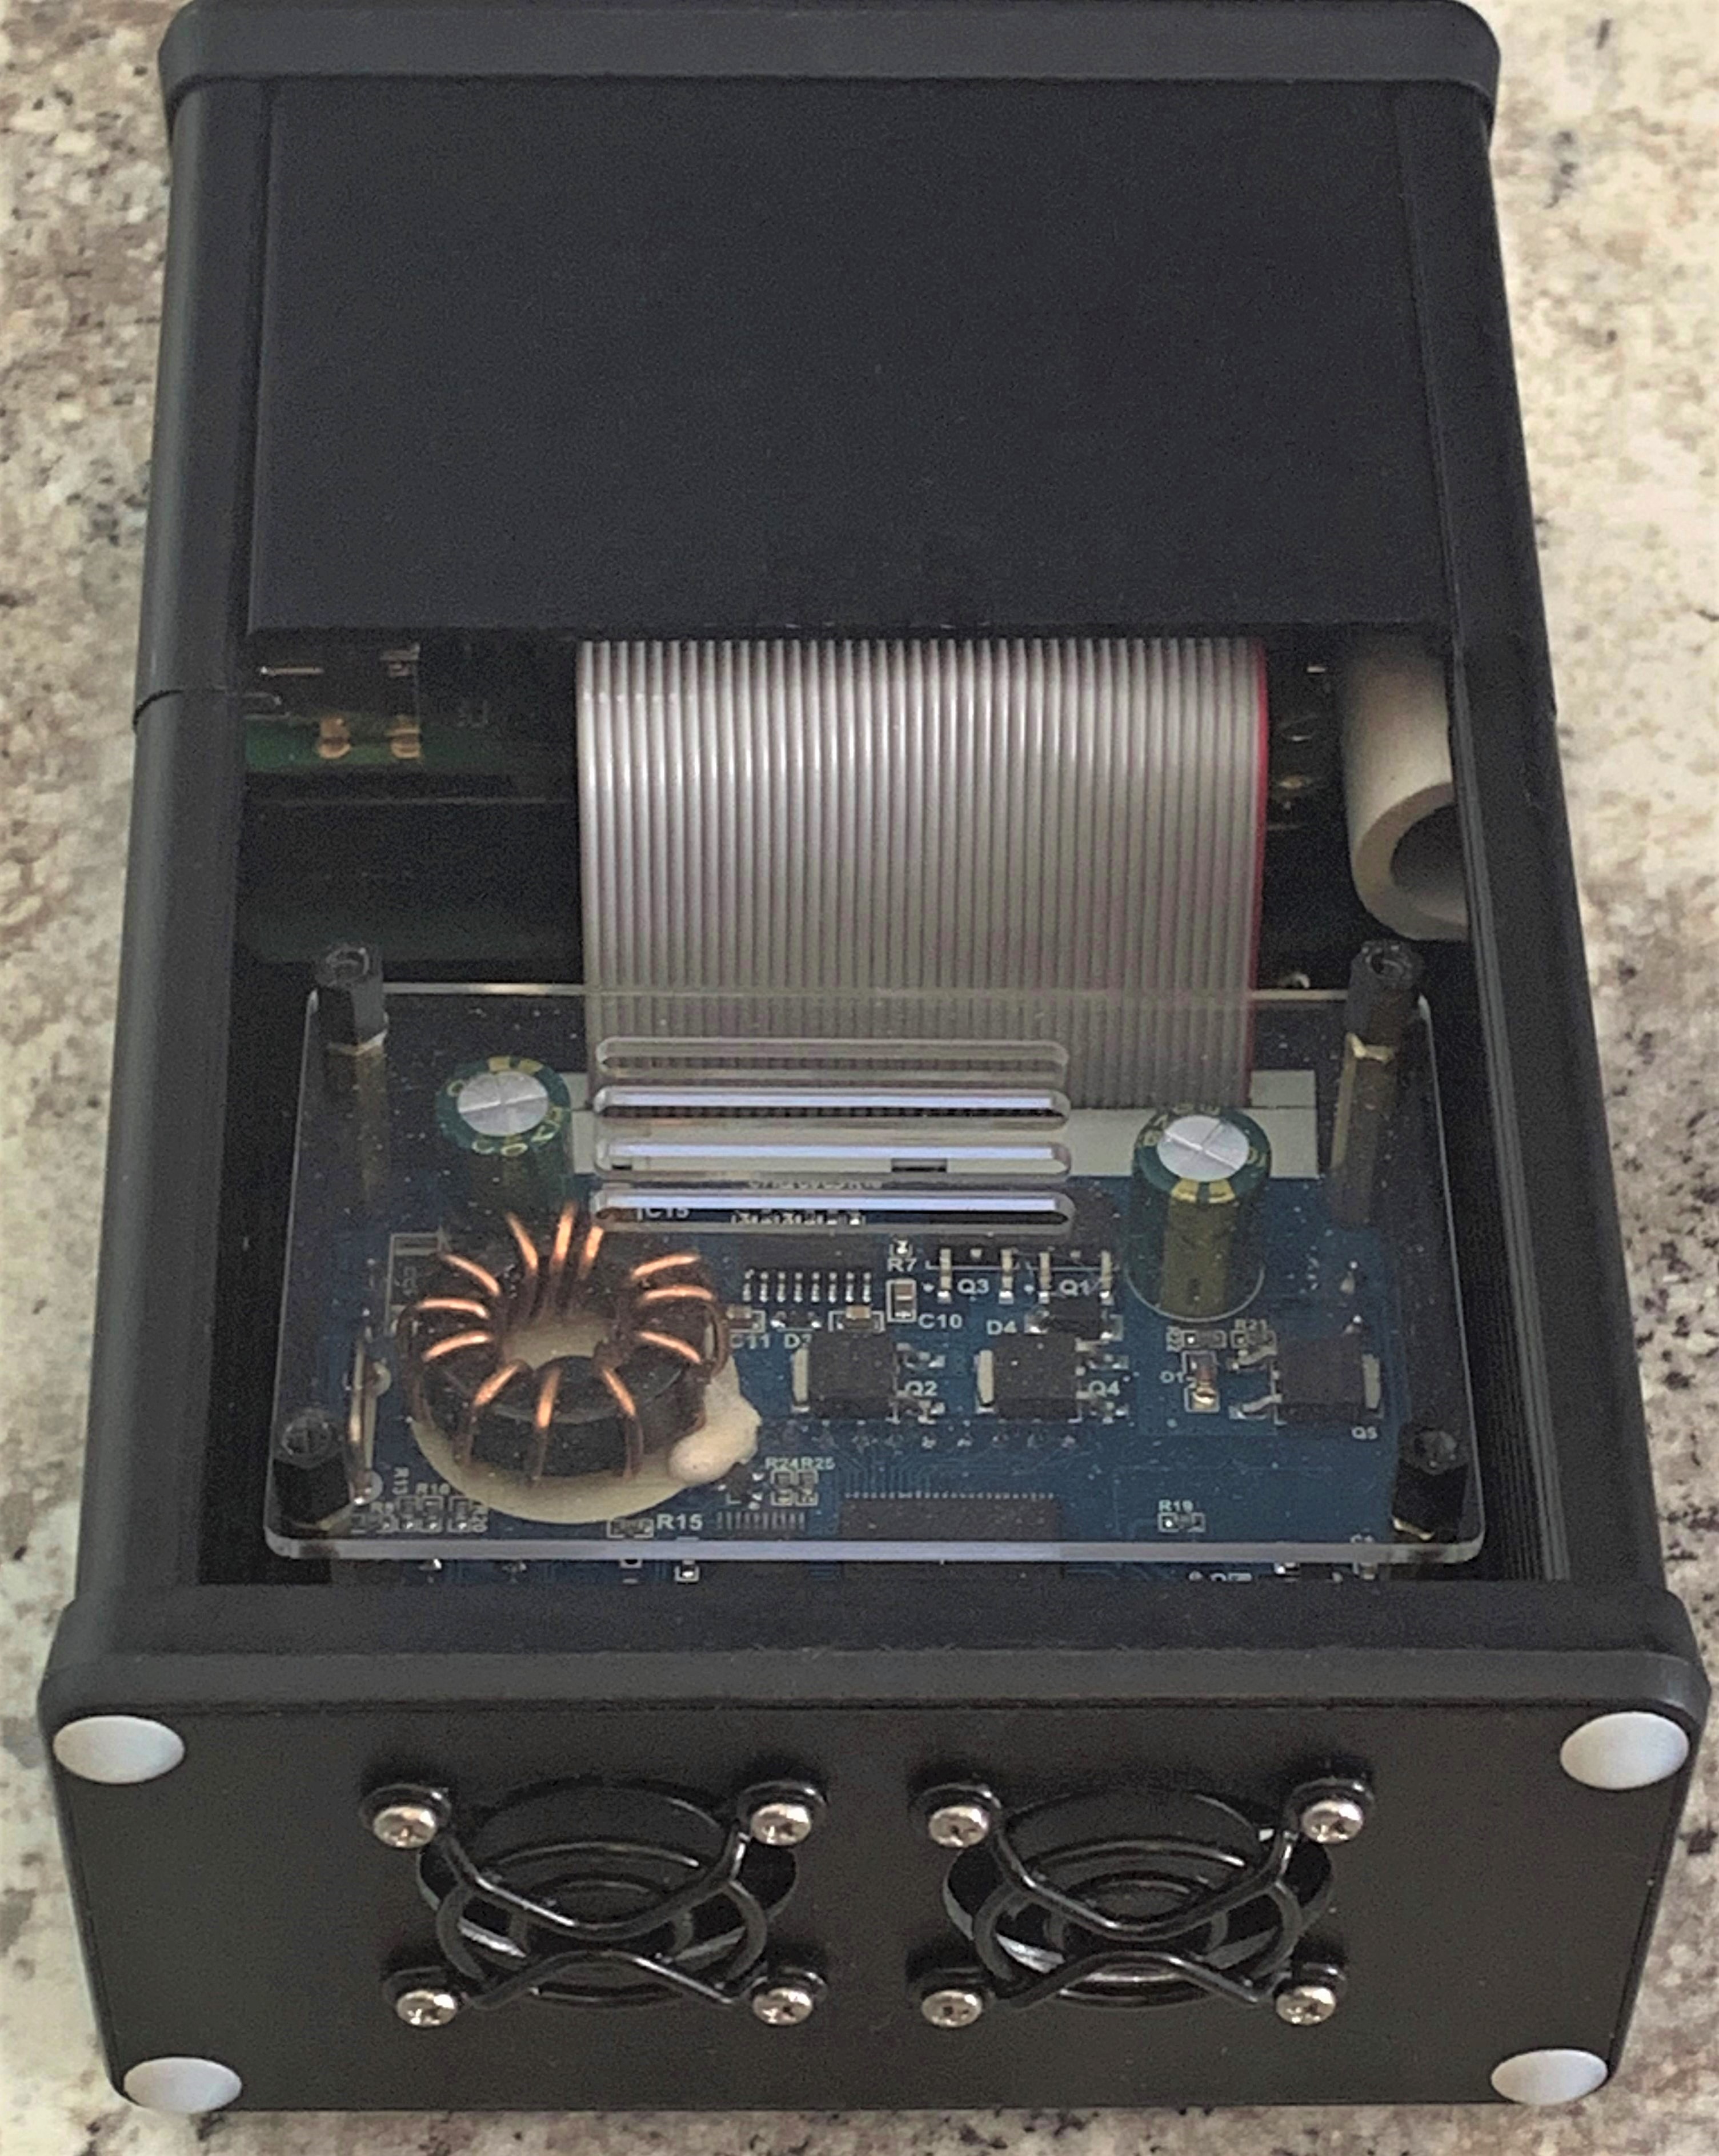
First, you see the typical Raspberry Pi arrangement of connectors on the top half of the aluminum case, while the bottom half has been expanded to accommodate the Rock Pi 4B’s large heatsink and SSD.
The SSD is mounted beneath the heatsink, but separated from the heatsink with standoffs. This positions the SSD it at the lowest level inside the case to avoid whatever ambient heat may be rising from the heatsink.
Beneath the ethernet and USB ports, the heatsink is in direct physical contact with the aluminum case, which effectively creates an extended heatsink.
The FPC cable for the M.2 extender board requires extra room beyond the end of the main board and heatsink, which means the microSD slot is located further inside the case, making it more difficult to access, plus microSD cards are more easily dropped inside the case.
A short length of ½” diameter PVC pipe, cut lengthwise, and mounted horizontally solves this issue by forming a catch tray and precise guide for accessing the slot. Tweezers are still required for insertion and removal, which is less frequent when booting the Rock Pi 4B from the eMMC module.
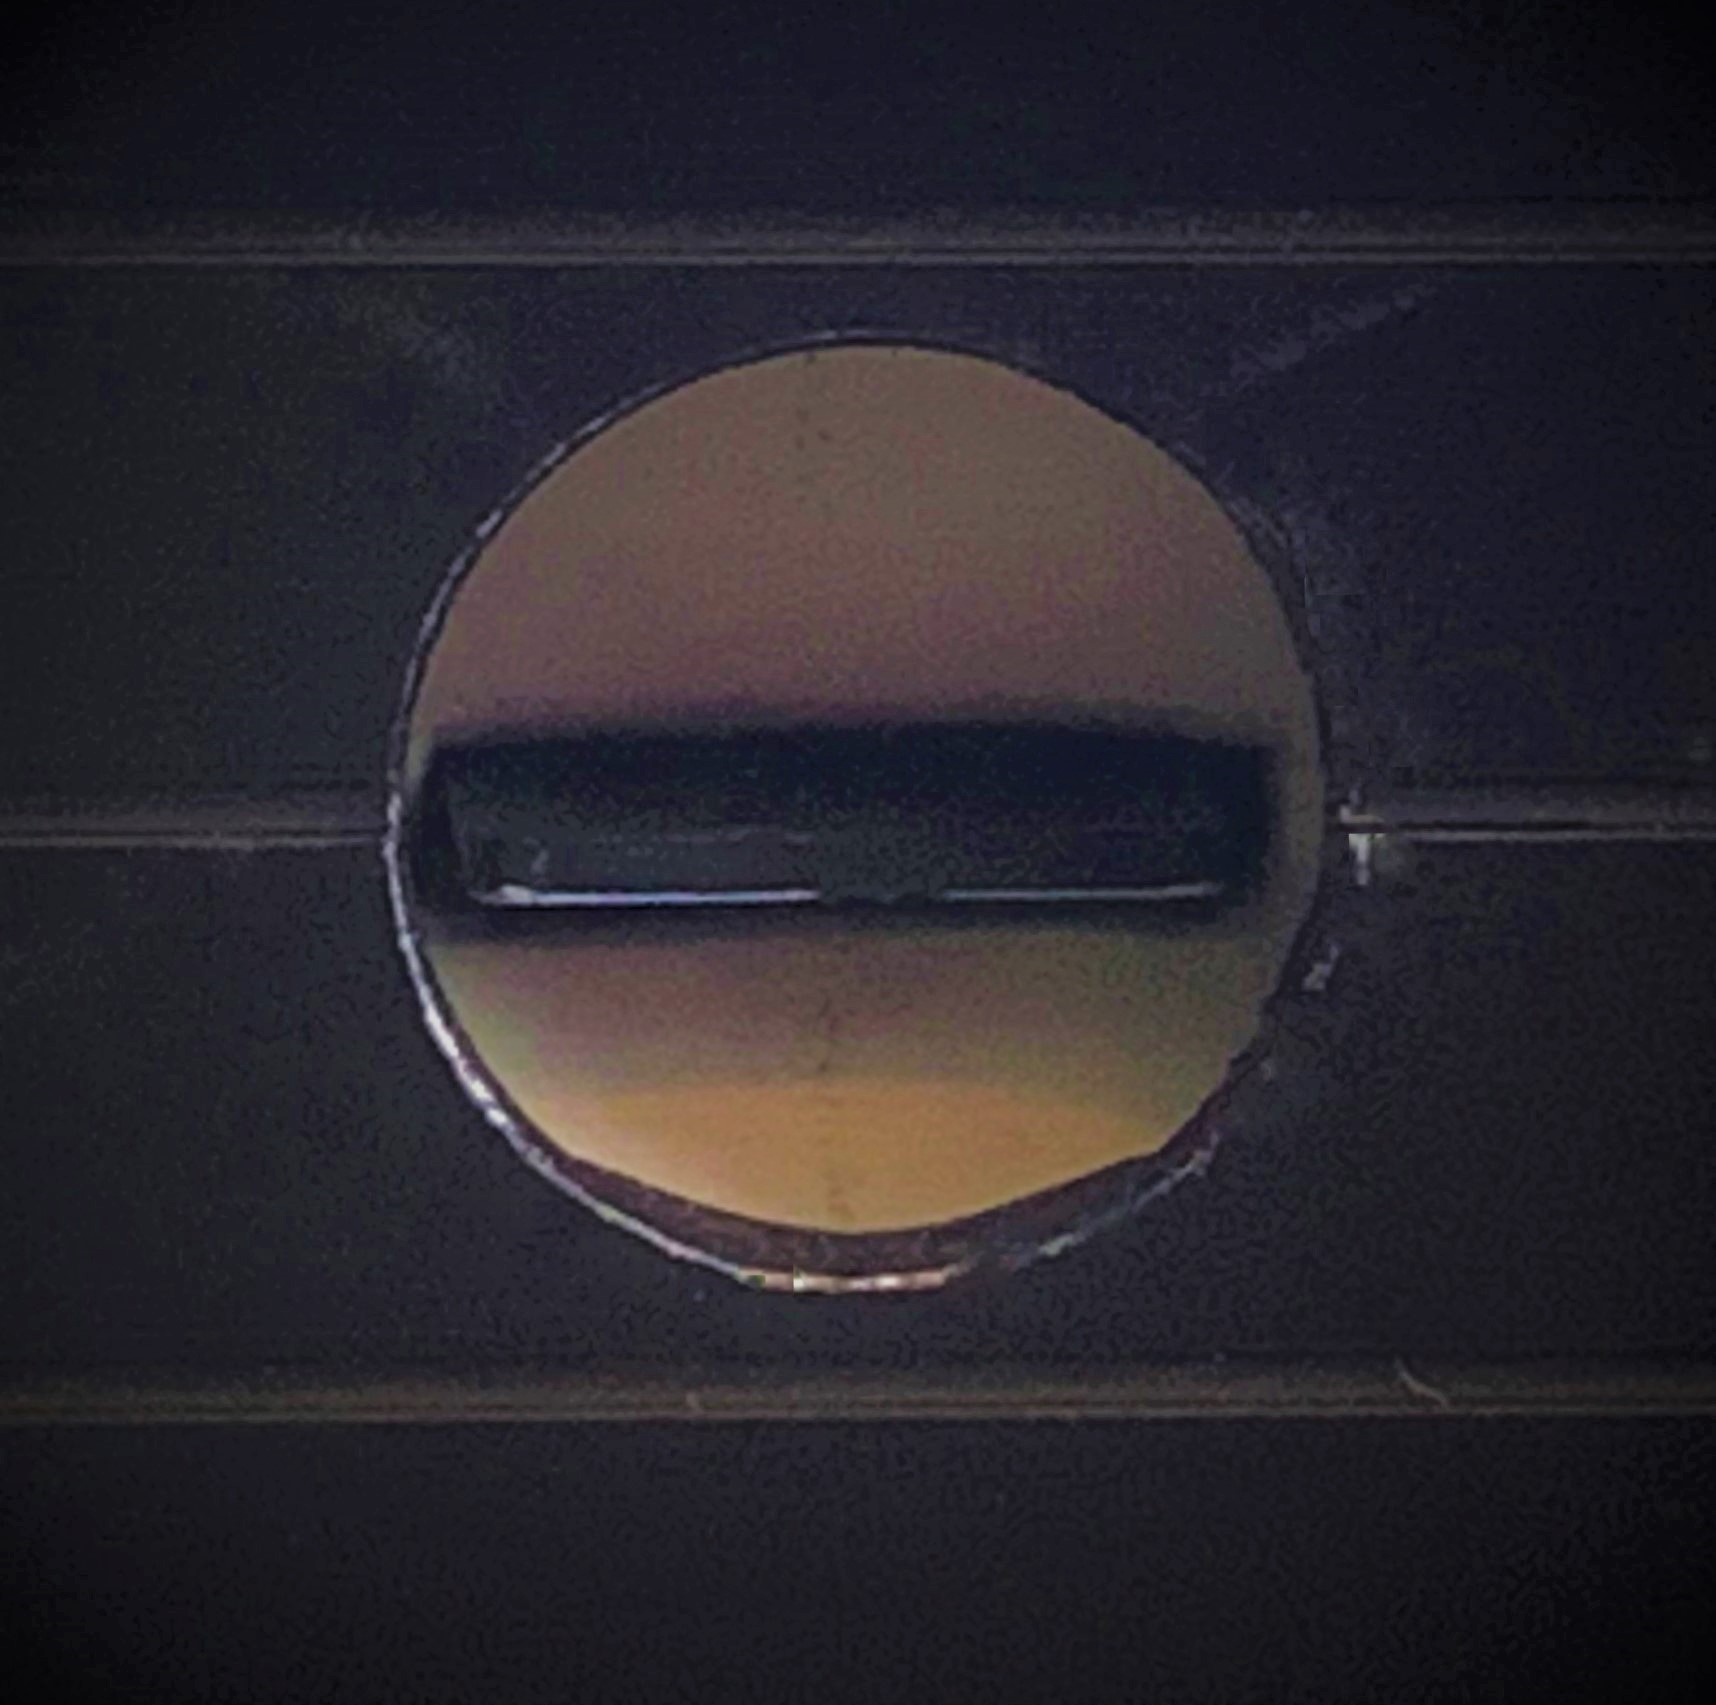
With the catch tray’s white color, it is much easier to see the microSD slot. A hole located near the power LED illuminates the interior of the catch tray creating a nice soft green glow when power is on.
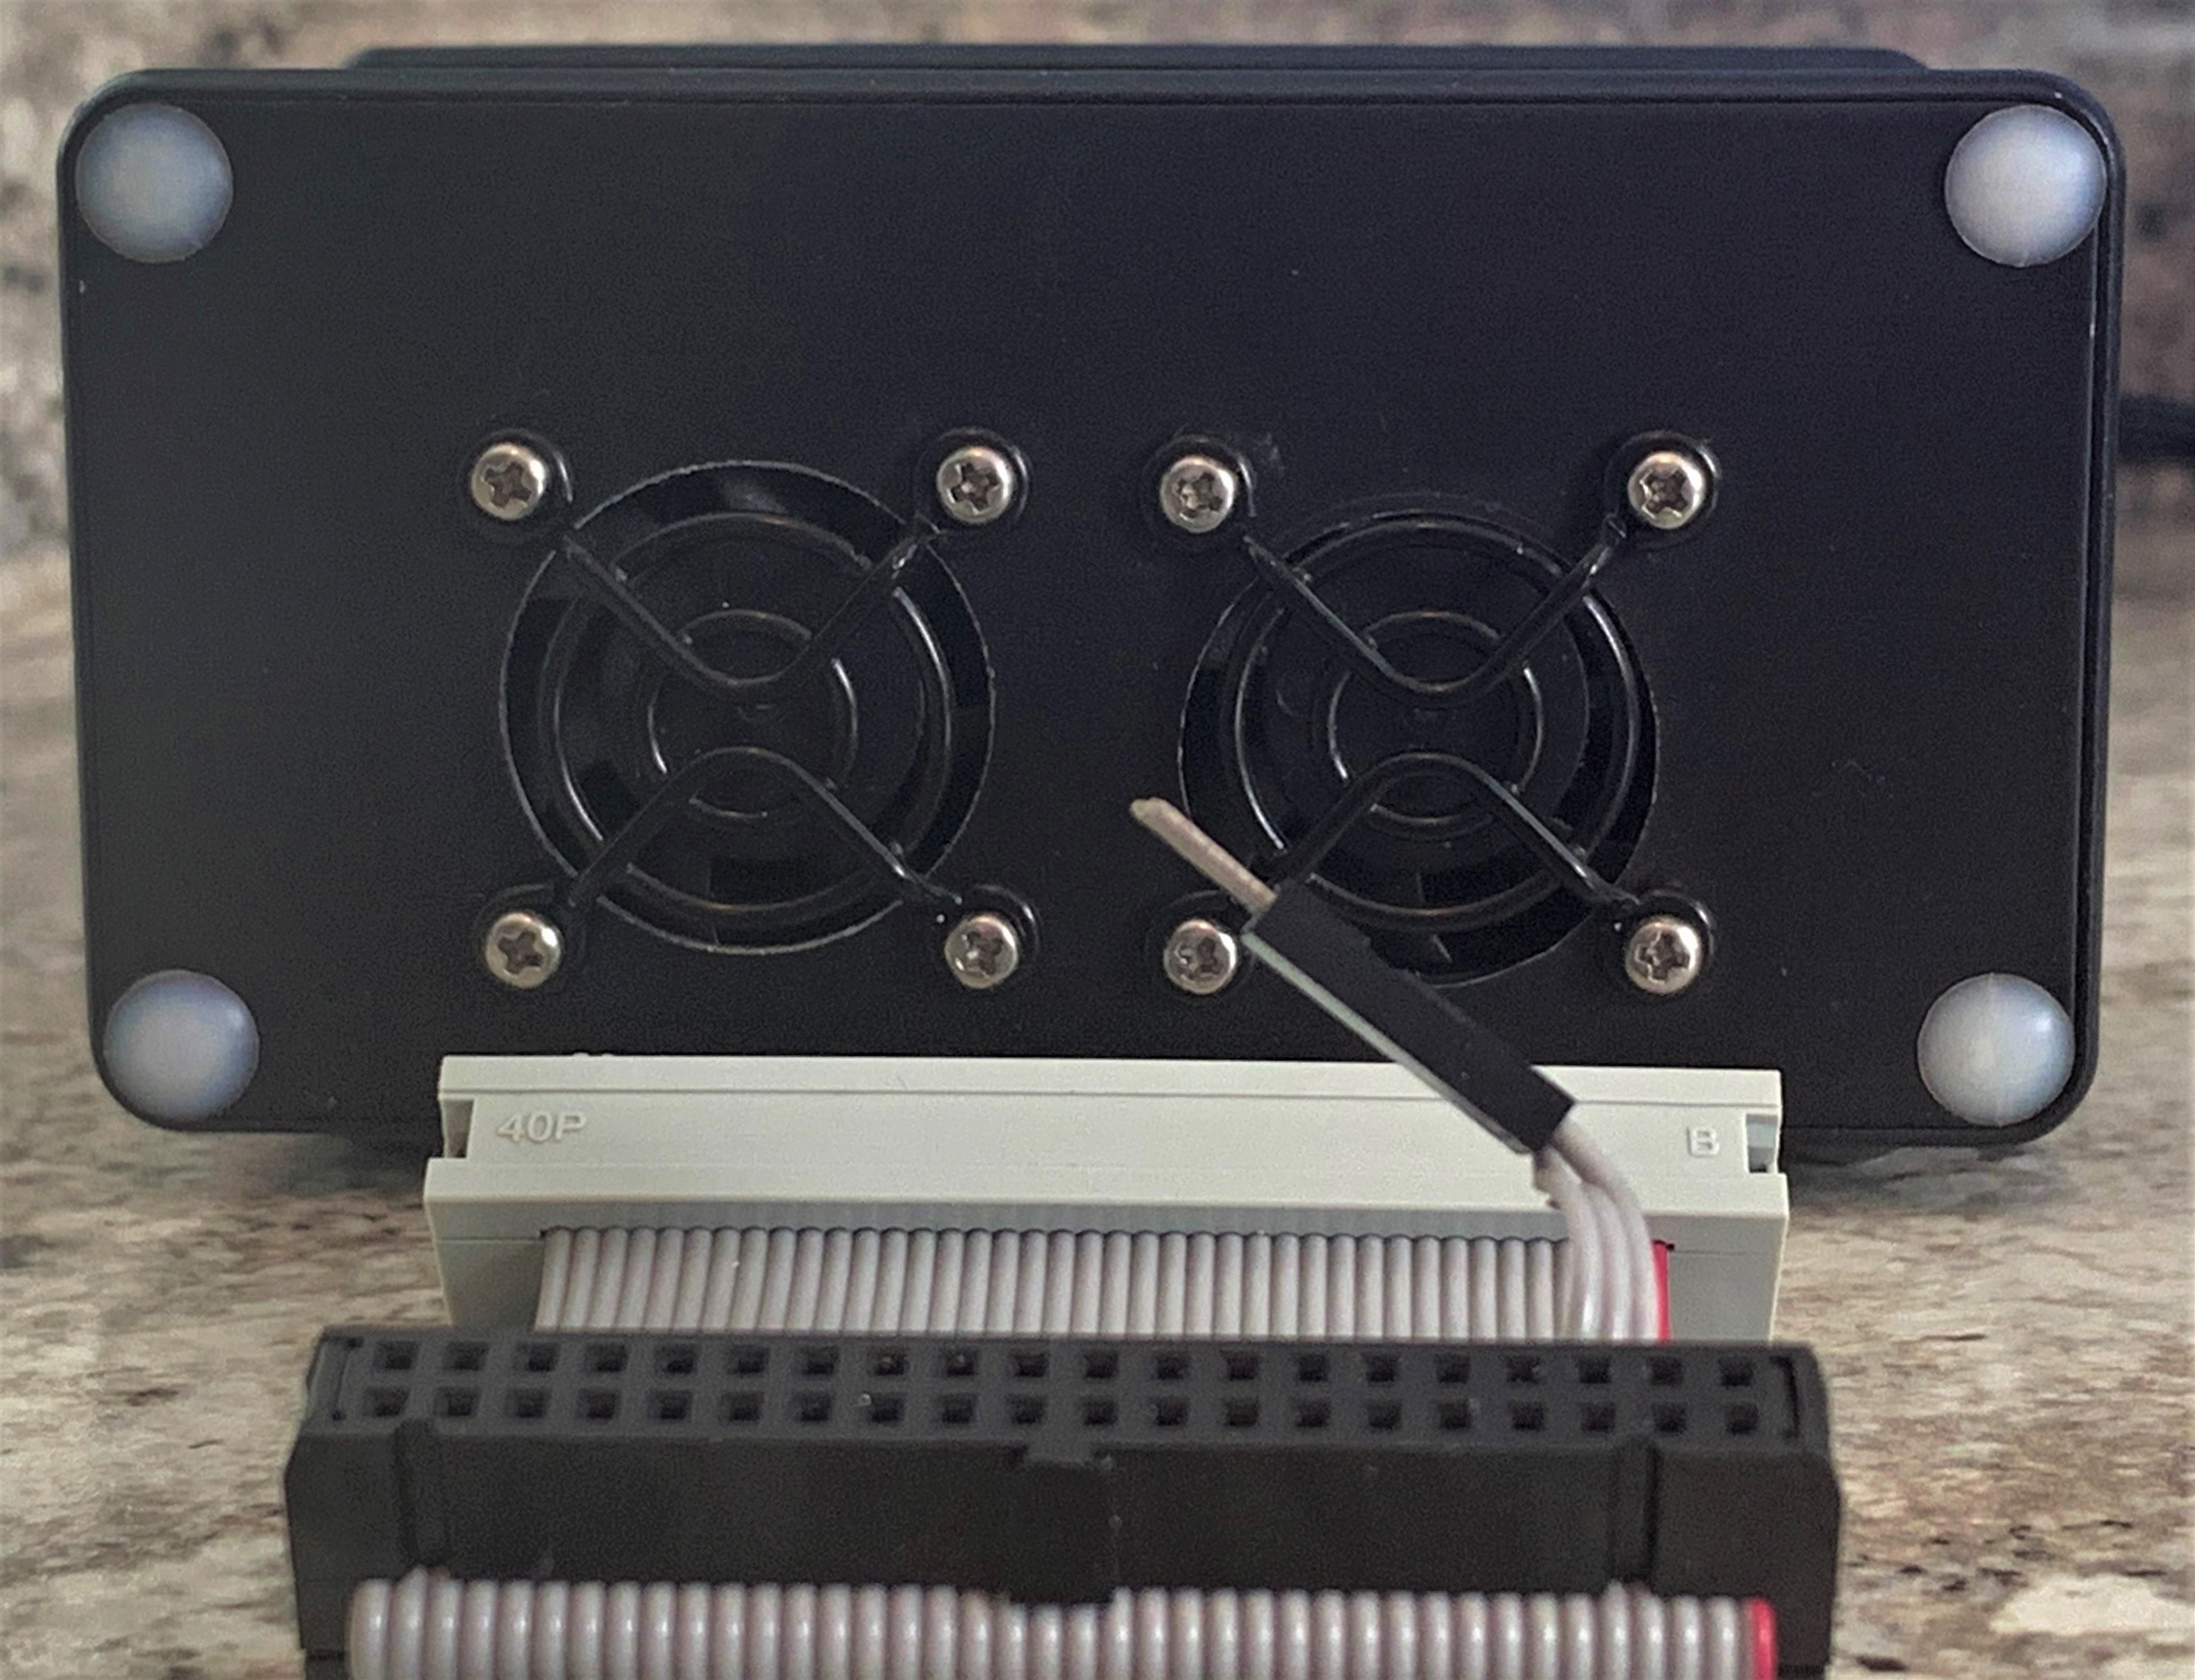
The aluminum case is cooled with dual internal Raspberry Pi fans, with protective grills that make the Rock Pi 4B ready to roll. Junior can carelessly grab it up and stuff it into a backpack, with no worries.
The dual fans are positioned to force air directly into the space between the large heatsink and the M.2 extender board. The hot air is pushed out through connector ports and vent holes.
The fans are powered from GPIO pins 4 & 6. A custom ribbon cable extends the 5 VDC & ground wires to compatible connectors and splitters for powering both fans while the GPIO header is being utilized by a ribbon cable during project development.
The top panel of the case can slide away from the fans, creating a gap for either the GPIO extender cable or a standard 40 pin ribbon cable to slip through for communicating with the external world. By using the optional GPIO extender ribbon, the top panel can remain in place to protect the Rock Pi 4B board and to maintain consistent airflow. It is no longer necessary to get inside the case, just to disconnect the ribbon cable.
There’s also less risk of breaking the breakout ‘T’ on the solderless breadboard because all the connect/disconnect stresses are at the middle of the ribbon cable, not at the more fragile endpoints. The female 40 pin mid-cable connector also allows for ‘hot-plugging’ of projects, without powering down.
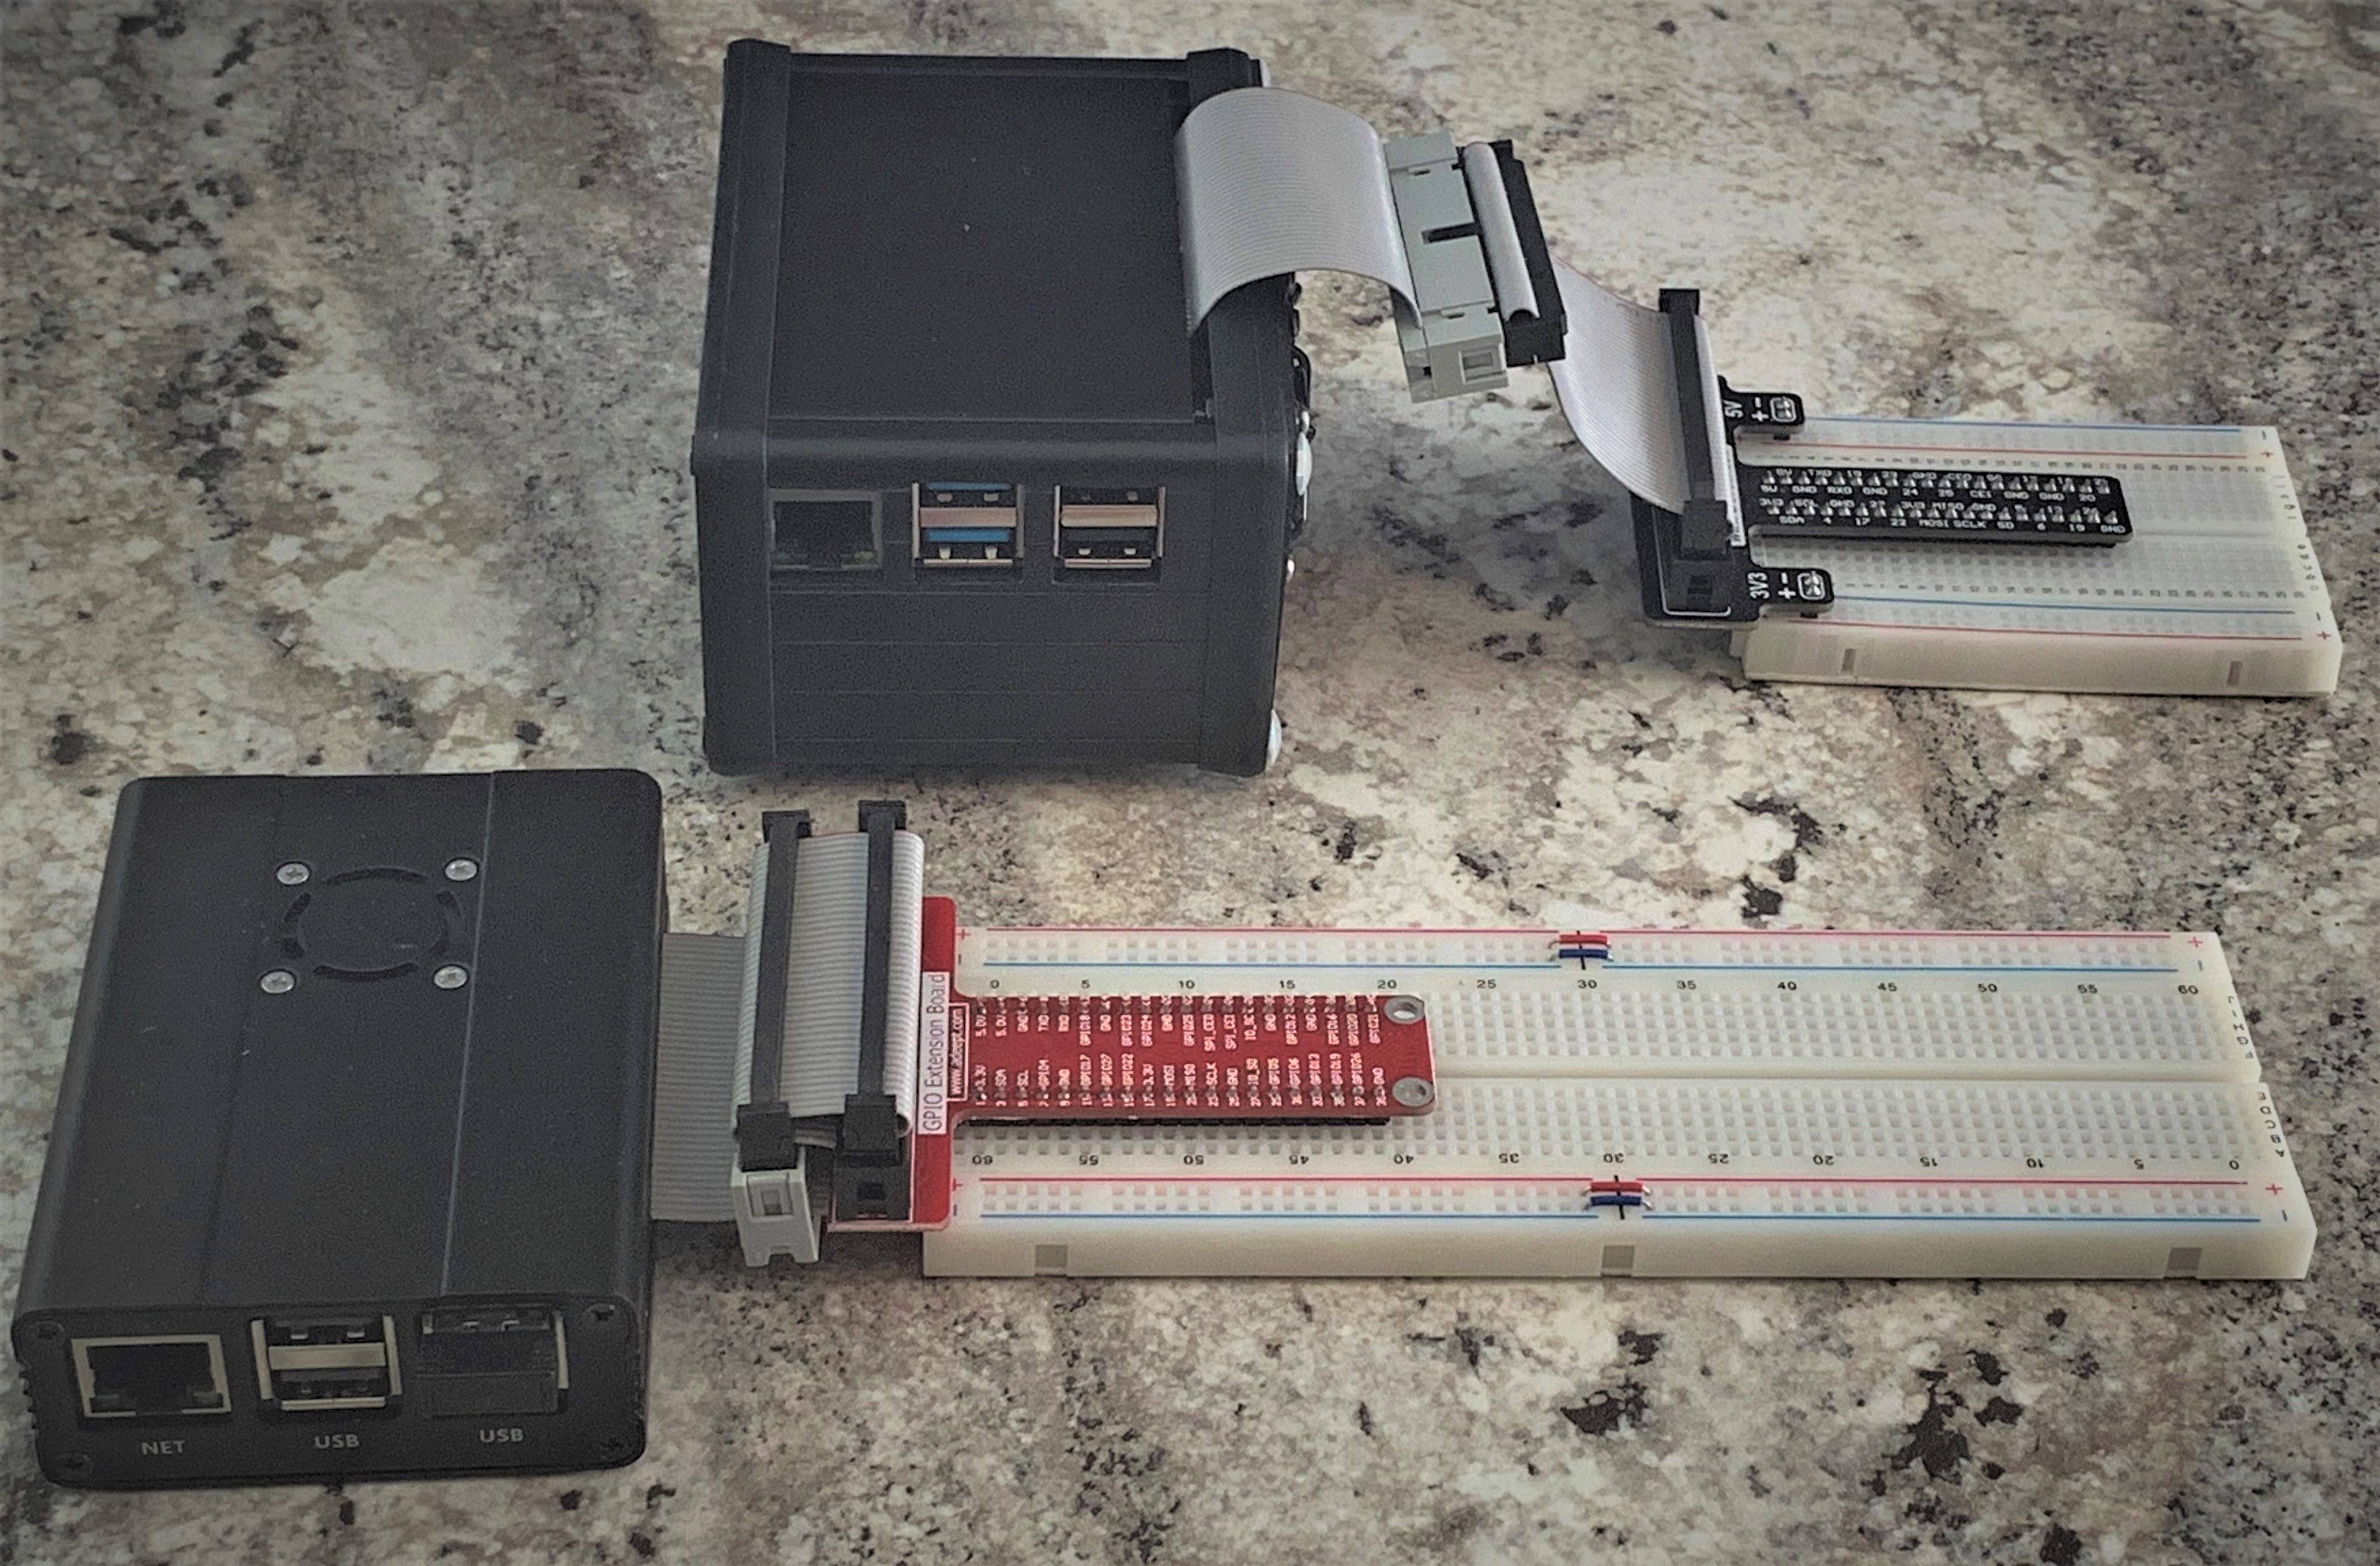
Above are similar configurations of the Rock Pi 4B aluminum case and the ($14.90) Raspberry Pi 3B+ aluminum case, both utilizing GPIO extender ribbon cables connected to solderless breadboards.
My objective was to make the case as small as possible, without losing functionality. But, the previously illustrated Rock Pi 4B aluminum case is less than half the size of the original aluminum project box from which it was made.
The unused portion of the original box can be a 100mm extension of the Rock Pi 4 case along the side of the cooling fans to include additional components and their electrical connections. No more grommets with silicone sealant.
The GPIO extender cable could be used for stacking RPi HATS or omitted if it is more desirable to connect devices directly to a few GPIO pins. Either way, M-F patch wires can be used to extend the 5 VDC power to the dual cooling fans, which have moved the far end of the extended aluminum case. With it being fully enclosed the airflow is forced onto the Rock Pi 4B, just as before. The air simply travels a little further to get there.
With the Rock Pi 4B being fully contained inside this case, the cutouts (except for the USB-C power connector and fans) could be omitted entirely for an outdoor headless configuration, safe from the elements.
Parts List:
30mm Black Fan Finger Grill (4 Packs)
$7.99
2.5mm X 0.45 HSS Taper and Plug Tap M2.5 X 0.45mm Pitch
$11.99
$43.64 Parts Total (aluminum case, dual fans, dual grills, 1 x Male + 1 x Female 40 pin IDC connectors for GPIO extender ribbon cable)
Issues
• The M2.5 mounting holes on the large heatsink were only threaded on one side. In order to use them to securely mount the M.2 extender board, it was necessary to purchase M2.5 taper and plug taps, which are smaller than those being sold in most American hardware stores. I could only order them from Amazon.
I am an experienced machinist and knew to be extra careful to avoid breaking them off because they are so small (I suspect this is the reason the holes have not been tapped all the way through by the mfr.) I also took extra care to clean out the aluminum particles afterwards, which could lead to shorted circuits.
For the convenience of others, I have requested that Radxa extend the M2.5 threads completely through the heat sink’s mounting holes so that they can be utilized from both sides.
• I could not have built this case without the new, shorter M.2 extender board. Thanks to Radxa for making that modification. However, instead of the end of the board being in line with the USB and ethernet connectors, it needs to be in line with the board and heatsink. The RPi connectors are intentionally designed to extend beyond the SBC in order to fit through cutouts in a case. This specific aluminum project case has a ribbed interior for mounting circuit boards. The connectors were only able to be flush with the case’s interior by filing away the ribs around them.
Then, I used a Dremel tool to modify the mounting holes on the M.2 extender board into slots to allow the M.2 extender board to slide back in line with the heatsink. This also permitted the heatsink to be in direct contact with the aluminum case, improving heat loss.
I have requested that Radxa shift the mounting holes by 2mm away from the end with the M.2 connector on future M.2 extender boards for better heat loss and appearance.
2 Likes
This looks pretty nice. A bit to fiddly for me, but might be an option depending upon what allnet comes up with, hopefully they take into account fan and M2 in their solution.
BTW, even with the large heatsink, the fans are very much needed; Have loaded up a 1TB M2 card with a music collection in MP3 and FLAC formats, have been running python-rgain’s collectiongain utility on the library…the script is multi-thread smart and sees all six cores and spawns all of them at once, the big heatsink gets HOT and it starts to throttle within a minute. So thermally-activated fans would be a complete win…bursty CPU load will never start the fans, but sustained processes would.
1 Like
Thanks for the feedback.
GPIO pin #5 is also extended for thermal control of fans, but haven’t crossed that bridge yet. Someday. 
Hmm, you really think it is a good idea to enclose a RK3399 and heatsink inside a flammable insulator, w/o airflow from cooling fans? You might want to keep a fire extinguisher handy 
Jacob put up a link about a wood based case. TheHermit mentions an all aluminum case, nominally 6 months ago. And then presents some nice ideas of his.
I just received my Rock Pi 4b with the all aluminum case. I have a problem with the m.2 extender ribbon cable because of a lack of clearance. While general concensus is that one shouldn’t bend a ribbon cable, there are apparently times when it can be done. I will try a conservative bend (about 60 degrees) and see how that works.
To make a case out of wood, for most circumstances I would use Baltic birch plywood for that. It typically has no voids and is quite stable. Being birch, it is not terribly durable. But, a nice coat of varnish or something could fix that. It may be that there are similar plywoods to Baltic birch plywood (thin plies, no voids).
I have an Odroid sitting here, as part of my GPS/NTP needs. This is a circumstance where a wood case I think is useful. At least in part. You want the GPS chip connected to the RPi clone to have as constant of temperature over the year that you can. If you want to get complicated, you could have Peltier cooling or electric heating. But I would lean towards using a low density, stable wood that is quite thick for an “outer” enclosure. Western red cedar would be the wood I would use here. Princess wood might work, balsa is of course a low density wood that most people recognize. I would try to use 0.75 inch to 1 inch thick wood (it is nice looking insulation). My thinking is that the bottom of the case is square, and we have a (4 wire) fan at the bottom pushing air up and into the case. This probably gets mounted close to the ceiling in a corner, and so there are 2 sides exposed. They should have louvers that can open or close near the top on those exposed faces. Have an Arduino control the fan speed to try and keep temperature constant. It’s possible extra heat might be needed at some times. But, I think once when starts looking at effects like that, you may find the precision time pulse from the GPS chip might be also sensitive to air pressure, and so you might need a slightly more complex control by the Arduino of fan speed, louver settings, and heat. Heating is better than cooling, as it avoids condensation issues (as long as heating doesn’t set things on fire). Inside this wood box, I would lean to an iron or plain steel box (high thermal mass, and reasonable thermal conductivity), which is what would contain the RPi clone with GPS chip, and the Arduino doing environment control.
TheHermit, perhaps a piece of shaped wood to keep SD card from falling inside? Wood and duct tape on the SD card (if you have seen the Red Green show, you will know about Canadians and duct tape)? ![]()